Subsections of RedHat
Advanced File Management
Permission Classes and Types
Permission classes
- user (u)
- group (g)
- other (o) (public)
- all (a) <- all combined
Permission types
- r,w,x
- works differently on files and directories
- hyphen (-) represents no permissions set
ls results permissions groupings
-
- rwx rw- r–
- user (owner), group, and other (public)
ls results first character meaning
- regular file
d directory
l symbolic link
c character device file
b block device file
p named pipe
s socket
Modifying Access Permission Bits
chmod command
- Modify permissions using symbolic or octal notation.
- Used by root or the file owner.
Flags
chmod -v ::: Verbose.
Symbolic notation
- Letters (ugo/rwx) and symbols (+, -, =) used to add, revoke, or assign permission bits.
Octal Notation
Three-digit numbering system ranging from 0 to 7.
0 —
1 –x
2 -w-
3 -wx
4 r–
5 r-x
6 rw-
7 rwx
Default Permissions
- Calculated based on the umask (user mask) value subtracted from the initial permissions value.
umask
- Three-digit value (octal or symbolic) that refers to read, write, and execute permissions for owner, group, and public.
- Default umask value is 0022 for the root user and 0002 normal users.
- The left-most 0 has no significance.
- If umask is set to 000 files will get max of 666
- If the initial permissions are 666 and the umask is 002 then the default permissions are 664. (666-002)
- Any new files or directories created after changing the umask will have the new default permissions set.
- umask settings are lost when you log off. Add it to the appropriate startup file to make it permanent.
Defaults
- files 666 rw-rw-rw-
- directories 777 rwxrwxrwx
umask command
Options
Special Permission Bits
- 3 types of special permission bits for executable files or directories for non root users
- setuid
- set on exe’s to provide non-owners the ability to run them with the privileges of the owning user
- may be set on directories and files but will have no effect.
- example: the su command
- shows an ’s’ in ls -l listing at the end of owners permissions
- If the file already has the “x” bit set for the user, the long listing will show a lowercase “s”, otherwise it will list it with an uppercase “S”.
- setgid
- set on exe’s to provide non-group members the ability to run them with the privileges of the owning group.
- May be set on shared directories
- allow files and subdirectories created underneath to automatically inherit the directory’s owning group.
- saves group members who are sharing the directory contents from changing the group ID for every new file and subdirectory that they add.
- write command has this set by default so a member of the tty group can run it. If the file already has the “x” bit set for the group, the long listing will show a lowercase “s”, otherwise it will list it with an uppercase “S”.
- Sticky bit
- may be set on public directories for inhibiting file deletion by non-owners
- may be set on directories and files but will have no effect.
- Set on /tmp and /var/tmp by default
- Letter “t” in other permission feild
- If the directory already has the “x” bit set for public, the long listing will show a lowercase “t”, otherwise it will list it with an uppercase “T”.
Access Control Lists (ACLs)
-
Setting a default ACL on a directory allows content sharing among user’s without having to modify access on each new file and subdirectory.
-
Extra permissions that can be set on files and directories.
-
Define permissions for named user and named groups.
-
Configured the same way on both files and directories.
-
Named Users
- May or may not be a part of the same group.
-
2 different groups of ACLs. Default ACLs and Access ACLs.
- Access ACLs
- Set on individual files and directories
- Default ACLs
- Applied on directories
- files and subdirectories inherit the ACL
- Execute bit must be set on the directory for public.
- Files receive the shared directory’s default ACLs as their access ACLs - what the mask limits.
- Subdirectories receive both default ACLs and access ACLs as they are.
-
A “+” at the end of ls -l listing indicates ACL is set
ACL Commands
getfacl
- Display ACL settings
- Displays:
- name of file
- owner
- owning group
- Permissions
- colon characters save space for named user/group (or UID/GID) when extended Permissions are set.
- Example: user:1000:r–
- the named user with UID 1000, who is neither the file owner nor a member of the owning group, is allowed read-only access to this file.
- Example: group:dba:rw-
- give the named group (dba) read and write access to the file.
setfacl
- set, modify, substitute, or delete ACL settings
- If you want to give read and write permissions to a specific user (user1) and change the mask to read-only at the same time, the setfacl command will allocate the permissions as mentioned; however, the effective permissions for the named user will only be read-only.
u:UID:perms
- named user must exist in /etc/passwd
- if no user specified, permissions are given to the owner of the file/directory
g:GID:perms
- Named group must exist in /etc/group
- If no group specified, permissions are given to the owning group of the file/directory
o:perms
- Neither owner or owning group
m:perms
- Maximum permissions for named user or named group
Switches
| Switch |
Description |
| -b |
Remove all Access ACLs |
| -d |
Applies to default ACLs |
| -k |
Removes all default ACLs |
| -m |
Sets or modifies ACLs |
| -n |
Prevent auto mask recalculation |
| -R |
Apply Recursively to directory |
| -x |
Remove Access ACL |
| -c |
Display output without header |
Mask Value
- Determine maximum allowable permissions for named user or named group
- Mask value displayed on separate line in getfacl output
- Mask is recalculated every time an ACL is modified unless value is manually entered.
- Overrides the set ACL value.
Find Command
- Search files and display the full path.
- Execute command on search results.
- Different search criteria
- name
- part name
- ownership
- owning group
- permissions
- inode number
- last access
- modification time in days or minutes
- size
- file type
- Command syntax
- {find} + {path} + {search option} + {action}
- Options
- -name / -iname (search by name)
- -user / -group (UID / GID)
- -perm (permissions)
- -inum (inode)
- -atime/amin (access time)
- -mtime/amin (modification time)
- -size / -type (size / type)
- Action
- copy, erase, rename, change ownership, modify permissions
- -exec {} \;
- replaces {} for each filename as it is found. The semicolon character (;) marks the termination of the command and it is escaped with the backslash character (\).
- -ok {} \;
- same as exec but requires confirmation.
- -delete
- -print <- default
Advanced File Management Labs
Lab: find stuff
- Create file 10 and search for it.
[vagrant@server1 ~]$ sudo touch /root/file10
[vagrant@server1 ~]$ sudo find / -name file10 -print
/root/file10
- Perform a case insensitive search for files and directories in /dev that begin with “usb” followed by any characters.
[vagrant@server1 ~]$ find /dev -iname usb*
/dev/usbmon0
- Find files smaller than 1MB (-1M) in size (-size) in the root user’s home directory (~).
[vagrant@server1 etc]$ find ~ -size -1M
- Search for files larger than 40MB (+40M) in size (-size) in the /usr directory:
[vagrant@server1 etc]$ sudo find /usr -size +40M
/usr/share/GeoIP/GeoLite2-City.b
- Find files in the entire root file system (/) with ownership (-user) set to user daemon and owning group (-group) set to any group other than (-not or ! for negation) user1:
[vagrant@server1 etc]$ sudo find / -user daemon -not -group user1
- Search for directories (-type) by the name “src” (-name) in /usr at a maximum of two subdirectory levels below (-maxdepth):
[vagrant@server1 etc]$ sudo find /usr -maxdepth 2 -type d -name src
/usr/local/src
/usr/src
- Run the above search but at least three subdirectory levels beneath /usr, substitute -maxdepth 2 with -mindepth 3.
[vagrant@server1 etc]$ sudo find /usr -mindepth 3 -type d -name src
/usr/src/kernels/4.18.0-425.3.1.el8.x86_64/drivers/gpu/drm//display/dmub/src
/usr/src/kernels/4.18.0-425.3.1.el8.x86_64/tools/usb/usbip/src
- Find files in the /etc directory that were modified (-mtime) more than (the + sign) 2000 days ago:
[vagrant@server1 etc]$ sudo find /etc -mtime +2000
/etc/libuser.conf
/etc/xattr.conf
/etc/whois.conf
- Run the above search for files that were modified exactly 12 days ago, replace “+2000” with “12”.
[vagrant@server1 etc]$ sudo find /etc -mtime 12
- To find files in the /var/log directory that have been modified (-mmin) in the past (the - sign) 100 minutes:
[vagrant@server1 etc]$ sudo find /var/log -mmin -100
/var/log/rhsm/rhsmcertd.log
/var/log/rhsm/rhsm.log
/var/log/audit/audit.log
/var/log/dnf.librepo.log
/var/log/dnf.rpm.log
/var/log/sa
/var/log/sa/sa16
/var/log/sa/sar15
/var/log/dnf.log
/var/log/hawkey.log
/var/log/cron
/var/log/messages
/var/log/secure
- Run the above search for files that have been modified exactly 25 minutes ago, replace “-100” with “25”.
[vagrant@server1 etc]$ sudo find /var/log -mmin 25
- To search for block device files (-type) in the /dev directory with permissions (-perm) set to exactly 660:
[vagrant@server1 etc]$ sudo find /dev -type b -perm 660
/dev/dm-1
/dev/dm-0
/dev/sda2
/dev/sda1
/dev/sda
- Search for character device files (-type) in the /dev directory with at least (-222) world writable permissions (this example would ignore checking the write and execute permissions):
[vagrant@server1 etc]$ sudo find /dev -type c -perm -222
- Find files in the /etc/systemd directory that are executable by at least their owner or group members:
[vagrant@server1 etc]$ sudo find /etc/systemd -perm /110
- Search for symlinked files (-type) in /usr with permissions (-perm) set to read and write for the owner and owning group:
sudo find /usr -type l -perm -ug=rw
- Search for directories in the entire directory tree (/) by the name “core” (-name) and list them (ls-ld) as they are discovered without prompting for user confirmation (-exec):
[vagrant@server1 etc]$ sudo find / -name core -exec ls -ld {} \;
- Use the -ok switch to prompt for confirmation before it copies each matched file (-name) in /etc/sysconfig to /tmp:
sudo find /etc/sysconfig -name '*.conf' -ok cp {} /tmp \;
Lab: Display ACL and give permissions
- Create and empty file aclfile1 in /tmp and display ACLs on it:
 cd /tmp
 touch aclfile1
 getfacl aclfile1
- Give rw permission to user 1 but with a mask of read only and view the results.
setfacl -m u:user1:rw,m:r aclfile1
- Promote the mask value to include write bit and verify:
 setfacl -m m:rw aclfile1
 getfacl -c aclfile1
Lab: Identify, Apply, and Erase Access ACLs
- Switch to user1 and create file acluser1 in /tmp:
 su - user1
 cd /tmp
 touch acluser1
- Use ls and getfacl to check existing acl entries:
 ls -l acluser1
 getfacl acluser1 -c
- Allocate rw permissions to user100 with setfacl in octal form:
setfacl -m u:user100:6 acluser1
- Run ls (+) and getfacl to verify:
 ls -l acluser1
 getfacl -c acluser1
-
Open another terminal as user100 and open the file and edit it.
-
Add user200 with full rwx permissions to acluser1 using the symbolic notation and then show the updated ACL settings:
 setfacl -m u:user200:rwx acluser1
 getfacl -c acluser1
- Delete the ACL entries set for user200 and validate:
 setfacl -x u:user200 acluser1
 getfacl acluser1 -c
- Delete the rest of the ACLs:
- Use the ls and getfacl commands and confirm for the ACLs removal:
 ls -l acluser1
 getfacl acluser1 -c
- create group aclgroup1
groupadd -g 8000 aclgroup1
- add this group as a named group along with the two named users (user100 and user200).
Lab: Apply, Identify, and erase default ACLs
- Switch or log in as user1 and create a directory projects in /tmp:
 su - user1
 cd /tmp
 mkdir projects
- Use the getfacl command for an initial look at the permissions on the directory:
- Allocate default read, write, and execute permissions to user100 and user200 on the directory. Use both octal and symbolic notations and the -d (default) option with the setfacl command.
 setfacl -dm u:user100:7,u:user200:rwx projects/
 getfacl -c projects/
- Create a subdirectory prjdir1 under projects and observe the ACL inheritance:
 mkdir prjdir1
 getfacl -c prjdir1
- Create a file prjfile1 under projects and observe the ACL inheritance:
 touch prjfile1
 getfacl -c prjfilel
- log in as one of the named users, change directory into /tmp/projects, and edit prjfile1 (add some random text). Then change into the prjdir1 and create file file100.
 su - user100
 cd /tmp/projects
 vim prjfile1
 ls -l prjfile1
 cd prjdir1
 touch file100
 pwd
- Delete all the default ACLs from the projects directory as user1 and confirm:
 exit
 su - user1
 cd /tmp
 setfacl -k projects
 getfacl -c projects
- create a group such as aclgroup2 by running groupadd -g 9000 aclgroup2 as the root user and repeat this exercise by adding this group as a named group along with the two named users (user100 and user200).
- Add an execute bit for the owner and a write bit for group and public
 [vagrant@server1 ~]$ chmod u+x permfile1 -v
 mode of 'permfile1' changed from 0444 (r--r--r--) to 0544 (r-xr--r--)
 [vagrant@server1 ~]$ chmod -v go+w permfile1
 mode of 'permfile1' changed from 0544 (r-xr--r--) to 0566 (r-xrw-rw-)
- Revoke the write bit from public
 [vagrant@server1 ~]$ chmod -v o-w permfile1
 mode of 'permfile1' changed from 0566 (r-xrw-rw-) to 0564 (r-xrw-r--)
 [vagrant@server1 ~]$ chmod -v a=rwx permfile1
 mode of 'permfile1' changed from 0564 (r-xrw-r--) to 0777 (rwxrwxrwx)
- Revoke write from the owning group and write and execute bits from public.
 [vagrant@server1 ~]$ chmod g-w,o-wx permfile1 -v
 mode of 'permfile1' changed from 0777 (rwxrwxrwx) to 0754 (rwxr-xr--)
- Read only for user, group, and other:
 [vagrant@server1 ~]$ touch permfile2
 [vagrant@server1 ~]$ chmod 444 permfile2
 [vagrant@server1 ~]$ ls -l permfile2
 -r--r--r--. 1 vagrant vagrant 0 Feb  4 12:22 permfile2
- Add an execute bit for the owner:
 [vagrant@server1 ~]$ chmod -v 544 permfile2
 mode of 'permfile2' changed from 0444 (r--r--r--) to 0544 (r-xr--r--)
- Add a write permission bit for group and public:
 [vagrant@server1 ~]$ chmod -v 566 permfile2
 mode of 'permfile2' changed from 0544 (r-xr--r--) to 0566 (r-xrw-rw-)
- Revoke the write bit for public:
 [vagrant@server1 ~]$ chmod -v 564 permfile2
 mode of 'permfile2' changed from 0566 (r-xrw-rw-) to 0564 (r-xrw-r--)
- Assign read, write, and execute permission bits to all three user categories:
 [vagrant@server1 ~]$ chmod -v 777 permfile2
 mode of 'permfile2' changed from 0564 (r-xrw-r--) to 0777 (rwxrwxrwx)
- Run the umask command without any options and it will display the current umask value in octal notation:
 [vagrant@server1 ~]$ umask
 0002
- Symbolic form
 [vagrant@server1 ~]$ umask -S
 u=rwx,g=rwx,o=rx
- Set all new files and directories to get 640 and 750 permissions,
 umask 027
 umask u=rwx,g=rx,o=
- Test new umask (666-027=640) (777-027=750)
 [vagrant@server1 ~]$ touch tempfile1
 [vagrant@server1 ~]$ ls -l tempfile1
 -rw-r-----. 1 vagrant vagrant 0 Feb  5 12:09 tempfile1
 [vagrant@server1 ~]$ mkdir tempdir1
 [vagrant@server1 ~]$ ls -ld tempdir1
 drwxr-x---. 2 vagrant vagrant 6 Feb  5 12:10 tempdir1
Lab: View suid bit on su command
 [vagrant@server1 ~]$ ls -l /usr/bin/su
 -rwsr-xr-x. 1 root root 50152 Aug 22 10:08 /usr/bin/su
Lab: Test the Effect of setuid Bit on Executable Files
- Open 2 terminal windows. Switch to user1 in terminal1
 [vagrant@server1 ~]$ su - user1
 Password:
 Last login: Sun Feb  5 12:37:12 UTC 2023 on pts/1
- Switch to root on terminal2
- T1 Revoke the setuid bit from /usr/bin/su
- T2 log off as root
- Try to log in has root from both terminals
 [user1@server1 ~]$ su - root
 Password:
 su: Authentication failure
- T1 restore the setuid bit
 [vagrant@server1 ~]$ sudo chmod -v +4000 /usr/bin/su
 mode of '/usr/bin/su' changed from 0755 (rwxr-xr-x) to 4755 (rwsr-xr-x)
Lab: Test the Effect of setgid Bit on Executable Files
-
Log into two terminals
T1 root
T2 user1
Opened with ssh
-
T2 list users currently logged in
- T2 send a message to root
- T1 revoke setgid from /usr/bin/write
chmod g-s /usr/bin/write -v
- Try to write root
[user1@server1 ~]$ write root
write: effective gid does not match group of /dev/pts/0
- Restore the setgid bit on /usr/bin/write:
[root@server1 ~]# sudo chmod -v +2000 /usr/bin/write
mode of '/usr/bin/write' changed from 0755 (rwxr-xr-x) to 2755 (rwxr-sr-x)
- Test
Lab: Set up Shared Directory for Group Collaboration
- set up 2 test users
 [root@server1 ~]# adduser user100
 [root@server1 ~]# adduser user200
- Add group sgrp with GID 9999 with the groupadd command:
[root@server1 ~]# groupadd -g 9999 sgrp
- Add user100 and user200 as members to sgrp using the usermod command:
 [root@server1 ~]# usermod -aG sgrp user100
 [root@server1 ~]# usermod -aG sgrp user200
- Create /sdir directory
[root@server1 ~]# mkdir /sdir
- Set ownership and owning group on /sdir to root and sgrp, using the chown command:
[root@server1 ~]# chown root:sgrp /sdir
- Set the setgid bit on /sdir using the chmod command:
[vagrant@server1 ~]$ sudo chmod g+s /sdir
- Add write permission to the group members on /sdir and revoke all permissions from public:
[root@server1 ~]# chmod g+w,o-rx /sdir
- Verify
 [root@server1 ~]# ls -ld /sdir
 drwxrws---. 2 root sgrp 6 Feb 13 15:49 /sdir
- Switch or log in as user100 and change to the /sdir directory:
 [root@server1 ~]# su - user100
 [user100@server1 ~]$ cd /sdir
- Create a file and check the owner and owning group on it:
 [user100@server1 sdir]$ touch file100
 [user100@server1 sdir]$ ls -l file100
 -rw-rw-r--. 1 user100 sgrp 0 Feb 10 22:41 file100
- Log out as user100, and switch or log in as user200 and change to the /sdir directory:
 [root@server1 ~]# su - user200
 [user200@server1 ~]$ cd /sdir
- Create a file and check the owner and owning group on it:
 [user200@server1 sdir]$ touch file200
 [user200@server1 sdir]$ ls -l file200
 -rw-rw-r--. 1 user200 sgrp 0 Feb 13 16:01 file200
Lab: View “t” in permissions for sticky bit
 [user200@server1 sdir]$ ls -l /tmp /var/tmp -d
 drwxrwxrwt. 8 root root 185 Feb 13 16:12 /tmp
 drwxrwxrwt. 4 root root 113 Feb 13 16:00 /var/tmp
Lab: Test the effect of Sticky Bit
- Switch to user100 and change to the /tmp directory
[user100@server1 sdir]$ cd /tmp
- Create file called stckyfile
[user100@server1 tmp]$ touch stickyfile
- Try to delete the file as user200
[user200@server1 tmp]$ rm stickyfile
rm: remove write-protected regular empty file 'stickyfile'? y
rm: cannot remove 'stickyfile': Operation not permitted
- Revoke the /tmp stickybit and confirm
[vagrant@server1 ~]$ sudo chmod o-t /tmp
[vagrant@server1 ~]$ ls -ld /tmp
drwxrwxrwx. 8 root root 4096 Feb 13 22:00 /tmp
- Retry the removal as user200
- Restore the sticky bit on /tmp
Lab: Manipulate File Permissions (user1)
- Create file file11 and directory dir11 in the home directory. Make a note of the permissions on them.
- Run the umask command to determine the current umask.
- Change the umask value to 0035 using symbolic notation.
- Create file22 and directory dir22 in the home directory.
- Observe the permissions on file22 and dir22, and compare them with the permissions on file11 and dir11.
- Use the chmod command and modify the permissions on file11 to match those on file22.
- Use the chmod command and modify the permissions on dir22 to match those on dir11. Do not remove file11, file22, dir11, and dir22 yet.
chmod g-wx,o-rx,o+w dir11
- create directory /sdir. Create group sgrp and create user1000 and user2000 and add them to the group:
 mkdir /sdir
 groupadd sgrp
 adduser user1000 && adduser user2000
 usermod -a -G sgrp user1000
 usermod -a -G sgrp user2000
- Set up appropriate ownership (root), owning group (sgrp), and permissions (rwx for group, — for public, s for group, and t for public) on the directory to support group collaboration and ensure non-owners cannot delete files.
 chgrp sgrp sdir
 chmod g=rwx,o=--- sdir
 chmod o+t sdir
 chmod g+s sdir
- Log on as user1000 and create a file under /sdir.
 su - user1000
 cd /sdir
 touch testfile
- Log on as user2000 and try to edit that file. You should be able to edit the file successfully.
 su - user200
 cd /sdir
 vim testfile
 cat testfile
- As user2000 try to delete the file. You should not be able to.
Lab: Find Files (root)
- Search for all files in the entire directory structure that have been modified in the last 300 minutes and display their type.
find /sdir -mtime -300 -exec file {} \;
- Search for named pipe and socket files.
 find / -type p
 find / -type s
Lab: Find Files Using Different Criteria (root)
- Search for regular files under /usr that were accessed more than 100 days ago, are not bigger than 5MB in size, and are owned by the user root.
find /usr -type f -mtime +100 -size -5M -user root
Lab: Apply ACL Settings (root)
- Create file testfile under /tmp.
- Create users.
 adduser user2000
 adduser user3000
 adduser user4000
- Apply ACL settings on the file so that user2000 gets 7, user3000 gets 6, and user4000 gets 4 permissions.
 setfacl -m u:user2000:7 testfile
 setfacl -m u:user3000:6 testfile
 setfacl -m u:user4000:4 testfile
- Remove the ACLs for user2000, and verify.
 setfacl -x user2000 testfile
 getfacl testfile
- Erase all remaining ACLs at once, and confirm.
 setfacl -b testfile
 getfacl testfile
Advanced Package Management
Package Groups
package group
- Group of packages that serve a common purpose.
- Can query, install, and delete as a single unit rather than dealing with packages individually.
- Two types of package groups: environment groups and package groups.
environment groups available in RHEL 9:
- server, server with GUI, minimal install, workstation, virtualization host, and custom operating system.
- Listed on the software selection window during RHEL 9 installation.
Package groups include:
- container management, smart card support, security tools, system tools, network servers, etc.
Individual packages, package groups, and modules:
Individual Package Management
List, install, query, and remove packages.
Listing Available and Installed Packages
- dnf lists available packages as well as installed packages.
Lab: list all packages available for installation from all enabled repos,
Lab: list of packages that are available only from a specific repo:
sudo dnf repoquery --repo "BaseOS"
Lab: grep for an expression to narrow down your search.
For example, to find whether the BaseOS repo includes the zsh package.
sudo dnf repoquery --repo BaseOS | grep zsh
Lab: list all installed packages on the system:
Three columns:
- package name
- package version
- repo it was installed from.
- @anaconda means the package was installed at the time of RHEL installation.
List all installed packages and all packages available for installation from all enabled repositories:
- @ sign identifies the package as installed.
List all packages available from all enabled repositories that should be able to update:
List whether a package (bc, for instance) is installed or available for installation from any enabled repository:
List all installed packages whose names begin with the string “gnome” followed by any number of characters:
sudo dnf list installed ^gnome*
List recently added packages:
Refer to the repoquery and list subsections of the dnf command manual pages for more options and examples.
Installing and Updating Packages
Installing a package:
- creates the necessary directory structure
- installs the required files
- runs any post-installation steps.
- If already installed, dnf command updates it to the latest available version.
Attempt to install a package called ypbind, proceed to update if it detects the presence of an older version:
Install or update a package called dcraw located locally at /mnt/AppStream/Packages/
sudo dnf localinstall /mnt/AppStream/Packages/dcraw*
Update an installed package (autofs, for example) to the latest available version. Dnf will fail if the specified package is not already installed:
Update all installed packages to the latest available versions:
Refer to the install and update subsections of the dnf command manual pages for more options and examples.
Show:
- release
- size
- whether it is installed or available for installation
- repo name it was installed or is available from
- short and long descriptions
- license
- so on
dnf info subcommand
View information about a package called autofs:
- Determines whether the specified package is installed or
not.
Refer to the info subsection of the dnf command manual pages.
Removing Packages
Removing a package:
- uninstalls it and removes all associated files and directory structure.
- erases any dependencies as part of the deletion process.
Remove a package called ypbind:
Output
- Resolved dependencies
- List of the packages that it would remove.
- Disk space that their removal would free up.
- After confirmation, it erased the identified packages and verified their removal.
- List of the removed packages
Refer to the remove subsection of the dnf command manual pages for more options and examples available for removing packages.
Lab: Manipulate Individual Packages
Perform management operations on a package called cifs-utils. Determine if this package is already installed and if it is available for installation. Display its information before installing it. Install the package and exhibit its information. Erase the package along with
its dependencies and confirm the removal.
- Check whether the cifs-utils package is already installed:
dnf list installed | grep cifs-utils
- Determine if the cifs-utils package is available for installation:
- Display detailed information about the package:
- Install the package:
dnf install -y cifs-utils
- Display the package information again:
- Remove the package:
- Confirm the removal:
dnf list installed | grep cif
- You can determine what package a specific file belongs to or which package comprises a certain string.
Search for packages that contain a specific file such as /etc/passwd/, use the provides or the whatprovides subcommand with dnf:
-
Indicates file is part of a package called setup, installed during RHEL installation.
-
Second instance, setup package is part of the BaseOS repository.
-
Can also use a wildcard character for filename expansion.
List all packages that contain filenames beginning with “system-config” followed by any number of characters:
dnf whatprovides /usr/bin/system-config*
To search for all the packages that match the specified string in their
name or summary:
Package Group Management
group subcommand- list, install, query, and remove groups of packages.
Listing Available and Installed Package Groups
group list subcommand:
- list the package groups available for installation from either or both repos
- list the package groups that are already installed on the system.
List all available and installed package groups from all repositories:
output:
- two categories of package groups:
- Environment group
- Package groups
Environment group:
- Larger collection of RHEL packages that provides all necessary software to build the operating system foundation for a desired purpose.
Package group
- Small bunch of RHEL packages that serve a common purpose.
- Saves time on the deployment of individual and dependent packages.
- Output shows installed and available package groups.
Display the number of installed and available package groups:
List all installed and available package groups including those that
are hidden:
sudo dnf group list hidden
Try group list with --installed and --available options to narrow
down the output list.
sudo dnf group list --installed
List all packages that a specific package group such as Base contains:
-v option with the group info subcommand for more
information.
Review group list and group info subsections of the dnf man pages.
Installing and Updating Package Groups
- Creates the necessary directory structure for all the packages included in the group and all dependent packages.
- Installs the required files.
- Runs any post-installation steps.
- Attempts to update all the packages included in the group to the latest available versions.
Install a package group called Emacs. Update if it detects an older version.
sudo dnf -y groupinstall emacs
Update the smart card support package group to the latest version:
dnf groupupdate "Smart Card Support"
Refer to the group install and group update subsections of the dnf command manual pages for more details.
Removing Package Groups
- Uninstalls all the included packages and deletes all associated files and directory structure.
- Erases any dependencies
Erase the smart card support package group that was installed:
sudo dnf -y groupremove 'smart card support'
Refer to the remove subsection of the dnf command manual pages for
more details.
Lab: Manipulate Package Groups
Perform management operations on a package group called system tools. Determine if this group is already installed and if it is available for installation. List the packages it contains and install it. Remove the group along with its dependencies and confirm the removal.
- Check whether the system tools package group is already installed:
- Determine if the system tools group is available for installation:
The group name is exhibited at the bottom of the list under the
available groups.
- Display the list of packages this group contains:
dnf group info 'system tools'
- All of the packages will be installed as part of the group installation.
- Install the group:
sudo dnf group install 'system tools'
- Remove the group:
sudo dnf group remove 'system tools' -y
- Confirm the removal:
Application Streams and Modules
Application Streams
- Introduced in RHEL 8.
- Employs a modular approach to organize multiple versions of a software application alongside its dependencies to be available for installation from a single repository.
module
- Logical set of application packages that includes everything required to install it, including the executables, libraries, documentation, tools, and utilities as well as dependent components.
- Modularity gives the flexibility to choose the version of software based on need.
- In older RHEL releases, each version of a package would have to come from a separate repository. (This has changed in RHEL 8.)
- Now modules of a single application with different versions can be stored and made available for installation from a common repository.
- The package management tool has also been enhanced to manipulate modules.
- RHEL 9 is shipped with two core repositories called BaseOS and Application Stream (AppStream).
BaseOS repository
- Includes the core set of RHEL 9 components
- kernel, modules, bootloader, and other foundational software packages.
- Lays the foundation to install and run software applications and programs.
- Available in the traditional rpm format.
AppStream repository
- Comes standard with core applications,
- Plus several add-on applications
- Rpm and modular format
- Include web server software, development languages, database software, etc.
Benefits of Segregation
Why separate BaseOS components from other applications?
(1) Separates application components from the core operating system elements.
(2) Allows publishers to deliver and administrators to apply application updates more frequently.
In previous RHEL versions, an OS update would update all installed components including the kernel, service, and application components to the latest versions by default.
This could result in an unstable system or a misbehaving application due to an unwanted upgrade of one or more packages.
By detaching the base OS components from the applications, either of the two can be updated independent of the other.
This provides enhanced flexibility in tailoring the system components and application workloads without impacting the underlying stability of the system.
Module Streams
- Collection of packages organized by version
- Each module can have multiple streams
- Each stream receives updates independent of the other streams
- Stream can be enabled or disabled.
enabled stream
- Allows the packages it contains to be queried or installed
- Only one stream of a specific module can be enabled at a time
- Each module has a default stream, which provides the latest or the recommended version.
Module Profiles
- List of recommended packages organized for purpose-built, convenient deployments to support a variety of use cases
such as:
- Minimal, development, common, client, server, etc.
- A profile may also include packages from the BaseOS repository or the dependencies of the stream
- Each module stream can have zero, one, or more profiles associated with it with only one of them marked as the default.
Module Management
Modules are special package groups usually representing an application, a language runtime, or a set of tools. They are available in one or multiple streams which usually represent a major version of a piece of software, They are available in one or multiple streams which give you an option to choose what versions of packages you want to consume.
https://docs.fedoraproject.org/en-US/modularity/using-modules/
Modules are a way to deliver different versions of software (such as programming languages, databases, or web servers) independently of the base operating system’s release cycle.
Each module can contain multiple streams, representing different versions or configurations of the software. For example, a module for Python might have streams for Python 2 and Python 3.
module dnf subcommand
- list, enable, install, query, remove, and disable
modules.
Listing Available and Installed Modules
List all modules along with their stream, profile, and summary
information available from all configured repos:
Limit the output to a list of modules available from a specific
repo such as AppStream by adding --repo AppStream:
dnf module list --repo AppStream
Output:
- default (d)
- enabled (e)
- disabled (x)
- installed (i)
List all the streams for a specific module such as ruby and display their status:
Modify the above and list only the specified stream 3.3 for the module ruby
List all enabled module streams:
dnf module list --enabled
Similarly, you can use the --installed and --disabled options with dnf module list to output only the installed or the disabled streams.
Refer to the module list subsection of the dnf command manual pages.
Installing and Updating Modules
Installing a module
- Creates directory tree for all packages included in the module and all dependent packages.
- Installs required files for the selected profile.
- Runs any post-installation steps.
- If module being loaded or a part of it is already present, the command attempts to update all the packages included in the profile to the latest available versions.
Install the perl module using its default stream and default
profile:
sudo dnf -y module install perl
Update a module called squid to the latest version:
sudo dnf module update squid -y
Install the profile “common” with stream “rhel9” for the container-tools module: (module:stream/profile)
sudo dnf module install container-tools:rhel9/common
- Shows
- Name, stream, version, list of profiles, default profile, repo name module was installed or is available from
- Summary, description, and artifacts.
- Can be viewed by supplying module info with dnf.
List all profiles available for the module ruby:
dnf module info --profile ruby
Limit the output to a particular stream such as 3.1:
dnf module info --profile ruby:3.1
Refer to the module info subsection of the dnf command manual pages for more details.
Removing Modules
Removing a module will:
- Uninstall all the included packages and
- Delete all associated files and directory structure.
- Erases any dependencies as part of the deletion process.
Remove the ruby module with “3.1” stream:
sudo dnf module remove ruby:3.1
Refer to the module remove subsection of the dnf command manual pages:
Lab: Manipulate Modules
- Perform management operations on a module called postgresql.
- Determine if this module is already installed and if it is available for installation.
- Show its information and install the default profile for stream “10”.
- Remove the module profile along with any dependencies
- confirm the removal.
- Check whether the postgresql module is already installed(i):
dnf module list postgresql
- Display detailed information about the default stream of the module:
dnf module info postgresql:15
- Install the module with default profile for stream “15”:
sudo dnf -y module install --profile postgresql:15
- Display the module information again:
dnf module info postgresql:15
- Erase the module profile for the stream:
dnf module remove -y postgresql:15
- Confirm the removal (back to (d)):
dnf module info postgresql:15
Switching Module Streams
- Typically performed to upgrade or downgrade the version of an installed module.
process:
-
uninstall the existing version provided by a stream alongside any dependencies that it has,
-
switch to the other stream
-
install the desired version.
-
Installing a module from a stream automatically enables the stream if it was previously disabled
-
you can manually enable or disable it with the dnf command.
-
Only one stream of a given module enabled at a time.
-
Attempting to enable another one for the same module automatically
disables the current enabled stream.
-
dnf module list and dnf module info expose the enable/disable status of the module stream.
Lab: Install a Module from an Alternative Stream
- Downgrade a module to a lower version.
- Remove the stream
ruby 3.3 and
- Confirm its removal.
- manually enable the stream perl 5.24 and confirm its new status.
- install the new version of the module and display its information.
- Check the current state of all perl streams:
- Remove perl 5.26:
sudo dnf module remove perl -y
- Confirm the removal:
- Reset the module so that neither stream is enabled or disabled. This will remove the enabled (e) indication from ruby 3.3
sudo dnf module reset ruby
- Install the non-default profile “minimal” for ruby stream 3.1. This will auto-enable the stream.
–allowerasing
- Will instruct the command to remove installed packages for dependency resolution.
sudo dnf module install ruby:3.1 --allowerasing
- Check the status of the module:
The dnf Command
- Introduced in RHEL 8
- Can use interchangeably with yum in RHEL
yum is a soft link to the dnf utility.
- Requires the system to have access to either:
- a local or remote software repository
- a local installable package file.
Subscription Management* (RHSM) service
-
Available in the Red Hat Customer Portal
-
Offers access to official Red Hat software repositories.
-
Other web-based repositories that host packages are available
-
You can also set up a local, custom repository on your system and add packages of your choice to it.
Primary benefit of using dnf over rpm:
-
Resolve dependencies automatically
- By identifying and installing any additional required packages
-
With multiple repositories set up, dnf extracts the software from wherever it finds it.
-
Perform abundant software administration tasks.
-
Invokes the rpm utility in the background
-
Can perform a number of operations on individual packages, package groups, and modules:
- listing
- querying
- installing
- removing
- enabling and disabling specific module streams.
Software handling tasks that dnf can perform on packages:
- Clean and repolist are specific to repositories.
- Refer to the manual pages of dnf for additional subcommands, operators, options, examples, and other details.
| Subcommand |
Description |
| check-update |
Checks if updates are available for installed packages |
| clean |
Removes cached data |
| history |
Display previous dnf activities as recorded in /var/lib/dnf/history/ |
| info |
Show details for a package |
| install |
Install or update a package |
| list |
List installed and available packages |
| provides |
Search for packages that contain the specified file or feature |
| reinstall |
Reinstall the exact version of an installed package |
| remove |
Remove a package and its dependencies |
| repolist |
List enabled repositories |
| repoquery |
Runs queries on available packages |
| search |
Searches package metadata for the specified string |
| upgrade |
Updates each installed package to the latest version |
dnf subcommands that are intended for operations on package
groups and modules:
| Subcommand |
Description |
| group install |
Install or updates a package group |
| group info |
Return details for a package group |
| group list |
List available package groups |
| group remove |
Remove a package group |
| module disable |
Disable a module along with all the streams it contains |
| module enable |
Enable a module along with all the streams it contains |
| module install |
Install a module profile including its packages |
| module info |
Show details for a module |
| module list |
Lists all available module streams along with their profiles and status |
| module remove |
Removes a module profile including its packages |
| module reset |
Resets a module so that it is neither in enable nor in disable state |
| module update |
Updates packages in a module profile |
For labs, you’ll need to create a definition file and configure access to the two repositories available on the RHEL 8 ISO
image.
Set up access to the two dnf repositories that are available on RHEL 9 image. (You should have already configured an automatic mounting of RHEL 9 image on /mnt.) Create a definition file for the repositories and confirm.
- Verify that the image is currently mounted:
- Create a definition file called local.repo in /etc/yum.repos.d/ using the vim editor and define the following data for both repositories in it:
 [BaseOS]
 name=BaseOS
 baseurl=file:///mnt/BaseOS
 gpgcheck=0

 [AppStream]
 name=AppStream
 baseurl=file:///mnt/AppStream
 gpgcheck=0
- Confirm access to the repositories:
- Ignore lines 1-4 in the output that are related to subscription and
system registration.
- Lines 5 and 6 show the rate at which the command read the repo data.
- Line 7 displays the timestamp of the last metadata check.
- last two lines show the repo IDs, repo names, and a count of packages they hold.
- AppStream repo consists of 4,672 packages
- BaseOS repo contains 1,658 packages.
- Both repos are enabled by default and are ready for use.
dnf yum Repository
dnf repository (yum repository or a repo)
-
Digital library for storing software packages
-
Repository is accessed for package retrieval, query, update, and installation
-
The two repositories
- BaseOS and AppStream
- come preconfigured with the RHEL 9 ISO image.
-
Number of other repositories available on the Internet that are maintained by software publishers such as Red Hat and CentOS.
-
Can build private custom repositories for internal IT use for stocking and delivering software.
- Good practice for an organization with a large Linux server base, as it manages dependencies automatically and aids in maintaining software consistency across the board.
-
Can also be used to store in-house developed packages.
-
It is important to obtain software packages from authentic and reliable sources such as Red Hat to prevent potential damage to your system and to circumvent possible software corruption.
-
There is a process to create repositories and to access preconfigured repositories.
-
There are two pre-set repositories available on the RHEL 9 image. You will configure access to them via a definition file to support the exercises and lab environment.
Repository Definition File
- Repo definition files are located in /etc/yum.repos.d/
- Can create local.repo file in this directory to specify local repos
- See dnf.conf man page
Sample repo definition file and key directives:
 [BaseOS_RHEL_9]
 name= RHEL 9 base operating system components
 baseurl=file://*mnt*BaseOS
 enabled=1
 gpgcheck=0
EXAM TIP:
- Knowing how to configure a dnf/yum repository using a URL plays an important role in completing some of the RHCSA exam tasks successfully.
- Use two forward slash characters (//) with the baseurl directive for an FTP, HTTP, or HTTPS source.
Five lines from a sample repo file:
Line 1 defines an exclusive ID within the square brackets.
Line 2 is a brief description of the repo with the “name” directive.
Line 3 is the location of the repodata directory with the “baseurl” directive.
Line 4 shows whether this repository is active.
Line 5 shows if packages are to be GPGchecked for authenticity.
Software Management with dnf
- Tools are available to work with individual packages as well as package groups and modules.
rpm command is limited to managing one package at a time.dnf has an associated configuration file that can define settings to control its behavior.
dnf Configuration File
- Key configuration file: /etc/dnf/dnf.conf
- “main” section
- Sets directives that have a global effect on dnf operations.
- Can define separate sections for each custom repository that you plan to set up on the system.
- Preferred location to store configuration for each custom repository in their own definition files is in /etc/yum.repos.d
- default location created for this purpose.
Default content of this configuration file:
 [main]
 gpgcheck=1
 installonly_limit=3
 clean_requirements_on_remove=True
 best=True
 skip_if_unavailable=False
The above and a few other directives that you may define in the file:
| Directive |
Description |
| best |
Whether to install (or upgrade to) the latest available version. |
| clean_requirements_on_remove |
Whether to remove dependencies during a package removal process that are no longer in use. |
| debuglevel |
Sets debug from 1 (minimum) and 10 (maximum). Default is 2. A value of 0 disables this feature. |
| gpgcheck |
Whether to check the GPG signature for package authenticity. Default is 1 (enabled). |
| installonly_limit |
Count of packages that can be installed concurrently. Default is 3. |
| keepcache |
Defines whether to store the package and header cache following a successful installation. Default is 0 (disabled). |
| logdir |
Sets the directory location to store the log files. Default is /var/log/ |
| obsoletes |
Checks and removes any obsolete dependent packages during installs and updates. Default is 1 (enabled). |
For other directives: man 5 dnf.conf
Advanced Package Management DIY Labs
- Configure Access to RHEL 8 Repositories (Make sure the RHEL 8 ISO image is attached to the VM and mounted.) Create a definition file under /etc/yum.repos.d/, and define two blocks (one for BaseOS and another for AppStream).
vim /etc/yum.repos.d/local.repo
 [BaseOS]
 name=BaseOS
 baseurl=file:///mnt/BaseOS
 gpgcheck=0

 [AppStrean]
 name=AppStream
 baseurl=file:///mnt/AppStream
 gpgcheck=0
- Verify the configuration with dnf repolist. You should see numbers in thousands under the Status column for both repositories.
Lab: Install and Manage Individual Packages
- List all installed and available packages separately.
dnf list --available && dnf list --installed
- Show which package contains the /etc/group file.
- Install the package httpd.
- Review /var/log/yum.log/ for confirmation. (/var/lib/dnf/history)
- Perform the following on the httpd package:
- Show information
- List dependencies
dnf repoquery --requires httpd
- Remove it
Lab Install and Manage Package Groups
- List all installed and available package groups separately.
dnf group list available && dnf group list installed
- Install package groups Security Tools and Scientific Support.
dnf group install 'Security Tools'
- Review /var/log/yum.log for confirmation.
- Show the packages included in the Scientific Support package group, and delete this group.
dnf group info 'Scientific Support' && dnf group remove 'Scientific Support'
Lab: Install and Manage Modules
- List all modules. Identify which modules, streams and profiles are installed, default, disabled, and enabled from the output.
- Install the default stream of the development profile for module php, and verify.
dnf module install php && dnf module list
- Remove the module.
Lab Switch Module Streams and Install Software
- List postgresql module. This will display the streams and profiles, and their status.
dnf module list postgresql
- Reset both streams
dnf module reset postgresql
- enable the stream for the older version, and install its client profile.
dnf module install postgresql:15
Advanced User Management
Local User Authentication Files
- Three supported account types: root, normal, service
- root
- has full access to all services and administrative functions on the system.
- created by default during installation.
- Normal
- user-level privileges
- cannot perform any administrative functions
- can run applications and programs that have been authorized.
- Service
- take care of their respective services, which include apache, ftp, mail, and chrony.
- User account information for local users is stored in four files that are located in the /etc directory.
- passwd, shadow, group, and gshadow (user authentication files)
- updated when a user or group account is created, modified, or deleted.
- referenced to check and validate the credentials for a user at the time of their login attempt,
- system creates their automatic backups by default as passwd-, shadow-, group-, and gshadow- in the /etc directory.
/etc/passwd
- vital user login data
- each row hold info for one user
- 644 permissions by default
- 7 feilds per row
- login name
- up to 255 characters
- _ and - characters are supported
- not recommended to include special characters and uppercase letters in login names.
- password
- “x” in this field points to /etc/shadow for actual password.
- “*” identifies disabled account
- Can also include a hashed password (RHEL uses SHA-512 by default)
- UID
- Number between 0 and 4.2 billion
- UID 0 is reserved for root account
- UIDs 1-200 are used by Red Hat for core service accounts
- UIDs 201-999 are reserved for non-core service accounts
- UIDs 1000 < are for normal user accounts (starts at 1000 by default)
- GID
- GID that matches entry in /etc/group (primary group)
- Group for every user by default that matches UID
- Comments (GECOS) or (GCOS)
- general comments about the user
- Home Directory
- absolute path to the user home directory.
- Shell
- absolute path of the shell file for the user’s primary shell after logging in. (default = (/bin/bash))
/etc/shadow
- no access permissions for any user (even root) (but owned by root)
- secure password control (shadow password)
- user passwords are hashed and stored in a more secure file /etc/shadow
- limits on user passwords in terms of expiration, warning period, etc. applied on per-user basis
- limits and other settings are defined in /etc/login.defs
- user is initially checked in the passwd file for existence and then in the shadow file for authenticity.
- contains user authentication and password aging information.
- Each row in the file corresponds to one entry in the passwd file.
- login names are used as a common key between the shadow and passwd files.
- nine colon-separated fields per line entry.
- 1 Login name
- 2 Encrypted password
- ! at the beginning of this field shows that the user account is locked
- if field is empty then user has passwordless entry
- 3 last change
- Number of days (lastchg) since the UNIX epoch, (UNIX time (January 01, 1970 00:00:00 UTC) when the password was last modified.
- Empty field represents the passiveness of password aging features.
- 0 forces the user to change their password upon next login.
- 4 minimum
- number of days (mindays) that must elapse before the user is allowed to change their password
- can be altered using the
chage command with the -m option or the passwd command with the -n option.
- 0 or null in this field disables this feature.
- 5 (Maximum)
- maximum number of days (maxdays) before the user password expires and must be changed.
- may be altered using the
chage command with the -M option or the passwd command with the -x option.
- null value here disables this feature along with other features such as the maximum password age, warning alerts, and the user inactivity period.
- 6 Field 6 (Warning)
- number of days (warndays) the user gets warnings for changing their password before it expires.
- may be altered using the
chage command with the -W option or the passwd command with the -w option.
- 0 or null in this field disables this feature.
- 7 Password Expiry)
- maximum allowable number of days for the user to be able to log in with the expired password. (inactivity period).
- may be altered using the
chage command with the -I option or the passwd command with the -i option.
- empty field disables this feature.
- 8 (Account Expiry)
- number of days since the UNIX time when the user account will expire and no longer be available.
- may be altered using the chage command with the
-E option.
- empty field disables this feature.
- 9 (Reserved): Reserved for future use.
/etc/group
- plaintext file and contains critical group information.
- 644 permissions by default and owned by root.
- Each row in the file stores information for one group entry.
- Every user on the system must be a member of at least one group (User Private Group (UPG)).
- a group name matches the username it is associated with by default
- four colon-separated fields per line entry.
- Field 1 (Group Name):
- Holds a group name that must begin with a letter. Group names with up to 255 characters, including the
- uppercase, underscore (_) and hyphen (-) characters, are also supported. (not recommended)
- Field 2 (Encrypted Password):
- Can be empty or contain an “x” (points to the /etc/gshadow file for the actual password), or a hashed group-level password.
- can set a password on a group for non-members to be able to change their group identity temporarily using the
newgrp command.
- non-members must enter the correct password in order to do so.
- Field 3 (GID):
- Holds a GID, that is also placed in the GID field of the passwd file.
- By default, groups are created with GIDs starting at 1000 and with the same name as the username.
- system allows several users to belong to a single group
- also allows a single user to be a member of multiple groups at the same time.
- Field 4 (Group Members):
- Lists the membership for the group. (user’s primary group is always defined in the GID field of the passwd file.)
/etc/gshadow
- no access permissions for any user (even root)
- group passwords are hashed and stored
- group names are used as a common key between the gshadow and group files.
- 000 permissions and owned by root
- four colon-separated fields
- Field 1 (Group Name):
- Consists of a group name as appeared in the group file.
- Field 2 (Encrypted Password):
- Can contain a hashed password, which may be set with the gpasswd command for non-group members to access the group temporarily using the
newgrp command.
- single exclamation mark (!) or a null value in this field allows group members password-less access and restricts non-members from switching into this group.
- Field 3 (Group Administrators):
- Lists usernames of group administrators that are authorized to add or remove members with the gpasswd command.
- Field 4 (Members):
- comma-separated list of members.
gpasswd command:
- add group administrators.
- add or delete group members.
- assign or revoke a group-level password.
- disable the ability of the newgrp command to access a group.
- picks up the default values from the /etc/login.defs file.
useradd and login.defs configuration files
useradd command
- picks up the default values from the /etc/default/useradd and /etc/login.defs files for any options that are not specified at the command line when executing it.
- login.defs file is also consulted by the usermod, userdel, chage, and passwd commands
- Both files store several defaults including those that affect the password length and password lifecycle.
/etc/default/useradd Default Directives:
- starting GID (GROUP) (provided the USERGROUPS_ENAB directive in the login.defs file is set to no)
- home directory location (HOME)
- number of inactivity days between password expiry and permanent account disablement (INACTIVE)
- account expiry date (EXPIRE),
- login shell (SHELL),
- skeleton directory location to copy user initialization files from (SKEL)
- whether to create mail spool directory (CREATE_MAIL_SPOOL)
/etc/login.defs default directives:
MAIL_DIR
PASS_MAX_DAYS, PASS_MIN_DAYS, PASS_MIN_LEN, and PASS_WARN_AGE
- password aging attributes.
UID_MIN, UID_MAX, GID_MIN, and GID_MAX
- ranges of UIDs and GIDs to be allocated to new users and groups
SYS_UID_MIN, SYS_UID_MAX, SYS_GID_MIN, and SYS_GID_MAX
- ranges of UIDs and GIDs to be allocated to new service users and groups
CREATE_HOME
- whether to create a home directory
UMASK
- permissions to be set on the user home directory at creation based on this umask value
USERGROUPS_ENAB
- whether to delete a user’s group (at the time of user deletion) if it contains no more members
ENCRYPT_METHOD
- encryption method for user passwords
Password Aging attributes
- Can be done for an individual user or applied to all users.
- Can prevent users from logging in to the system by locking their access for a period of time or permanently.
- Must be performed by a user with elevated privileges of the root user.
- Normal users may be allowed access to privileged commands by defining them appropriately in a configuration file.
- Each file that exists on the system regardless of its type has an owning user and an owning group.
- every file that a user creates is in the ownership of that user.
- ownership may be changed and given to another user by a super user.
Password Aging and management
- Setting restrictions on password expiry, account disablement, locking and unlocking users, and password change frequency.
- Can choose to inactivate it completely for an individual user.
- Stored in the /etc/shadow file (fields 4 to 8) and its default policies in the /etc/login.defs configuration file.
- aging management tools—
chage and passwd—
usermod command can be used to implement two aging attributes (user expiry and password expiry) and lock and unlock user accounts.
chage command
- Set or alter password aging parameters on a user account.
- Changes various fields in the shadow file
- Switches
- -d (–lastday)
- Specifies an explicit date in the YYYY-MM-DD format, or the number of days since the UNIX time when the password was last modified. With -d 0, the user is forced to change the password at next login. It corresponds to field 3 in the shadow file.
- -E (–expiredate)
- Sets an explicit date in the YYYY-MM-DD format, or the number of days since the UNIX time on which the user account is deactivated. This feature can be disabled with -E -1. It corresponds to the eighth field in the shadow file.
- -I (–inactive)
- Defines the number of days of inactivity after the password expiry and before the account is locked. The user may be able to log in during this period with their expired password. This feature can be disabled with -I -1. It corresponds to field 7 in the shadow file.
- -l
- Lists password aging attributes set on a user account.
- -m (–mindays)
- Indicates the minimum number of days that must elapse before the password can be changed. A value of 0 allows the user to change their password at any time. It corresponds to field 4 in the shadow file.
- -M (–maxdays)
- Denotes the maximum number of days of password validity before the user password expires and it must be changed. This feature can be disabled with -M -1. It corresponds to field 5 in the shadow file.
- -W (–warndays)
- Designates the number of days for which the user gets alerts to change their password before it expires. It corresponds to field 6 in the shadow file.
passwd command
- set or modify a user’s password
- modify the password aging attributes and
- lock or unlock account
- Switches
- -d (–delete)
- Deletes a user password
- does not expire the user account.
- -e (–expire)
- Forces a user to change their password upon next logon.
- sets date to prior to Unix time
- -i (–inactive)
- Defines the number of days of inactivity after the password expiry and before the account is locked. (field 7 in shadow file)
- -l (–lock)
- -n (–minimum)
- Specifies the number of days that must elapse before the password can be changed. (field 4 in shadow file)
- -S (–status)
- Displays the status information for a user.
- -u (–unlock)
- Unlocks a locked user account.
- -w (–warning)
- Designates the number of days for which the user gets alerts to change their password before it actually expires. (field 6 in shadow file)
- -x (–maximum)
- Denotes the maximum number of days of password validity before the user password expires and it must be changed. (field 5 in shadow file)
usermod command
- Modify a user’s attribute
- Lock or unlock their account
- Switches
- -L (–lock)
- Locks a user account by placing a single exclamation mark (!) at the beginning of the password field and before the hashed password string.
- -U (–unlock)
- Unlocks a user’s account by removing the exclamation mark (!) from the beginning of the password field.
Linux Groups and their Management
- /etc/group
- /etc/login.defs
- /etc/gshadow
- group administrator information and group-level passwords
- group management tools
groupadd, groupmod, and groupdel- create, alter, and erase groups
groupadd command
- adds entries to the group and gshadow files for each group added to the system
- picks up default values from /etc/login.defs
- Switches
- -g (–gid)
- Specifies the GID to be assigned to the group
- -o (–non-unique)
- Creates a group with a matching GID of an existing group. When two groups have an identical GID, members of both groups get identical rights on each other’s files. This should only be done in specific situations.
- -r
- Creates a system group with a GID below 1000
- groupname
groupmod command
- syntax of this command is very similar to the groupadd with most options identical.
- Additional flags
- -n
- change name of existing group
User Management
Switching Users
su command
Ctrl-d
- return to previous user
su -
- switch user with startup scripts
-c
- issue a command as a user without switching to them.
- root user can switch into any user account that exists on the system without being prompted for that user’s password.
- switching into the root account to execute privileged actions is not recommended.
whoami command
logname command
- Identity of the user who originally logged in.
groupdel command
- removes entries for the specified group from both group and gshadow files.
Doing as Superuser (substitute user)
- Any normal user that requires privileged access to administrative commands or non-owning files is defined in the sudoers file.
- File may be edited with a command called
visudo
- Creates a copy of the file as sudoers.tmp and applies the changes there. After the visudo session is over, the updated updated file overwrites the original sudoers file and sudoers.tmp is deleted.
- syntax
- user1 ALL=(ALL) ALL
- %dba ALL=(ALL) ALL
group is prefixed by %
- Make it so members are not prompted for password
- user1 ALL=(ALL) NOPASSWD:ALL
- %dba ALL=(ALL) NOPASSWD:ALL
- Limit access to a single command
- user1 ALL=/usr/bin/cat
- %dba ALL=/usr/bin/cat
- too many entries can clutter sudoers file. Use aliases instead:
- User_Alias
- you can define a User_Alias called PKGADM for user1, user100, and user200. These users may or may not belong to the same Linux group.
- Cmnd_Alias
- you can define a Cmnd_Alias called PKGCMD containing yum and rpm package management commands
sudo command
- /etc/sudoers
- /etc/sudoers.d/
- drop-in directory
/var/log/secure
- Sudo logs successful authentication and command data to here under the name of the user using the command.
Owning User and Owning Group
- Every file and directory has an owner.
- Creator assumes ownership by default.
- Every user is a member of one or more groups.
- Owners group is also assigned to file or directory by default.
chown command
- alter the ownership for files and directories
- Must have root privileges.
- Can also change owning group.
chgrp command
- alter the owning group for files and directories
- Must have root privileges.
Advanced User Management Labs
Lab: Set and Confirm Password Aging with chage (root)
- Set password aging parameters for user100 to mindays (-m) 7, maxdays (-M) 28, and warndays (-W) 5:
chage -m 7 -M 28 -W 5 user100
- Confirm
- Set the account expiry to January 31, 2020
chage -E 2020-01-31 user100
- Verify the new account expiry setting
Lab: Set and Confirm Password Aging with passwd (root)
- Set password aging attributes for user200 to mindays 10, maxdays 90, and warndays 14:
passwd -n 10 -x 90 -w 14 user200
- Confirm:
- Set the number of inactivity days to 5:
- Confirm:
- Ensure that the user is forced to change their password at next login:
- Confirm:
Lab: Lock and Unlock a User Account with usermod and passwd (root)
- Obtain the current password information for user200 from the shadow file:
- Lock the account for user200:
- Confirm:
- Unlock the account with either of the following:
usermod -U user200
or
passwd -u user200
- confirm
Lab: Create a Group and Add Members (root)
- Create the group linuxadm with GID 5000:
groupadd -g 5000 linuxadm
- Create a group called dba with the same GID as that of group linuxadm:
- Confirm:
grep linuxadm /etc/group
grep dba /etc/group
- Add user1 as a secondary member of group dba using the
usermod command. The existing membership for the user must remain intact.
- Verify the updated group membership information for user1 by extracting the relevant entry from the group file, and running the id and groups command for user1:
grep dba /etc/group
id user1
groups user1
Lab: Modify and Delete a Group Account (root)
- Alter the name of linuxadm to sysadm:
groupmod -n sysadm linuxadm
- Change the GID of sysadm to 6000:
- Confirm:
grep sysadm /etc/group
grep linuxadm /etc/group
- Delete sysadm group and confirm:
groupdel sysadm
grep sysadm /etc/group
Lab: To switch from user1 (assuming you are logged in as user1) into root without executing the startup scripts
- switch to user100
- See what whoami and logname reports now:
- use su as follows and execute this privileged command to obtain desired results:
su -c 'firewall-cmd --list-services'
Lab: Add user1 to sudo file but only for the cat command.
- Open up /etc/sudoers and add the following:
- run cat as user1 with and without sudo:
cat /etc/sudoers
sudo cat /etc/sudoers
Lab: Add user and command aliases to the sudoer file.
- Add the following to the bottom of the sudoers file:
Cmnd_Alias PKGCMD = /usr/bin/yum, /usr/bin/rpm
User_Alias PKGADM = user1, user100, user200
PKGADM ALL=PKGCMD
- Run rpm or yum with sudo as one of the users.
Lab: Take a look at examples in the sudoers file.
- Create a file file1 as user1 in their home directory and exhibit the file’s long listing:
- View the corresponding UID and GID instead, you can specify the -n option with the command:
Lab: Modify File Owner and Owning Group
- Change into the /tmp directory and create file10 and dir10:
cd /tmp
touch file10
mkdir dir10
- Check and validate that both attributes are set to user1:
ls -l file10
ls -ld dir10
- Set the ownership of file10 to user100 and confirm:
sudo chown user100 file10
ls -l file10
- Alter the owning group to dba and verify:
sudo chgrp dba file10
ls -l file10
- Change the ownership to user200 and owning group to user100 and confirm:
sudo chown user200:user100 file10
- Modify the ownership to user200 and owning group to dba recursively on dir10 and validate:
sudo  chown -R user200:dba dir10
ls -ld dir10
- Create group lnxgrp with GID 6000.
- Create user user5000 with UID 5000 and GID 6000. Assign this user a password.
useradd -u 5000 -g 6000 user5000
- Establish password aging attributes so that this user cannot change their password within 4 days after setting it and with a password validity of 30 days. This user should start getting warning messages for changing password 10 days prior to account lock down.
chage -m 4 -M 30 -W 10 user5000
- This user account needs to expire on the 20th of December, 2021.
chage -E 2021-12-20 user5000
Lab 6-2: Lock and Unlock User (root)
- Lock the user account for user5000 using the passwd command, and
- confirm by examining the change in the /etc/shadow file.
- Try to log in with user5000 and observe what happens.
- Use the usermod command and unlock
Basic File Managment
Chapter 3 RHCSA Notes - File Management
7 File types
- regular
- directory
- block special device
- character special device
- symbolic link
- named pipe
- socket
Commands
Regular files
- Text or binary data.
- Represented by hyphen (-).
Directory Files
- Identified by the letter “d” in the beginning of ls output.
Block and Character (raw) Special Device Files
- All hardware has device file in /dev/.
- Used by system to communicate with device.
- Identified by “c” or “b” in ls listing.
- Each device driver is assigned a unique number called the major number
- Character device
- Reads and writes 8 bits at a time.
- Serial
- Block device
- Receives data in fixed block size determined by drivers
- 512 or 4096 bytes
Major Number
- Used by kernel to recognize device driver type.
- Column 5 of ls listing.
Minor Number
- Each device controlled by the same device driver gets a Minor Number
- Applies to disk partitions as well.
- The same driver can control multiple devices of the same type.
- Column 6 of ls listing
Symbolic Links
- Shortcut to another file or directory.
- Begins with “l” in ls listing.
ls -l /usr/sbin/vigr
lrwxrwxrwx. 1 root root 4 Jul 21 14:36 /usr/sbin/vigr -> vipw
Compression and Archiving
Archiving
- Preserves file attributes such as ownership, owning group, and timestamp.
- Preserves extended file attributes such as ACLs and SELinux contexts.
- Syntax of
tar and star are identical.
star command
tar (tape archive) command
- Create, append, update, list, and extract files/directory tree to/from a file called a tarball(tarfile)
- Can compress a tarball after it’s been created.
- Automatically removes “/” so you do not have to specify the full pathname when restoring files at any location.
flags
tar -c :: Create tarball.
tar -f :: Specify tarball name.
tar -p :: Preserve file permissions. Default for the root user. Specify this if you create an archive as a normal user.
tar -r :: Append files to the end of an existing uncompressed tarball.
tar -t :: List contents of a tarball.
tar -u :: Append files to the end of an existing uncompressed tarball provided the specified files being added are newer.
-z
-j
-C
Archive entire home directory:
tar -cvf /tmp/home.tar /home
Archive two specific files:
tar -cvf /tmp/files.tar /etc/passwd /etc/yum.conf
Append files in a directory to existing tarball:
tar -rvf /tmp/files.tar /etc/yum.repos.d
Restore single file and confirm:
tar -xf /tmp/files.tar etc/yum.conf
ls -l etc/yum.conf
Restore all files and confirm:
tar -xf /tmp/files.tar
ls
Create a gzip-compressed tarball under /tmp for /home:
tar -czf /tmp/home.tar.gz /home
Create bzip2-compressed tarball under /tmp for /home:
sudo tar -cjf /tmp/home.tar.bz2 /home
List content of gzip-compressed archive without uncompressing it:
tar -xf /tmp/home.tar.bz2 -C /tmp
gzip (gunzip) command
- Create a compressed file for each of the specified files.
- Adds .gz extension.
Flags
Copy /etc/fstab to the current directory and display filename when uncompressed:
cp /etc/fstab .
ls -l fstab
gzip fstab and view details:
gzip fstab
ls -l fstab.gz
Display compression info:
Uncompress fstab.gz:
gunzip fstab.gz
ls -l fstab
bzip2 (bunzip2) command
- Better compression/ decompression ratio but is slower than gzip.
Compress fstab using bzip and view details:
bzip2 fstab
ls -l fstab.bz2
Unzip fstab.bz2 and view details:
bunzip2 fstab.bz2
ls -l fstab
File Editing
Vim
vimguide
File and Directory Operations
touch command
- File is created with 0 bytes in size.
- Run touch on it and it will get a new timestamp
Flags
Set date on file1 to 2019-09-20:
touch -d 2019-09-20 file1
Change modification time on file1 to current system time:
mkdir command
flags
Create dir1 verbosely:
Create dir2/perl/perl5:
mkdir -vp dir2/perl/perl5
Commands for displaying file contents
cat command
- Concatenate and print files to standard output.
Flags
Redirect output to specified file:
tac command
- Display file contents in reverse
more command
- Display files on page-by-page basis.
- Forward text searching only.
Navigation
less command
- Display files on page-by-page basis.
- Forward and backwards searching.
Navigation
head command
- Displays first 10 lines of a file.
View top 3 lines of a file:
tail command
- Display last 10 lines of a file.
Flags
View last 3 lines of /etc/profile:
View updates to the system log file /varlog/messages in real time:
sudo tail -f /var/log/messages
Counting Words, Lines, and Characters in Text Files
wc (word count) command
- Display the number of lines, words, and characters (or bytes) contained in a text file or input supplied.
Flags
 wc /etc/profile
  85  294 2123 /etc/profile
Display count of characters on /etc/profile:
Copying Files and Directories
cp command
- Copy files or directories.
- Overwrites destination without warning.
- root has a custom alias in their .bashrc file that automatically adds the -i option.
Flags
Copy file to new directory:
Get confirmation before overwriting:
cp file1 dir1 -i
cp: overwrite 'dir1/file1'? y
Copy a directory and view hierarchy:
cp -r dir1 dir2
ls -l dir2 -R
Copy file while preserving attributes:
Moving and renaming Files and Directories
mv command
- Move or rename files and directories.
- Can move a directory into another directory.
- Target directory must exist otherwise you are just renaming the directory.
- Alias exists in root’s home directory for -i in the .bashrc file.
alias—“alias mv=’mv -i’""
Flags
Move a dir into another dir (target exists):
Rename a directory (Target does not exist):
Removing files
rm command
- Delete one or more specified files or directories.
- Alias—“alias rm=’rm -i’”— in the .bashrc file in the root user’s home directory.
- Remember to backslash “" any wildcard characters in filenames.
Flags
Erase newfile2:
rm a directory:
rm a directory recursively:
rmdir command
- Remove empty directories.
Flags
File Linking
inode (index node)
- Contains metadata about a file (128 bytes)
- File type, Size, permissions, owner name, owning group, access times, link count, etc.
- Also shows number of allocated blocks and pointers to the data storage location.
- Assigned a unique numeric identifier that is used by the kernel for accessing, tracking, and managing the file.
- Does not store the filename.
- Filename and corresponding inode number mapping is maintained in the directory’s metadata where the file resides.
- Links are not created between files and directories
Hard links
- Mapping between one or more filenames and an inode number.
- Hard-linked files are indistinguishable from one another.
- All hard-linked files will have identical metadata.
- Changes to the file metadata and content can be made by accessing any of the filenames.
- Cannot cross file system boundaries.
- Cannot link directories.
ls -li output
- Column 1 inode number.
- Column 3 link count.
Soft Links
- Symbolic (symlink).
- Like a Windows shortcut.
- Unique inode number for each symlink.
- Link count does not increase or decrease.
- Size of soft link is the number of character in pathname to target.
- Can cross file system boundaries.
- Can link directories.
- ls-l shows l at the beginning of the permissions for soft link
- if you remove the original file, the softlink will point to a file that doesn’t exist.
- RHEL 8 has four soft-linked directories under /.
- bin -> usr/bin
- lib -> usr/lib
- lib64 ->usr/lib64
- sbin -> usr/sbin
- Same syntax for creating linked directories
ln command
- Create links between files.
- Creates hard link by default.
Hard link file10 and file20 and verify the inode number:
touch file10
ln file10 file20
ls -li
Create a soft link to file10 called soft10:
Copying vs linking
Copying
- Duplicates source file.
- Each copy stores data at a unique location.
- Each copied file has a unique inode number and unique metadata.
- If a copy is moved, erased, or renamed, the source file will have no impact, and vice versa.
- Copy is used when the data needs to be edited independent of the other.
- Permissions on the source and the copy are managed independent of each other.
Linking
- Creates a shortcut that points to the source file.
- Source can be accessed or modified using either the source file or the link.
- All linked files point to the same data.
- Hard Link: All hard-linked files share the same inode number, and hence the metadata.
- Symlink: Each symlinked file has a unique inode number, but the inode number stores only the pathname to the source.
- Hard Link: If the hard link is weeded out, the other file and the data will remain untouched.
- Symlink: If the source is deleted, the soft link will be broken and become meaningless. If the soft link is removed, the source will have no impact.
- Links are used when access to the same source is required from multiple locations.
- Permissions are managed on the source file.
Labs
Lab Create and Manage Hard Links
- Create an empty file /tmp/hard1, and display the long file listing including the inode number:
touch /tmp/hard1
ls -li /tmp/hard1
- Create two hard links called hard2 and hard3 under /tmp, and display the long listing:
ln /tmp/hard1 /tmp/hard2
ln /tmp/hard1 /tmp/hard3
ls -li /tmp/hard*
- Edit file hard2 and add some random text. Display the long listing for all three files again:
vim /tmp/hard2
ls -li /tmp/hard*
- Erase file hard1 and hard3, and display the long listing for the remaining file:
rm -f /tmp/hard1 /tmp/hard3
ls -li /tmp/hard*
Lab: Create and Manage Soft Links
- Create soft link /root/soft1 pointing to /tmp/hard2, and display the long file listing for both:
sudo ln -s /tmp/hard2 /root/soft1
ls -li /tmp/hard2 /root/soft1
sudo ls -li /tmp/hard2 /root/soft1
2.Edit soft1 and display the long listing again:
sudo vim /root/soft1
sudo ls -li /tmp/hard2 /root/soft1
3.Remove hard2 and display the long listing:
sudo ls -li /tmp/hard2 /root/soft1
remove the soft link
Lab: Archive, List, and Restore Files
Create a gzip-compressed archive of the /etc directory.
Create a bzip2-compressed archive of the /etc directory.
sudo tar -cjf etc.tar.bz2 /etc
Compare the file sizes of the two archives.
Run the tar command and uncompress and restore both archives without specifying the compression tool used.
sudo tar -xf etc.tar.bz2 ; sudo tar -xf etc.tar.gz
Lab: Practice the vim Editor
As user1 on server1, create a file called vipractice in the home directory using vim. Type (do not copy and paste) each sentence from Lab 3-1 on a separate line (do not worry about line wrapping). Save the file and quit the editor.
Open vipractice in vim again and reveal line numbering. Copy lines 2 and 3 to the end of the file to make the total number of lines in the file to 6.
:set number!
#then
yy and p
Move line 3 to make it line 1.
Go to the last line and append the contents of the .bash_profile.
Substitute all occurrences of the string “Profile” with “Pro File”, and all occurrences of the string “profile” with “pro file”.
Erase lines 5 to 8.
Provide a count of lines, words, and characters in the vipractice file using the wc command.
Lab: File and Directory Operations
As user1 on server1, create one file and one directory in the home directory.
List the file and directory and observe the permissions, ownership, and owning group.
ls -l file3
ls -l dir5
ls -ld dir5
Try to move the file and the directory to the /var/log directory and notice what happens.
mv dir5 /var/log
mv file3 /var/log
Try again to move them to the /tmp directory.
Duplicate the file with the cp command, and then rename the duplicated file using any name.
cp /tmp/file3 file4
ls /tmp
ls
Erase the file and directory created for this lab.
rm -d /tmp/dir5; rm file4
Basic Package Management
RPM (Redhat Package Manager)
- Specially formatted File(s) packaged together with the .rpm extension.
- Packages included or available for RHEL are in rpm format.
- Metadata info gets updated whenever a package is updated.
rpm command
- Install, Upgrade, remove, query, freshen, or decompress packages.
- Validate package authenticity and integrity.
Packages
- Two types of packages binary (or installable) and source.
Binary packages
- Installation ready
- Bundled for distribution.
- Have .rpm extension.
- Contain:
- install scripts (pre and post)
- Executables
- Configuration files
- Library files
- Dependency information
- Where to install files
- Documentation
- How to install/uninstall
- Man pages for config files/commands
- Other install and usage info
- Metadata
- Stored in central location
- Includes:
- Package version
- Install location
- Checksum values
- List of included files and their attributes
- Package intelligence
- Used by package administration toolset for successful completion of the package installation process.
- May include info on:
- prerequisites
- User account setup
- Needed directories/ soft links
- Includes reverse process for uninstall
Package Naming
5 parts to a package name:
1. Name
2. Version
3. release (revision or build)
4. Linux version
5. Processor Architecture
- noarch
- platform independant
- src
- Source code packages
- Always has .rpm extension
- .rpm is removed after install
Example:
openssl-1.1.1-8.el8.x86_64.rpm,
Package Dependency
- Dependency info is in the metadata
- Read by package handling utilities
Package Database
- Metadata for installed packages and package files is stored in /var/lib/rpm/
- Package database
- Referenced by package manipulation utilities to obtain:
- package name and version data
- Info about owerships, permissions, timestamps, and file sizes that are part of the package.
- Contain info on dependencies.
- Aids management commands in:
- listing and querying packages
- Verifying dependencies and file attributes.
- Installing new packages.
- Upgrading and uninstalling packages.
- Removes and replaces metadata when a package is replaced.
- Can maintain multiple version of a single package.
- rpm (redhat package manager)
- Does not automatically resolve dependencies.
- yum (yellowdog update, modified)
- Find, get, and install dependencies automatically.
- softlink to dnf now.
- dnf (dandified yum)
Package management with rpm
rpm package management tasks:
- query
- install
- upgrade
- freshen
- overwrite
- remove
- extract
- validate
- verify
- Works with installed and installable packages.
rpm command
Query options
Query and display packages
-q (--query)
List all installed packages
-qa (--query --all)
List config files in a package
-qc (--query --config-files)
List documentation files in a package
-qd (--query --docfiles)
Exhibit what package a file comes from
-qf (--query --file)
Show installed package info (Version, Size, Installation status, Date, Signature, Description, etc.)
-qi (--query --info)
Show installable package info (Version, Size, Installation status, Date, Signature, Description, etc.)
-qip (--query --info --package)
List all files in a package.
-ql (--query --list)
List files and packages a package depends on.
-qR (--query --requires)
List packages that provide the specified package or file.
-q --whatprovides
List packages that require the specified package or file.
-q --whatrequires
Package installation options
Remove a package
-e (--erase)
Upgrades installed package. Or loads if not installed.
-U (--upgrade)
Display detailed information
-v (--verbose or -vv)
Verify integrity of a package or package files
-V (--verify)
Querying packages
Query packages in the package database or at a specified location.
Installing a package
- Creates directory structure needed
- Installs files
- Runs needed post installation steps
- Installing package will fail if missing dependencies.
- Error message will show missing dependencies.
Upgrading a package
- Installs the package if previous version does not exist. (-U)
- Makes backup of effected configuration files and adds .rpmsave extension.
Freshening a package
- Older version must exist.
- -F option
- Will only work if a newer version of a package is available.
Overwriting a Package
- Replaces existing files of a package with the same version.
- –replacepkgs option.
- Useful when you suspect corruption.
Removing a Package
- Uninstalls package and associated files/ directories
- -e Option
- Checks to see if this package is a dependency for another program and fails if it is.
rpm2cpio command- -i (extract)
- -d create directory structure.
Useful for:
- Examining package contents.
- Replacing corrupt or lost command.
- Replace critical configuration file to it’s original state
Package Integrity and Credibility
- MD5 Checksum for verifying package integrity
- GNU Privacy Guard Public Key (GNU Privacy Guard or GPG) for ensuring credibility of publisher.
- PGP (Pretty Good Privacy) - commercial version of GPG.
--nosignature
- Don’t verify package or header signatures when reading.
-K
- keep package files after installation
rpmkeys command
- check credibility, import GPG key, and verify packages
- Redhat signs their products and updates with a GPG key.
- Files in installation media include public keys in the products for verification.
- Copied to /etc/pki/rpm-gpg during OS installation.
RPM-GPG-KEY-redhat-release
- Used for packages shipped after November 2009 and their updates.
RPM-GPG-KEY-redhat-beta
- For Beta products shipped after November 2009.
- Import the relevant GPG key and the verify the package to check the credibility of a package.
Viewing GPG Keys
- view with rpm command
rpm -q gpg-pubkey
-i option
Verifying Package Attributes
- Compare package file attributes with originals stored in package database at the time of installation.
-V option
- compare owner, group, permission mode, size, modification time, digest, type, etc.
- Returns to prompt if no changes are detected
- -v or vv for verbose
-Vf
- run the check directly on the file
- Three columns of output:
- Column 1
- 9 fields
- S = Different file size.
- M = Mode or permission or file type change.
- 5 = MD5 Checksum does not match.
- D = Device file and its major and minor number have changed.
- L = File is a symlink and it’s path has been altered.
- U = Ownership has changed.
- G = Group membership has been modified.
- T = Timestamp changed.
- P = Capabilities are altered.
- . = No modifications detected.
- Column 2
- File type
- c = Configuration file
- d = Documentation File
- g = Ghost FIle
- l = License file
- r = Readme file
- Column 3
Basic Package Management Labs
Lab: Mount RHEL 9 ISO Persistently
-
Go to the VirtualBox VM Manager and make sure that the RHEL 8 image is attached to RHEL9-VM1 as depicted below:
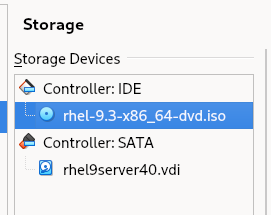
-
Open the /etc/fstab file in the vim editor (or another editor of your choice) and add the following line entry at the end of the file to mount the DVD image (/dev/sr0) in read-only (ro) mode on the /mnt directory.
/dev/sr0 /mnt iso9660 ro 0 0
Note: sr0 represents the first instance of the optical device and iso9660 is the standard format for optical file systems.
-
Mount the file system as per the configuration defined in the /etc/fstab file using the mount command with the -a (all) option:
-
Verify the mount using the df command:
Note: The image and the packages therein can now be accessed via the /mnt directory just like any other local directory on the system.
-
List the two directories—/mnt/BaseOS/Packages and /mnt/AppStream/Packages—that contain all the software packages (directory names are case sensitive):
ls -l /mnt/BaseOS/Packages | more
Lab: Query Packages (RPM)
-
query all installed packages:
rpm -qa
-
query whether the perl package is installed:
rpm -q perl
-
list all files in a package:
rpm -ql iproute
-
list only the documentation files in a package:
rpm -qd audit
-
list only the configuration files in a package:
rpm -qc cups
-
identify which package owns the specified file:
rpm -qf /etc/passwd
-
display information about an installed package including version, release, installation status, installation date, size, signatures, description, and so on:
rpm -qi setup
-
list all file and package dependencies for a given package:
rpm -qR chrony
-
query an installable package for metadata information (version, release, architecture, description, size, signatures, etc.):
rpm -qip /mnt/BaseOS/Packages/zsh-5.5.1-6.el8.x86_64.rpm
-
determine what packages require the specified package in order to operate properly:
rpm -q --whatrequires lvm2
Lab: Installing a Package (RPM)
- Install zsh-5.5.1-6.el8.x86_64.rpm
sudo rpm -ivh /mnt/BaseOS/Packages/zsh-5.5.1-6.el8.x86_64.rpm
Lab: Upgrading a Package (RPM)
- Upgrade sushi with the -U option:
sudo rpm -Uvh /mnt/AppStream/Packages/sushi-3.28.3-1.el8.x86_64.rpm
Lab: Freshening a Package
- Freshen the sushi package:
sudo rpm -Fvh /mnt/AppStream/Packages/sushi-3.28.3-1.el8.x86_64.rpm
Lab: Overwriting a Package
- Overwrite zsh-5.5.1-6.el8.x86_64
sudo rpm -ivh --replacepkgs /mnt/BaseOS/Packages/zsh-5.5.1-6.el8.x86_64
Lab: Removing a Package
- Remove sushi
sudo rpm sushi -ve
-
You have lost /etc/crony.conf. Determine what package this file comes from:
rpm -qf /etc/chrony.conf
-
Extract all files from the crony package to /tmp and create the directory structure:
[root@server30 mnt]# cd /tmp

[sudo rpm2cpio /mnt/BaseOS/Packages/chrony-3.3-3.el8.x86_64.rpm | cpio -imd
1066 blocks](<[root@server30 tmp]# rpm2cpio /mnt/BaseOS/Packages/chrony-4.3-1.el9.x86_64.rpm | cpio -imd
1253 blocks>)
-
Use find to locate the crony.conf file:
sudo find . -name chrony.conf
-
Copy the file to /etc:
Lab: Validating Package Integrity and Credibility
- Check the integrity of zsh-5.5.1-6.el8.x86_64.rpm located in /mnt/BaseOS/Packages:
rpm -K /mnt/BaseOS/Packages/zsh-5.5.1-6.el8.x86_64.rpm --nosignature
- Import the GPG key from the proper file and verify the signature for the zsh-5.5.1-6.el8.x86_64.rpm package.
sudo rpmkeys --import /etc/pki/rpm-gpg/RPM-GPG-KEY-redhat-release
sudo rpmkeys -K /mnt/BaseOS/Packages/zsh-5.5.1-6.el8.x86_64.rpm
Lab: Viewing GPG Keys
- List the imported key:
rpm -q gpg-pubkey
- View details for the first key:
rpm -qi gpg-pubkey-fd431d51-4ae0493b
Lab: Verifying Package Attributes
-
Run a check on the at program:
sudo rpm -V at
-
Change permissions of one of the files and run the check again:
ls -l /etc/sysconfig/atd
sudo chmod -v 770 /etc/sysconfig/atd
sudo rpm -V at
-
Run the check directly on the file:
sudo rpm -Vf /etc/sysconfig/atd
-
Reset the value and check the file again:
sudo chmod -v 644 /etc/sysconfig/atd
sudo rpm -V at
- Run the
ls command on the /mnt/AppStream/Packages directory to confirm that the rmt package is available:
[root@server30 tmp]# ls -l /mnt/BaseOS/Packages/rmt*
-r--r--r--. 1 root root 49582 Nov 20  2021 /mnt/BaseOS/Packages/rmt-1.6-6.el9.x86_64.rpm
- Run the rpm command and verify the integrity and credibility of the package:
[root@server30 tmp]# rpmkeys -K /mnt/BaseOS/Packages/rmt-1.6-6.el9.x86_64.rpm
/mnt/BaseOS/Packages/rmt-1.6-6.el9.x86_64.rpm: digests signatures OK
- Install the Package:
[root@server30 tmp]# rpmkeys -K /mnt/BaseOS/Packages/rmt-1.6-6.el9.x86_64.rpm
/mnt/BaseOS/Packages/rmt-1.6-6.el9.x86_64.rpm: digests signatures OK
[root@server30 tmp]# rpm -ivh /mnt/BaseOS/Packages/rmt-1.6-6.el9.x86_64.rpm
Verifying...                         ################################# [100%])
Preparing...                         ################################# [100%])
Updating / installing...
   1:rmt-2:1.6-6.el9                 ################################# [100%])
- Show basic information about the package:
[root@server30 tmp]# rpm -qi rmt
Name        : rmt
Epoch       : 2
Version     : 1.6
Release     : 6.el9
Architecture: x86_64
Install Date: Sat 13 Jul 2024 09:02:08 PM MST
Group       : Unspecified
Size        : 88810
License     : CDDL
Signature   : RSA/SHA256, Sat 20 Nov 2021 08:46:44 AM MST, Key ID 199e2f91fd431d51
Source RPM  : star-1.6-6.el9.src.rpm
Build Date  : Tue 10 Aug 2021 03:13:47 PM MST
Build Host  : x86-vm-55.build.eng.bos.redhat.com
Packager    : Red Hat, Inc. <http://bugzilla.redhat.com/bugzilla>
Vendor      : Red Hat, Inc.
URL         : http://freecode.com/projects/star
Summary     : Provides certain programs with access to remote tape devices
Description :
The rmt utility provides remote access to tape devices for programs
like dump (a filesystem backup program), restore (a program for
restoring files from a backup), and tar (an archiving program).
- Show all the files the package contains:
[root@server30 tmp]# rpm -ql rmt
/etc/default/rmt
/etc/rmt
/usr/lib/.build-id
/usr/lib/.build-id/c2
/usr/lib/.build-id/c2/6a51ea96fc4b4367afe7d44d16f1405c3c7ec9
/usr/sbin/rmt
/usr/share/doc/star
/usr/share/doc/star/CDDL.Schily.txt
/usr/share/doc/star/COPYING
/usr/share/man/man1/rmt.1.gz
- List the documentation files the package has:
[root@server30 tmp]# rpm -qd rmt
/usr/share/doc/star/CDDL.Schily.txt
/usr/share/doc/star/COPYING
/usr/share/man/man1/rmt.1.gz
- Verify the attributes of each file in the package. Use verbose mode.
[root@server30 tmp]# rpm -vV rmt
.........  c /etc/default/rmt
.........    /etc/rmt
.........  a /usr/lib/.build-id
.........  a /usr/lib/.build-id/c2
.........  a /usr/lib/.build-id/c2/6a51ea96fc4b4367afe7d44d16f1405c3c7ec9
.........    /usr/sbin/rmt
.........    /usr/share/doc/star
.........  d /usr/share/doc/star/CDDL.Schily.txt
.........  d /usr/share/doc/star/COPYING
.........  d /usr/share/man/man1/rmt.1.gz
- Remove the package:
[root@server30 tmp]# rpm -ve rmt
Preparing packages...
rmt-2:1.6-6.el9.x86_64
Lab 9-1: Install and Verify Packages
As user1 with sudo on server3,
- make sure the RHEL 9 ISO image is attached to the VM and mounted.
- Use the rpm command and install the zsh package by specifying its full path.
[root@server30 Packages]# rpm -ivh /mnt/BaseOS/Packages/zsh-5.8-9.el9.x86_64.rpm
Verifying...                         ################################# [100%])
Preparing...                         ################################# [100%])
	package zsh-5.8-9.el9.x86_64 is already installed
- Run the rpm command again and perform the following on the zsh package:
- (1) show information
[root@server30 Packages]# rpm -qi zsh
Name        : zsh
Version     : 5.8
Release     : 9.el9
Architecture: x86_64
Install Date: Sat 13 Jul 2024 06:49:40 PM MST
Group       : Unspecified
Size        : 8018363
License     : MIT
Signature   : RSA/SHA256, Thu 24 Feb 2022 08:59:15 AM MST, Key ID 199e2f91fd431d51
Source RPM  : zsh-5.8-9.el9.src.rpm
Build Date  : Wed 23 Feb 2022 07:10:14 AM MST
Build Host  : x86-vm-56.build.eng.bos.redhat.com
Packager    : Red Hat, Inc. <http://bugzilla.redhat.com/bugzilla>
Vendor      : Red Hat, Inc.
URL         : http://zsh.sourceforge.net/
Summary     : Powerful interactive shell
Description :
The zsh shell is a command interpreter usable as an interactive login
shell and as a shell script command processor.  Zsh resembles the ksh
shell (the Korn shell), but includes many enhancements.  Zsh supports
command line editing, built-in spelling correction, programmable
command completion, shell functions (with autoloading), a history
mechanism, and more.
[root@server30 Packages]# rpm -K zsh-5.8-9.el9.x86_64.rpm
zsh-5.8-9.el9.x86_64.rpm: digests signatures OK
- (3) display attributes
[root@server30 Packages]# rpm -V zsh
Lab 9-2: Query and Erase Packages
As user1 with sudo on server3,
- make sure the RHEL 9 ISO image is attached to the VM and mounted.
- Use the rpm command to perform the following:
- (1) check whether the setup package is installed
[root@server30 Packages]# rpm -q setup
setup-2.13.7-10.el9.noarch
- (2) display the list of configuration files in the setup package
[root@server30 Packages]# rpm -qc setup
/etc/aliases
/etc/bashrc
/etc/csh.cshrc
/etc/csh.login
/etc/environment
/etc/ethertypes
/etc/exports
/etc/filesystems
/etc/fstab
/etc/group
/etc/gshadow
/etc/host.conf
/etc/hosts
/etc/inputrc
/etc/motd
/etc/networks
/etc/passwd
/etc/printcap
/etc/profile
/etc/profile.d/csh.local
/etc/profile.d/sh.local
/etc/protocols
/etc/services
/etc/shadow
/etc/shells
/etc/subgid
/etc/subuid
/run/motd
/usr/lib/motd
- (3) show information for the zlib-devel package on the ISO image
[root@server30 Packages]# rpm -qi ./zlib-devel-1.2.11-40.el9.x86_64.rpm
Name        : zlib-devel
Version     : 1.2.11
Release     : 40.el9
Architecture: x86_64
Install Date: (not installed)
Group       : Unspecified
Size        : 141092
License     : zlib and Boost
Signature   : RSA/SHA256, Tue 09 May 2023 05:31:02 AM MST, Key ID 199e2f91fd431d51
Source RPM  : zlib-1.2.11-40.el9.src.rpm
Build Date  : Tue 09 May 2023 03:51:20 AM MST
Build Host  : x86-64-03.build.eng.rdu2.redhat.com
Packager    : Red Hat, Inc. <http://bugzilla.redhat.com/bugzilla>
Vendor      : Red Hat, Inc.
URL         : https://www.zlib.net/
Summary     : Header files and libraries for Zlib development
Description :
The zlib-devel package contains the header files and libraries needed
to develop programs that use the zlib compression and decompression
library.
- (4) reinstall the zsh package (–reinstall -vh),
[root@server30 Packages]# rpm -hv --reinstall ./zsh-5.8-9.el9.x86_64.rpm
Verifying...                         ################################# [100%])
Preparing...                         ################################# [100%])
Updating / installing...
   1:zsh-5.8-9.el9                   ################################# [ 50%])
Cleaning up / removing...
   2:zsh-5.8-9.el9                   ################################# [100%])
- (5) remove the zsh package.
[root@server30 Packages]# rpm -e zsh
Basic User Management
Listing Logged-In Users
A list of the users who have successfully signed on to the system with valid credentials can be printed using who and w
who command
- references the /run/utmp file and displays the information.
- displays login name of user
- shows terminal session device filename
- pts stands for pseudo terminal session
- shows data and time of user login
- Shows if terminal session is graphical(:0), remote(IP address), or textual on the console
what command (w)
- Shows length of time the user has been idle
- CPU time used by all processes including any existing background jobs attached to this terminal (JCPU),
- CPU time used by the current process (PCPU),
- current activity (WHAT).
- current system time
- system up duration
- number of users logged in
- cpu averages over last 1, 5, and 15 minutes
- load average (CPU load): 0.00 and 1.00 correspond to no load and full load, and a number greater than 1.00 signifies excess load (over 100%).
last command
- Reports the history of successful user login attempts and system boots
- Consults the wtmp file located in the /var/log directory.
- wtmp keeps a record of login/logout activities
- login time
- duration a user stayed logged in
- tty
- Output
- Login name
- Terminal name
- Terminal name or IP from where connection was established
- Day, Month, date, and time when the connection was established
- Log out time or (still logged in)
- Duration of session
- Action name (system reboots section)
- Activity name (system reboots section)
- Linux kernel version (system reboots section)
- Day, Month, date, and time when the reboot command was issued (system reboots section)
- System restart time (system reboots section)
- Duration the system remained down or (still running) (system reboots section)
- log filename (wtmp) (last line)
lastb command
- reports failed login attempts
- Consults /var/log/btmp
- record of failed login attempts
- login name
- time
- tty
- Must be root to run this command
- Columns
- name of user
- protocol used
- terminal name or ip address
- Day, Month, Date, and time of the attempt
- Duration the attempt was tried
- Duration the attempt last for
- log filename (btmp) (last line)
lastlog command
- most recent login evidence info for every user account that exists on the system
- Consults /var/log/lastlog
- record of most recent user attempts
- login name
- time
- port (or tty)
- Columns:
- Login name of user
- Terminal name assigned upon Logging in
- Terminal name or Ip address from where the session was initiated
- Timestamp for the latest login or “Never logged in”
- service accounts are used by their respective services, and they are not meant for logging.
id (identifier) Command
- displays the calling user’s:
- UID (User IDentifier)
- username
- GID (Group IDentifier)
- group name
- all secondary groups the user is a member of
- SELinux security context
groups Command:
- lists all groups the calling user is a member of:
- first group listed is the primary group for the user who executed this command
- other groups are secondary (or supplementary).
- can also view group membership information for a different user.
User Account Management
useradd Command
- add a new user to the system
- adds entries to the four user authentication files for each account added to the system
- creates a home directory for the user and copies the default user startup files from the skeleton directory /etc/skel into the user’s home directory
- used to update the default settings that are used at the time of new user creation for unspecified settings
- Options
- -b (–base-dir)
- Defines the absolute path to the base directory for placing user home directories. The default is /home.
- -c (–comment)
- Describes useful information about the user.
- -d (–home-dir)
- Defines the absolute path to the user home directory.
- -D (–defaults)
- Displays the default settings from the /etc/default/useradd file and modifies them.
- -e (–expiredate)
- Specifies a date on which a user account is automatically disabled. The format for the date specification is YYYY-MM-DD.
- -f (–inactive)
- Denotes maximum days of inactivity between password expiry and permanent account disablement.
- -g (–gid)
- Specifies the primary GID. Without this option, a group account matching the username is created with the GID matching the UID.
- -G (–groups)
- Specifies the membership to supplementary groups.
- -k (–skel)
- location of the skeleton directory (default is /etc/skel) (stores default user startup files)
- These files are copied to the user’s home directory at the time of account creation.
- Three hidden bash shell files: (default)
- .bash_profile, .bashrc, and .bash_logout
- You can customize these files or add your own to be used for accounts created thereafter.
- -m (–create-home)
- Creates a home directory if it does not already exist.
- -o (–non-unique)
- Creates a user account sharing the UID of an existing user.
- When two users share a UID, both get identical rights on each other’s files.
- Should only be done in specific situations.
- -r (–system)
- Creates a service account with a UID below 1000 and a never-expiring password.
- -s (–shell)
- Defines the absolute path to the shell file. The default is /bin/bash.
- -u (–uid)
- Indicates a unique UID. Without this option, the next available UID from the /etc/passwd file is used.
- login
- Specifies a login name to be assigned to the user account.
usermod Command
- modify the attributes of an existing user
- similar syntax to useradd and most switches identical.
- Options unique to usermod:
- -a (–append)
- Adds a user to one or more supplementary groups
- -l (–login)
- Specifies a new login name
- -m (–move-home)
- Creates a home directory and moves the content over from the old location
- -G
- Add a list of groups a user is a member of.
userdel Command
- to remove a user from the system
passwd Command
- set or modify a user’s password
No-Login (Non-Interactive) User Account
nologin command
- /sbin/nologin
- special purpose program that can be employed for user accounts that do not require login access to the system.
- located in the /usr/sbin (or /sbin) directory
- user is refused with the message, “This account is currently not available.”
- If a custom message is required, you can create a file called nologin.txt in the /etc directory and add the desired text to it.
- If a no-login user is able to log in with their credentials, there is a problem. Use the grep command against the /etc/passwd file to ensure ‘/sbin/nologin’ is there in the shell field for that user.
- examples of user accounts that do not require login access are the service accounts such as ftp, apache, and sshd.
Basic User Management Labs
Lab: who
Lab: what
Lab: last
- List all user login, logout, and system reboot occurrences:
- List system reboot info only:
Lab: lastb
Lab: lastlog
Lab: id
- View info about currently active user:
- View info about another user:
Lab: groups
- View current user’s groups:
- View groups of another user:
Lab: user authentication files
- list of the four files and their backups from the /etc directory:
ls -l /etc/passwd* /etc/group* /etc/shadow* /etc/gshadow*
- View first and last 3 lines of the passwd file
head -3 /etc/passwd ; tail -3 /etc/passwd
- verify the permissions and ownership on the passwd file:
- View first and last 3 lines of the shadow file:
head -3 /etc/shadow ; tail -3 /etc/shadow
- verify the permissions and ownership on the shadow file:
- View first and last 3 lines of the group file:
head -3 /etc/group ; tail -3 /etc/group
- Verify the permissions and ownership on the group file:
- View first and last 3 lines of the gshadow file:
head -3 /etc/gshadow ; tail -3 /etc/gshadow
- Verify the permissions and ownership on the gshadow file:
Lab: useradd and login.defs
- use the cat or less command to view the useradd file content or display the settings with the useradd command:
- grep on the/etc/login.defs with uncommented and non-empty lines:
grep -v ^# /etc/login.defs | grep -v ^$
Lab: Create a User Account with Default Attributes (root)
- Create user2 with all the default directives:
- Assign this user a password and enter it twice when prompted:
- grep for user2: on the authentication files to examine what the useradd command has added:
cd /etc ; grep user2: passwd shadow group gshadow
- Test this new account by logging in as user2 and then run the id and groups commands to verify the UID, GID, and group membership information:
Lab: Create a User Account with Custom Values
- Create user3 with UID 1010, home directory /usr/user3a, and shell /bin/sh:
useradd -u 1010 -d /usr/user3a -s /bin/sh user3
- Assign user1234 as password (passwords assigned in the following way is not recommended; however, it is okay in a lab environment):
echo user1234 | passwd --stdin user3
- grep for user3: on the four authentication files to see what was added for this user:
cd /etc ; grep user3: passwd shadow group gshadow
- Test this account by switching to or logging in as user3 and entering user1234 as the password. Run the id and groups commands for further verification.
Lab: Modify and Delete a User Account
- Modify the login name for user2 to user2new, UID to 2000, home directory to /home/user2new, and login shell to /sbin/nologin.
usermod -l user2new -m -d /home/user2new -s /sbin/nologin -u 2000 user2
- Obtain the information for user2new from the passwd file for confirmation:
grep user2new /etc/passwd
- Remove user2new along with their home and mail spool directories:
- Confirm the user deletion:
grep user2new /etc/passwd
Lab: Create a User Account with No-Login Access (root)
- Look at the current nologin users:
- Create user4 with non-interactive shell file /sbin/nologin:
useradd -s /sbin/nologin user4
- Assign user1234 as password:
echo user1234 | passwd --stdin user4
- grep for user4 on the passwd file and verify the shell field containing the nologin shell:
- Test this account by attempting to log in or switch:
Lab: Check User Login Attempts (root)
- execute the last, lastb, and lastlog commands, and observe the outputs.
- List the timestamps when the system was last rebooted.
Lab 5-2: Verify User and Group Identity (user1)
- run the who and w commands one at a time, and compare the outputs.
- Execute the
id and groups commands, and compare the outcomes. Examine the extra information that the id command shows, but not the groups command.
Lab 5-3: Create Users (root)
- create user account user4100 with UID 4100 and home directory under /usr.
useradd -m -d /usr/user4100 -u 4100 user4100
- Create another user account user4200 with default attributes.
- Assign both users a password.
 passwd user4100
 passwd user4200
- View the contents of the passwd, shadow, group, and gshadow files, and observe what has been added for the two new users.
 cat /etc/passwd
 cat /etc/shadow
 cat /etc/group
 cat /etc/gshadow
Lab: Create User with Non-Interactive Shell (root)
- Create user account user4300 with the disability of logging in.
useradd -s /sbin/nologin user4300
- Assign this user a password.
- Try to log on with this user and see is displayed on the screen.
- View the content of the passwd file, and see what is there that prevents this user from logging in.
Boot Process, Grub2, and Kernel
Linux Kernel
- controls everything on the system.
- hardware
- enforces security and access controls
- runs, schedules, and manages processes and service daemons.
- comprised of several modules.
- new kernel must be installed or an existing kernel must be upgraded when the need arises from an application or functionality standpoint.
- core of the Linux system.
- manages
- hardware
- enforces security
- regulates access to the system
handles
-
processes
-
services
-
application workloads.
-
collection of software components called modules
- Modules
- device drivers that control hardware devices
- processor
- memory
- storage
- controller cards
- peripheral equipment
- interact with software subsystems
- storage partitioning
- file systems
- networking
- virtualization
-
Some modules are static to the kernel and are integral to system functionality,
-
Some modules are loaded dynamically as needed
-
RHEL 8.0 and RHEL 8.2 are shipped with kernel version 4.18.0 (4.18.0-80 and 4.18.0-193 to be specific) for the 64-bit Intel/AMD processor architecture computers with single, multi-core, and multi-processor configurations.
-
uname -m shows the architecture of the system.
-
Kernel requires a rebuild when a new functionality is added or removed.
-
functionality may be introduced by:
- installing a new kernel
- upgrading an existing one
- installing a new hardware device, or
- changing a critical system component.
-
existing functionality that is no longer needed may be removed to make the overall footprint of the kernel smaller for improved performance and reduced memory utilization.
-
tunable parameters are set that define a baseline for kernel functionality.
-
Some parameters must be tuned for some applications and database software to be installed smoothly and operate properly.
-
You can generate and store several custom kernels with varied configuration and required modules
-
only one of them can be active at a time.
-
different kernel may be loaded by interacting with GRUB2.
Kernel Packages
- set of core kernel packages that must be installed on the system at a minimum to make it work.
- Additional packages providing supplementary kernel support are also available.
Core and some add-on kernel packages.
| Kernel Package |
Description |
| kernel |
Contains no files, but ensures other kernel packages are accurately installed |
| kernel-core |
Includes a minimal number of modules to provide core functionality |
| kernel-devel |
Includes support for building kernel modules |
| kernel-modules |
Contains modules for common hardware devices |
| kernel-modules-extra |
Contains modules for not-so-common hardware devices |
| kernel-headers |
Includes files to support the interface between the kernel and userspace |
| kernel-tools-libs |
Includes the libraries to support the kernel tools |
| libraries and programs kernel-tools |
Includes tools to manipulate the kernel |
Kernel Packages
- Packages containing the source code for RHEL 8 are also available for those who wish to customize and recompile the code
List kernel packages installed on the system:
dnf list installed kernel*
- Shows six kernel packages that were loaded during the OS installation.
Analyzing Kernel Version
Check the version of the kernel running on the system to check for compatibility with an application or database:
 uname -r
 5.14.0-362.24.1.el9_3.x86_64
5 - Major version
14 - Major revision
0 - Kernel patch version
362 - Red Hat version
el9 - Enterprise Linux 9
x86_64 - Processor architecture
Kernel Directory Structure
Kernel and its support files (noteworthy locations)
- /boot
- /proc
- /usr/lib/modules
/boot
- Created at system installation.
- Linux kernel
- GRUB2 configuration
- other kernel and boot support files.
View the /boot filesystem:
ls -l /boot
- four files are for the kernel and
- vmlinuz - main kernel file
- initramfs - main kernel’s boot image
- config - configuration
- System.map - mapping
- two files for kernel rescue version
- Have the current kernel version appended to their names.
- have the string “rescue” embedded within their names
/boot/efi/ and /boot/grub2/
- hold bootloader information specific to firmware type used on the system: UEFI or BIOS.
List /boot/Grub2:
 [root@localhost ~]# ls -l /boot/grub2
 total 32
 -rw-r--r--. 1 root root   64 Feb 25 05:13 device.map
 drwxr-xr-x. 2 root root   25 Feb 25 05:13 fonts
 -rw-------. 1 root root 7049 Mar 21 04:47 grub.cfg
 -rw-------. 1 root root 1024 Mar 21 05:12 grubenv
 drwxr-xr-x. 2 root root 8192 Feb 25 05:13 i386-pc
 drwxr-xr-x. 2 root root 4096 Feb 25 05:13 locale
- grub.cfg
- bootable kernel information
- grub.env
- environment information that the kernel uses.
/boot/loader
- storage location for configuration of the running and rescue kernels.
- Configuration is stored in files under the /boot/loader/entries/
 [root@localhost ~]# ls -l /boot/loader/entries/
 total 12
 -rw-r--r--. 1 root root 484 Feb 25 05:13  8215ac7e45d34823b4dce2e258c3cc47-0-rescue.conf
 -rw-r--r--. 1 root root 460 Mar 16 06:17  8215ac7e45d34823b4dce2e258c3cc47-5.14.0-362.18.1.el9_3.x86_64.conf
 -rw-r--r--. 1 root root 459 Mar 16 06:17  8215ac7e45d34823b4dce2e258c3cc47-5.14.0-362.24.1.el9_3.x86_64.conf
- The files are named using the machine id of the system as stored in /etc/machine-id/ and the kernel version they are for.
content of the kernel file:
 [root@localhost entries]# cat  /boot/loader/entries/8215ac7e45d34823b4dce2e258c3cc47-5.14.0- 362.18.1.el9_3.x86_64.conf
 title Red Hat Enterprise Linux (5.14.0-362.18.1.el9_3.x86_64) 9.3  (Plow)
 version 5.14.0-362.18.1.el9_3.x86_64
 linux /vmlinuz-5.14.0-362.18.1.el9_3.x86_64
 initrd /initramfs-5.14.0-362.18.1.el9_3.x86_64.img $tuned_initrd
 options root=/dev/mapper/rhel-root ro crashkernel=1G-4G:192M,4G- 64G:256M,64G-:512M resume=/dev/mapper/rhel-swap rd.lvm.lv=rhel/root  rd.lvm.lv=rhel/swap rhgb quiet  $tuned_params
 grub_users $grub_users
 grub_arg --unrestricted
 grub_class rhel
- “title” is displayed on the bootloader screen
- “kernelopts” and “tuned_params” supply values to the booting kernel to control its behavior.
/proc
- Virtual, memory-based file system
- contents are created and updated in memory at system boot and during runtime
- destroyed at system shutdown
- current state of the kernel, which includes
- hardware configuration
- status information
- processor
- memory
- storage
- file systems
- swap
- processes
- network interfaces
- connections
- routing
- etc.
- Data kept in tens of thousands of zero-byte files organized in a hierarchy.
List /proc:
ls -l /proc
- numerical subdirectories contain information about a specific process
- process ID matches the subdirectory name.
- other files and subdirectories contain information, such as
- memory segments for processes and
- configuration data for system components.
- can view the configuration in vim
Show selections from the cpuinfo and meminfo files that hold
processor and memory information:
cat/proc/cpuinfo && cat /proc/meminfo
- data used by top, ps, uname, free, uptime and w, to display information.
/usr/lib/modules/
- holds information about kernel modules.
- subdirectories are specific to the kernels installed on the system.
Long listing of /usr/lib/modules/ shows two installed kernels:
 [root@localhost entries]# ls -l /usr/lib/modules
 total 8
 drwxr-xr-x. 7 root root 4096 Mar 16 06:18 5.14.0-362.18.1.el9_3.x86_64
 drwxr-xr-x. 8 root root 4096 Mar 16 06:18 5.14.0-362.24.1.el9_3.x86_64
View /usr/lib/modules/5.14.0-362.18.1.el9_3.x86_64/:
ls -l /usr/lib/modules/5.14.0-362.18.1.el9_3.x86_64
- Subdirectories hold module-specific information for the kernel version.
/lib/modules/4.18.0-80.el8.x86_64/kernel/drivers/
- stores modules for a variety of hardware and software components in various subdirectories:
ls -l /usr/lib/modules/5.14.0-362.18.1.el9_3.x86_64/kernel/drivers
- Additional modules may be installed on the system to support more
components.
Installing the Kernel
-
requires extra care
-
could leave your system in an unbootable or undesirable state.
-
have the bootable medium handy prior to starting the kernel install process.
-
By default, the dnf command adds a new kernel to the system, leaving the existing kernel(s) intact. It does not replace or overwrite existing kernel files.
-
Always install a new version of the kernel instead of upgrading it.
-
The upgrade process removes any existing kernel and replaces it with a new one.
-
In case of a post-installation issue, you will not be able to revert to the old working kernel.
-
Newer version of the kernel is typically required:
- if an application needs to be deployed on the system that requires a different kernel to operate.
- When deficiencies or bugs are identified in the existing kernel, it can hamper the kernel’s smooth operation.
-
new kernel
- addresses existing issues
- adds bug fixes
- security updates
- new features
- improved support for hardware devices.
-
dnf is the preferred tool to install a kernel
-
it resolves and installs any required dependencies automatically.
-
rpm may be used but you must install any dependencies manually.
-
Kernel packages for RHEL are available to subscribers on Red Hat’s Customer Portal.
Linux Boot Process
Multiple phases during the boot process.
- Starts selective services during its transition from one phase into another.
- Presents the administrator an opportunity to interact with a preboot program to boot the system into a non-default target.
- Pass an option to the kernel.
- Reset the lost or forgotten root user password.
- Launches a number of services during its transition to the default or specified target.
- boot process after the system has been powered up or restarted.
- lasts until all enabled services are started.
- login prompt will appear on the screen
- boot process is automatic, but you
- may need to interact with it to take a non-default action, such as
- booting an alternative kernel
- booting into a non-default operational state
- repairing the system
- recovering from an unbootable state
boot process on an x86 computer may be split into four major phases:
(1) the firmware phase
(2) the bootloader phase
(3) the kernel phase
(4) the initialization phase.
The system accomplishes these phases one after the other while performing and attempting to complete the tasks identified in each phase.
The Firmware Phase (BIOS and UEFI)
firmware:
- BIOS (Basic Input/Output System) or the UEFI (Unified Extensible Firmware Interface) code that is stored in flash memory on the x86-based system board.
- runs the Power-On-Self-Test (POST) to detect, test, and initialize the system hardware components.
- Installs appropriate drivers for the video hardware
- exhibits system messages on the screen.
- scans available storage devices to locate a boot device,
- starting with a 512-byte image that contains
- 446 bytes of the bootloader program,
- 64 bytes for the partition table
- last two bytes with the boot signature.
- referred to as the Master Boot Record (MBR)
- located on the first sector of the boot disk.
- As soon as it discovers a usable boot device, it loads the bootloader into memory and passes control over to it.
BIOS
- small memory chip in the computer that stores
- system date and time,
- list and sequence of boot devices,
- I/O configuration,
- etc.
- configuration is customizable.
- hardware initialization phase
- detecting and diagnosing peripheral devices.
- runs the POST on the devices as it finds them
- installs drivers for the graphics card and the attached monitor
- begins exhibiting system messages on the video hardware.
- discovers a usable boot device
- loads the bootloader program into memory, and passes control over to it.
UEFI
- new 32/64-bit architecture-independent specification replacing BIOS.
- delivers enhanced boot and runtime services
- superior features such as speed over the legacy 16-bit BIOS.
- has its own device drivers
- able to mount and read extended file systems
- includes UEFI-compliant application tools
- supports one or more bootloader programs.
- comes with a boot manager that allows you to choose an alternative boot source.
Bootloader Phase
- Once the firmware phase is over and a boot device is detected,
- system loads a piece of software called bootloader that is located in the boot sector of the boot device.
- RHEL uses GRUB2 (GRand Unified Bootloader) version 2 as the bootloader program. GRUB2 supports both BIOS and UEFI firmware.
The primary job of the bootloader program is to
- spot the Linux kernel code in the /boot file system
- decompress it
- load it into memory based on the configuration defined in the /boot/grub2/grub.cfg file
- transfer control over to it to further the boot process.
UEFI-based systems,
- GRUB2 looks for the EFI system partition /boot/efi instead
- Runs the kernel based on the configuration defined in the /boot/efi/EFI/redhat/grub.efi file.
Kernel Phase
- kernel is the central program of the operating system, providing access to hardware and system services.
- After getting control from the bootloader, the kernel:
-
extracts the initial RAM disk (initrd) file system image found in the /boot file system into memory,
-
decompresses it
-
mounts it as read-only on /sysroot to serve as the temporary root file system
-
loads necessary modules from the initrd image to allow access to the physical disks and the partitions and file systems therein.
-
loads any required drivers to support the boot process.
-
Later, it unmounts the initrd image and mounts the actual physical root file system on / in read/write mode.
-
At this point, the necessary foundation has been built for the boot process to carry on and to start loading the enabled services.
-
kernel executes the systemd process with PID 1 and passes the control over to it.
Initialization Phase
-
fourth and the last phase in the boot process.
-
Systemd:
-
takes control from the kernel and continues the boot process.
-
is the default system initialization scheme used in RHEL 9.
-
starts all enabled userspace system and network services
-
Brings the system up to the preset boot target.
-
A boot target is an operational level that is achieved after a series of services have been started to get to that state.
-
system boot process is considered complete when all enabled services are operational for the boot target and users are able to log in to the system
GRUB2 Bootloader
- After the firmware phase has concluded:
- Bootloader presents a menu with a list of bootable kernels available on the system
- Waits for a predefined amount of time before it times out and boots the default kernel.
- You may want to interact with GRUB2 before the autoboot times out to boot with a non-default kernel boot to a different target, or customize the kernel boot string.
- Press a key before the timeout expires to interrupt the autoboot process and interact with GRUB2.
- autoboot countdown default value is 5 seconds.
Interacting with GRUB2
- GRUB2 main menu shows a list of bootable kernels at the top.
- Edit a selected kernel menu entry by pressing an e or go to the grub> command prompt by pressing a c.
edit mode,
- GRUB2 loads the configuration for the selected kernel entry from the /boot/grub2/grub.cfg file in an editor
- enables you to make a desired modification before booting the system.
- you can boot the system into a less capable operating target by adding “rescue”, “emergency”, or “3” to the end of the line that begins with the keyword “linux”,
- Press
Ctrl+x when done to boot.
- one-time temporary change and it won’t touch the grub.cfg file.
- press
ESC to discard the changes and return to the main menu.
grub> command prompt appears when you press Ctrl+c while in the edit window- or a
c from the main menu.
- command mode: execute debugging, recovery, etc.
- view available commands by pressing the TAB key.
GRUB2 Commands
Understanding GRUB2 Configuration Files
/boot/grub2/grub.cfg
- Referenced at boot time.
- Generated automatically when a new kernel is installed or upgraded
- not advisable to modify it directly, as your changes will be overwritten. :
/etc/default/grub
- primary source file that is used to regenerate grub.cfg.
- Defines the directives that govern how GRUB2 should behave at boot time.
- Any changes made to the grub file will only take effect after the grub2-mkconfig utility has been executed
- Defines the directives that control the behavior of GRUB2 at boot time.
- Any changes in this file must be followed by the execution of the
grub2-mkconfig command in order to be reflected in grub.cfg.
Default settings:
 [root@localhost default]# nl /etc/default/grub
     1	GRUB_TIMEOUT=5
     2	GRUB_DISTRIBUTOR="$(sed 's, release .*$,,g' /etc/system-release)"
     3	GRUB_DEFAULT=saved
     4	GRUB_DISABLE_SUBMENU=true
     5	GRUB_TERMINAL_OUTPUT="console"
     6	GRUB_CMDLINE_LINUX="crashkernel=1G-4G:192M,4G-64G:256M,64G-:512M resume=/dev/mapper/rhel-swap rd.lvm.lv=rhel/root rd.lvm.lv=rhel/swap rhgb quiet"
     7	GRUB_DISABLE_RECOVERY="true"
     8	GRUB_ENABLE_BLSCFG=true
| Directive |
Description |
| GRUB_TIMEOUT |
Wait time, in seconds, before booting off the default kernel. Default is 5. |
| GRUB_DISTRIBUTOR |
Name of the Linux distribution |
| GRUB_DEFAULT |
Boots the selected option from the previous system boot |
| GRUB_DISABLE_SUBMENU |
Enables/disables the appearance of GRUB2 submenu |
| GRUB_TERMINAL_OUTPUT |
Sets the default terminal |
| GRUB_CMDLINE_LINUX |
Specifies the command line options to pass to the kernel at boot time |
| GRUB_DISABLE_RECOVERY |
Lists/hides system recovery entries in the GRUB2 menu |
| GRUB_ENABLE_BLSCFG |
Defines whether to use the new bootloader specification to manage bootloader configuration |
- Default settings are good enough for normal system operation.
/boot/grub2/grub.cfg - /boot/efi/EFI/redhat/grub.cfg
- Main GRUB2 configuration file that supplies boot-time configuration information.
- located in the /boot/grub2/ on BIOS-based systems
- /boot/efi/EFI/redhat/ on UEFI-based systems.
- can be recreated manually with the
grub2-mkconfig utility
- automatically regenerated when a new kernel is installed or upgraded.
- file will lose any previous manual changes made to it.
grub2-mkconfig command
- Uses the settings defined in helper scripts located in the /etc/grub.d directory.
 [root@localhost default]# ls -l /etc/grub.d
 total 104
 -rwxr-xr-x. 1 root root  9346 Jan  9 09:51 00_header
 -rwxr-xr-x. 1 root root  1046 Aug 29  2023 00_tuned
 -rwxr-xr-x. 1 root root   236 Jan  9 09:51 01_users
 -rwxr-xr-x. 1 root root   835 Jan  9 09:51  08_fallback_counting
 -rwxr-xr-x. 1 root root 19665 Jan  9 09:51 10_linux
 -rwxr-xr-x. 1 root root   833 Jan  9 09:51  10_reset_boot_success
 -rwxr-xr-x. 1 root root   892 Jan  9 09:51  12_menu_auto_hide
 -rwxr-xr-x. 1 root root   410 Jan  9 09:51  14_menu_show_once
 -rwxr-xr-x. 1 root root 13613 Jan  9 09:51  20_linux_xen
 -rwxr-xr-x. 1 root root  2562 Jan  9 09:51  20_ppc_terminfo
 -rwxr-xr-x. 1 root root 10869 Jan  9 09:51 30_os- prober
 -rwxr-xr-x. 1 root root  1122 Jan  9 09:51 30_uefi- firmware
 -rwxr-xr-x. 1 root root   218 Jan  9 09:51 40_custom
 -rwxr-xr-x. 1 root root   219 Jan  9 09:51 41_custom
 -rw-r--r--. 1 root root   483 Jan  9 09:51 README
00_header
- sets the GRUB2 environment
10_linux
- searches for all installed kernels on the same disk partition
30_os-prober
- searches for the presence of other operating systems
40_custom and 41_custom are to
- introduce any customization.
- like add custom entries to the boot menu.
grub.cfg file
- Sources /boot/grub2/grubenv for kernel options and other settings.
 [root@localhost grub2]# cat grubenv
 # GRUB Environment Block
 # WARNING: Do not edit this file by tools other than grub-editenv!!!
 saved_entry=8215ac7e45d34823b4dce2e258c3cc47-5.14.0- 362.24.1.el9_3.x86_64
 menu_auto_hide=1
 boot_success=0
 boot_indeterminate=0
 ############################################################################
 ##################################################### #######################
If a new kernel is installed:
- the existing kernel entries remain intact.
- All bootable kernels are listed in the GRUB2 menu
- any of the kernel entries can be selected to boot.
Lab: Change Default System Boot Timeout
- change the default system boot timeout value to 8 seconds persistently, and validate.
-
Edit the /etc/default/grub file and change the setting as follows:
`GRUB_TIMEOUT=8
-
Execute the grub2-mkconfig command to reproduce grub.cfg:
grub2-mkconfig -o /boot/grub2/grub.cfg
3.Restart the system with sudo reboot and confirm the new
timeout value when GRUB2 menu appears.
Booting into Specific Targets
RHEL
-
boots into graphical target state by default if the Server with GUI software selection is made during installation.
-
can also be directed to boot into non-default but less capable operating targets from the GRUB2 menu.
-
offers emergency and rescue boot targets.
- special target levels can be launched from the GRUB2 interface by
- selecting a kernel
- pressing e to enter the edit mode
- appending the desired target name to the line that begins with the keyword “linux”.
- Press ctrl+x to boot into the supplied target
- Enter root password
reboot when you are done
-
You must know how to boot a RHEL 9 system into a specific target from the GRUB2 menu to modify the fstab file or reset an unknown root user password.
Append “emergency” to the kernel line entry:

Other options:
- “rescue”
- “1”
- “s”
- “single”
Reset the root User Password
- Terminate the boot process at an early stage to be placed in a special debug shell in order to reset the root password.
-
Reboot or reset server1, and interact with GRUB2 by pressing a key before the autoboot times out. Highlight the default kernel entry in the GRUB2 menu and press e to enter the edit mode. Scroll down to the line entry that begins with the keyword “linux” and press the End key to go to the end of that line:
-
Modify this kernel string and append “rd.break” to the end of the line.
-
Press Ctrl+x when done to boot to the special shell. The system mounts the root file system read-only on the /sysroot directory. Make /sysroot appear as mounted on / using the chroot command:
3. Remount the root file system in read/write mode for the passwd command to be able to modify the shadow file with a new password:
- Enter a new password for root by invoking the passwd command:
- Create a hidden file called .autorelabel to instruct the operating system to run SELinux relabeling on all files, including the shadow file that was updated with the new root password, on the next reboot:
- Issue the exit command to quit the chroot shell and then the reboot command to restart the system and boot it to the default target.
Second method
Look into using init=/bin/bash for password recovery as a second method.
Boot Grub2 Kernel Labs
Lab: Enable Verbose System Boot
- Remove “quiet” from the end of the value of the variable GRUB_CMDLINE_LINUX in the /etc/default/grub file
- Run grub2-mkconfig to apply the update.
- Reboot the system and observe that the system now displays verbose information during the boot process.
Lab: Reset root User Password
- Reset the root user password by booting the system into emergency mode with SELinux disabled.
- Try to log in with root and enter the new password after the reboot.
Lab: Install New Kernel
- Check the current version of the kernel using the uname or rpm command.
- Download a higher version from the Red Hat Customer Portal or rpmfind.net and install it.
- Reboot the system and ensure the new kernel is listed on the bootloader menu.
5.14.0-427.35.1.el9_4.x86_64
Lab: Download and Install a New Kernel
- download the latest available kernel packages from the Red Hat Customer Portal
- install them using the dnf command.
- ensure that the existing kernel and its configuration remain intact.
- As an alternative (preferred) to downloading kernel packages individually and then installing them, you can follow the instructions provided in “Containers” chapter to register server1 with RHSM and run sudo dnf install kernel to install the latest kernel and all the dependencies collectively.
-
Check the version of the running kernel:
uname -r
-
List the kernel packages currently installed:
rpm -qa | grep kernel
-
Sign in to the Red Hat Customer Portaland click downloads.
-
Click “Red Hat Enterprise Linux 8” under “By Category”:
-
Click Packages and enter “kernel” in the Search bar to narrow the list of available packages:
-
Click “Download Latest” against the packages kernel, kernel-core, kernel-headers, kernel-modules, kernel-tools, and kernel-tools-libs to download them.
-
Once downloaded, move the packages to the /tmp directory using the mv command.
-
List the packages after moving them:
-
Install all the six packages at once using the dnf command:
dnf install /tmp/kernel* -y
-
Confirm the installation alongside the previous version:
sudo dnf list installed kernel*
-
The /boot/grub2/grubenv/ file now has the directive “saved_entry” set to the new kernel, which implies that this new kernel will boot up on the next system restart:
sudo cat /boot/grub2/grubenv
-
Reboot the system. You will see the new kernel entry in the GRUB2 boot list at the top. The system will autoboot this new default kernel.
-
Run the uname command once the system has been booted up to
confirm the loading of the new kernel:
uname -r
-
View the contents of the version and cmdline files under /proc to verify the active kernel:
`cat /proc/version
Or just dnf install kernel
Installation
Chapter 1 RHCSA Notes - Installation
About RHEL9
- Kernel 5.14
- Released May 2019
- Built along side of Fedora 34
- Installer program = Anaconda
- Default Bootloader = GRUB2
- Default automatic partitioning = /boot, /, swap
- Default desktop environment = GNOME
Installation Logs
/root/anaconda-ks.cfg Configuration entered
/var/log/anaconda/anaconda.log Contains informational, debug, and other general messages
/var/log/anaconda/journal.log Stores messages generated by many services and components during system installation
/var/log/anaconda/packaging.log Records messages generated by the dnf and rpm commands during software installation
/var/log/anaconda/program.log Captures messages generated by external programs
/var/log/anaconda/storage.log Records messages generated by storage modules
/var/log/anaconda/syslog Records messages related to the kernel
/var/log/anaconda/X.log Stores X Window System information
Note: Logs are created in /tmp then transferred over to /var/log/anaconda once the install is finished.
6 Virtual Consoles
- Monitor the installation process.
- View diagnostic messages.
- Discover and fix any issues encountered.
- Information displayed on the console screens is captured in installation log files.
Console 1 (Ctrl+Alt+F1)
- Main screen
- Select language
- Then switches default console to 6
Console 2 (Ctrl_Alt+F2)
- Shell interface for root user
Console 3 (Ctrl_Alt+F3)
- Displays install messages
- Stores them in /tmp/anaconda.log
- Info on detected hardware, etc.
Console 4 (Ctrl_Alt+F4)
- Shows storage messages
- Stores them in /tmp/storage.log
Console 5 (Ctrl_Alt+F5)
- Program messages
- Stores them in /tmp/program.log
Console 6 (Ctrl_Alt+F6)
- Default Graphical configuration and installation console screen
Console 1 Brings you to the log in screen. Console 2 does nothing. Console 3-6 all bring you to this log in screen
Lab Setup
VM1
server1.example.om
192.168.0.110
Memory: 2GB
Storage: 1x20GB
2 vCPUs
VM2
server2.exmple.om
192.168.0.120
Memory: 2048
Storage: 1x20GB
	4x250 MB data disk
	1x5GB data disk
2 vCPUs
Setting up VM1
Download the disc iso on Redhat’s website: https://access.redhat.com/downloads/content/rhel
Name RHEL9-VM1 Accept defaults.
Set drive to 20 gigs
press “spe” to hlt utooot
Selet instll
selet lnguge
onfigure timezone under time & dte
go into instlltion destintion nd li “done”
Networ nd hostnme settings
- hnge the hostnme to server1.exmple.om
- go to IPv4 settings in networ nd host nd set to mnul ddress: 192.168.0.110 netms 24 gtewy 192.168.0.1 then sve
- slide the on/off swith in the min menu to on
Set root pssword
Chnge the oot order
- power off the vm
- Set oot sequene to hrd dis first then optil, remove floppy
Accept license terms and rete user
ssh from host os with putty
Issue these Commnds after set up
whoami
hostname
pwd
logout or ctrl+d
Using cockpit
- Web gui for managing RHEL system
- Comes pre-installed
- if not then install with:
- must enable cockpit socket
sudo systemctl enable --now cockpit.socket
- https://yourip:9090
Labs
Lab:
Enable cockpit.socket:
sudo systemctl enable --now cockpit.socket
In a web browser, go to https://<your-ip>:9090
Interaction
Looking to get started using Fedora or Red Hat operating systems?
This guide with get you started with the RHEL Graphical environment, file system, and essential commands to get started using Fedora, Red Hat, or other RHEL based systems.
RedHat (RHEL9) Graphical Environment (Wayland)
Redhat runs a graphical environment called Wayland. This is the foundation for running GUI apps. Wayland is a client/server display protocol. Which just means that the user (the client) requests a resource and the display manager (the server) serves those resources.
Wayland is slowly replaced and older display protocol called “X”. And has better graphics capabilities, features, and performance than X. And consists of a Display or Login manager and a Desktop environment.
The Display/ Login manager presents the login screen for users to log in. Once you log in, you get to the pre-configured desktop manager or Desktop Environment (DE). The GNOME Display Manager. (GDM)
File System and Directory Hierarchy
The standard for the Linux filesystem is the Filesystem Hierarchy Standard (FHS). Which describes locations, names, and permissions for a variety of file types and directories.
The directory structure starts at the root. Which is notated by a “/”. The top levels of the directory can be viewed by running the ls command on the root of the directory tree.
Size of the root file system is automatically determined by the installer program based on the available disk space when you select the default partitioning (it may be altered). Here is a listing of the contents of /:
$ ls /
afs  bin  boot  dev  etc  home  lib  lib64  lost+found  media  mnt  opt  proc  root  run  sbin  snap  srv  sys  tmp  usr  var
Some of these directories hold static data such as commands, configuration files, kernel and device files, etc. And some hold dynamic data such as log and status files.
There are three major categories of file systems. They are:
- disk-based
- network-based
- memory-based
Disk-based files systems are physical media such as a hard drive or a USB flash drive and store information persistently. The root and boot file systems and both disk-based and created automatically when you select the default partitioning.
Network-Based file systems are disk-based file systems that are shared over the network for remote access. (Also stored persistently)
Memory-Based filesystems are virtual. And are created automatically at system startup and destroyed when the system goes down.
Key Directories in /
/etc (extended text configuration)
This directory contains system configuration files for systemd, LVM, and user shell startup template files.
david@fedora:$ ls /etc
abrt                    dhcp                        gshadow-       locale.conf               openldap            request-key.d          sysctl.conf
adjtime                 DIR_COLORS                  gss            localtime                 opensc.conf         resolv.conf            sysctl.d
aliases                 DIR_COLORS.lightbgcolor     gssproxy       login.defs                opensc-x86_64.conf  rpc                    systemd
alsa                    dleyna-server-service.conf  host.conf      logrotate.conf            openvpn             rpm                    system-release
alternatives            dnf                         hostname       logrotate.d               opt                 rpmdevtools            system-release-cpe
anaconda                dnsmasq.conf                hosts          lvm                       os-release          rpmlint                tcsd.conf
anthy-unicode.conf      dnsmasq.d                   hp             machine-id                ostree              rsyncd.conf            terminfo
apk                     dracut.conf                 httpd          magic                     PackageKit          rwtab.d                thermald
appstream.conf          dracut.conf.d               idmapd.conf    mailcap                   pam.d               rygel.conf             timidity++.cfg
asound.conf             egl                         ImageMagick-7  makedumpfile.conf.sample  paperspecs          samba                  tmpfiles.d
audit                   environment                 init.d         man_db.conf               passwd              sane.d                 tpm2-tss
authselect              ethertypes                  inittab        mcelog                    passwd-             sasl2                  Trolltech.conf
avahi                   exports                     inputrc        mdevctl.d                 passwdqc.conf       security               trusted-key.key
bash_completion.d       exports.d                   ipp-usb        mercurial                 pinforc             selinux                ts.conf
bashrc                  favicon.png                 iproute2       mime.types                pkcs11              services               udev
bindresvport.blacklist  fedora-release              iscsi          mke2fs.conf               pkgconfig           sestatus.conf          udisks2
binfmt.d                filesystems                 issue          modprobe.d                pki                 sgml                   unbound
bluetooth               firefox                     issue.d        modules-load.d            plymouth            shadow                 updatedb.conf
brlapi.key              firewalld                   issue.net      mono                      pm                  shadow-                UPower
brltty                  flatpak                     java           motd                      polkit-1            shells                 uresourced.conf
brltty.conf             fonts                       jvm            motd.d                    popt.d              skel                   usb_modeswitch.conf
ceph                    fprintd.conf                jvm-common     mtab                      ppp                 sos                    vconsole.conf
chkconfig.d             fstab                       kdump          mtools.conf               printcap            speech-dispatcher      vdpau_wrapper.cfg
chromium                fuse.conf                   kdump.conf     my.cnf                    profile             ssh                    vimrc
chrony.conf             fwupd                       kernel         my.cnf.d                  profile.d           ssl                    virc
cifs-utils              gcrypt                      keys           nanorc                    protocols           sssd                   vmware-tools
containers              gdbinit                     keyutils       ndctl                     pulse               statetab.d             vpl
credstore               gdbinit.d                   krb5.conf      ndctl.conf.d              qemu                subgid                 vpnc
credstore.encrypted     gdm                         krb5.conf.d    netconfig                 qemu-ga             subgid-                vulkan
crypto-policies         geoclue                     ld.so.cache    NetworkManager            rc0.d               subuid                 wgetrc
crypttab                glvnd                       ld.so.conf     networks                  rc1.d               subuid-                whois.conf
csh.cshrc               gnupg                       ld.so.conf.d   nfs.conf                  rc2.d               subversion             wireplumber
csh.login               GREP_COLORS                 libaudit.conf  nfsmount.conf             rc3.d               sudo.conf              wpa_supplicant
cups                    groff                       libblockdev    nftables                  rc4.d               sudoers                X11
cupshelpers             group                       libibverbs.d   nilfs_cleanerd.conf       rc5.d               sudoers.d              xattr.conf
dbus-1                  group-                      libnl          npmrc                     rc6.d               swid                   xdg
dconf                   grub2.cfg                   libreport      nsswitch.conf             rc.d                swtpm-localca.conf     xml
debuginfod              grub2-efi.cfg               libssh         nvme                      reader.conf.d       swtpm-localca.options  yum.repos.d
default                 grub.d                      libuser.conf   odbc.ini                  redhat-release      swtpm_setup.conf       zfs-fuse
depmod.d                gshadow                     libvirt        odbcinst.ini              request-key.conf    sysconfig
As you can see, there is a lot of stuff here.
/root
This is the default home directory for the root user.
/mnt
/mnt is used to temporarily mount a file system.
/boot (Disk-Based)
This directory contains the Linux Kernel, as well as boot support and configuration files.
The size of /boot is determined by the installer program based on the available disk space when you select the default partitioning. It may be set to a different size during or after the installation.
/home
This is used to store user home directories and other user contents.
/opt (Optional)
This directory holds additional software that may need to be installed on the system. A sub directory is created for each installed software.
/usr (UNIX System Resources)
Holds most of the system files such as:
/usr/bin
Binary directory for user executable commands
/usr/sbin
System binaries required at boot and system administration commands not intended for execution by normal users. This directory is not included in the default search path for normal users.
/usr/lib and /usr/lib64
Contain shared library routines required by many commands/programs located in /usr/bin and /usr/sbin. These are used by kernel and other applications and programs for their successful installation and operation.
/usr/lib directory also stores system initialization and service management programs. /usr/lib64 contains 64-bit shared library routines.
/usr/include
Contains header files for the C programming language.
/usr/local:
This is a system administrator repository for storing commands and tools. These commands not generally included with the original Linux distribution.
| Directory |
Contains |
| /usr/local/bin |
ecutables |
| /usr/local/etc |
configuration files |
| /usr/local/lib and /usr/local/lib64 |
library routines |
| /usr/share |
manual pages, documentation, sample templates, configuration files |
/usr/src:
This directory is used to store source code.
Variable Directory (/var)
For data that frequently changes while the system is operational. Such as log, status, spool, lock, etc.
Common sub directories in /var:
/var/log
Contains most system log files. Such as boot logs, user logs, failed user logs, installation logs, cron logs, mail logs, etc.
/var/opt
Log, status, etc. for software installed in /opt.
/var/spool
Queued files such as print jobs, cron jobs, mail messages, etc.
/var/tmp
For large or longer term temporary files that need to survive system reboots. These are deleted if they are not accessed for a period of 30 days.
/tmp (Temporary)
Temporary files that survive system reboots. These are deleted after 10 days if they are not accessed. Programs may need to create temporary files in order to run.
/dev (Devices)
Contains Device nodes for physical and virtual devices. Linux kernel talks to devices through these nodes. Device nodes are automatically created and deleted by the udevd service. Which dynamically manages devices.
The two types of device files are character (or raw) and block.
Character devices
- Accessed serially.
- Console, serial printers, mice, keyboards, terminals, etc.
Block devices
- Accessed in a parallel fashion with data exchanged in blocks.
- Data on block devices is accessed randomly.
- Hard disk drives, optical drives, parallel printers, etc.
Procfs File System (/proc)
- Config and status info on:
- Kernel, CPU, memory, disks, partitioning, file systems, networking, running processes, etc.
- Zero-length pseudo files point to data maintained by the kernel in the memory.
- Interface to interact with kernel-maintained information.
- Contents created in memory at system boot time, updated during runtime, and destroyed at system shutdown.
Runtime File System (/run)
- Data for processes running on the system.
- Used to automatically mount external file systems (CD, DVD, flash USB.)
- Contents deleted at shutdown.
The System File System (/sys)
- Info about hardware devices, drivers, and some kernel features.
- Used by the kernel to load necessary support for devices, create device nodes in /dev, and configure devices.
- Auto-maintained.
Essential System Commands
tree command
- List hierarchy of directories and files.
- Column 2
- Column 3
Options.
tree -a :: Include hidden files in the output.
tree -d :: Exclude files from the output.
tree -h :: Displays file sizes in human-friendly format.
tree -f :: Prints the full path for each file.
tree -p :: Includes file permissions in the output
Labs
List only the directories (-d) in the root user’s home directory (/root).
View tree man pages.
Prompt Symbols
- Hash sign (#) for root user.
- Dollar sign ($) for normal users.
Linux Commands
Two types of commands:
- User
- General purpose.
- For any user.
- System Management
- Superuser.
- Require elevated privileges.
Command Mechanics
Basic Syntax
- command option(s) argument(s)
- Many commands have preconfigured default options and arguments.
An option that starts with a single hyphen character (-la, for instance) ::: Short-option format.
- Two hyphen characters (–all, for instance) ::: Long-option format.
Listing Files and Directories
ls
Flags
ls -l ::: View long listing format.
ls -d ::: View info on the specified directory.
ls -h ::: Human readable format.
ls -a ::: List all files, including the hidden files.
ls -t ::: Sort output by date and time with the newest file first.
ls -R ::: List contents recursively.
ls -i ::: View inode information.
labs:
Show the long listing of only /usr without showing its contents.
Sort output by date and time with the newest file first.
List contents of the /etc directory recursively.
List directory info and the contents of a directory recursively.
View ls manpage.
Printing Working Directory (pwd) command
- Returns the absolute path to a file or directory.
Navigating Directories
Absolute path (full path or a fully qualified pathname) :: Points to a file or directory in relation to the top of the directory tree. It always starts with the forward slash (/).
Relative path :: Points to a file or directory in relation to your current location.
Labs:
Go one level up into the parent directory using the relative path
cd into /etc/sysconfig using the absolute path (/etc/sysconfig), or the relative path (etc/sysconfig)
cd /etc/sysconfig
cd /
cd etc/sysconfig
Change into the /usr/bin directory from /etc/sysconfig using relative or absolute path
or
Return to your home directory
or
Use the absolute path to change into the home directory of the root user from /etc/sysconfig
Switch between the current and previous directories
use the cd command to print the home directory of the current user
Terminal Device Files
- Unique pseudo (or virtual) numbered device files that represent terminal sessions opened by users.
- Used to communicate with individual sessions.
- Stored in the /dev/pts/ (pseudo terminal session).
- Created when a user opens a new terminal session.
- Removed when a session closes.
tty command
- Identify current terminal session.
- Displays filename and location.
- Example: /dev/pts/0
Inspecting System’s Uptime and Processor Load
uptime command
- Displays:
- System’s current time.
- System up time.
- Number of users currently logged in.
- Average % CPU load over the past 1, 5, and 15 minutes.
- 0.00 and 1.00 represent no load and full load.
- Greater than 1.00 signifies excess load (over 100%).
clear command
- Clears the terminal screen and places the cursor at the top left of the screen.
- Can also use Ctrl+l for this command.
Determining Command Path
Tools for identifying the absolute path of the command that will be executed when you run it without specifying its full path.
which, whereis, and type
show the full location of the ls command:
which command
- Show command aliases and location.
[root@server1 bin]# which ls
alias ls='ls --color=auto'
        /usr/bin/ls
whereis command
- Locates binary, source, and manual files for specified command name.
[root@server1 bin]# whereis ls
ls: /usr/bin/ls /usr/share/man/man1/ls.1.gz /usr/share/man/man1p/ls.1p.gz>)
type command
- Find whether the given command is an alias, shell built-in, file, function, or keyword.
uname command
- Show system operating system name.
[root@server1 bin]# uname
Linux
Flags
uname -s ::: Show kernel name.
uname -n ::: Show hostname.
uname -r ::: Show kernel release.
uname -v ::: Show kernel build date.
uname -m ::: Show machine hardware name.
uname -p ::: Show processor type.
uname -i ::: Show hardware platform.
uname -o ::: Show OS name.
uname -a ::: Show kernel name, nodename, release, version, machine, and os.
Linux = Kernel name
server1.example.com = Hostname of the system
4.18.0-80.el8.x86_64 = Kernel release
#1 SMP Wed Mar 13 12:02:46 UTC 2019 = Date and time of the kernel built
x86_64 = Machine hardware name
x86_64 = Processor type
x86_64 = Hardware platform
GNU/Linux = Operating system name
Viewing CPU Specs
lscpu command
- Shows CPU:
- Architecture.
- Operating modes.
- Vendor.
- Family.
- Model.
- Speed.
- Cache memory.
- Virtualization support type.
architecture of the CPU (x86_64)
supported modes of operation (32-bit and 64-bit)
sequence number of the CPU on this system (1)
threads per core (1)
cores per socket (1)
number of sockets (1)
vendor ID (GenuineIntel)
CPU model (58) model name (Intel …)
speed (2294.784 MHz)
amount and levels of cache memory (L1d, L1i, L2, and L3)
Getting Help
Manual pages
- Informational pages stored in /usr/share/man for each program.
See Using Man Pages for more.
man command
Flags:
-k
- Perform a keyword search on manual pages.
- Must build the database with
mandb first.
-f
apropos whatisinfopinfo
/usr/share/doc/
- Directory with additional program documentation.
line at the bottom indicates the line number of the manual page.
Man page navigation
h ::: Help on navigation.
q ::: Quit the man page.
Up arrow key ::: Scroll up one line.
Enter or Down arrow key ::: Scroll down one line.
f / Spacebar / Page down ::: Move forward one page.
b / Page up ::: Move backward one page.
d / u ::: Move down/up half a page.
g / G ::: Move to the beginning / end of the man pages.
:f ::: Display line number and bytes being viewed.
/pattern ::: Searches forward for the specified pattern.
?pattern ::: Searches backward for the specified pattern.
n / N ::: Find the next / previous occurrence of a pattern.
Headings in the Manual
NAME
- Name of the command or file with a short description.
SYNOPSIS
- Syntax summary.
DESCRIPTION
- Overview of the command or file.
OPTIONS
- Options available for use.
EXAMPLES
- Some examples to explain the usage.
FILES
- A list of related files.
SEE ALSO
- Reference to other manual pages or topics.
BUGS
- Any reported bugs or issues.
AUTHOR
- Contributor information.
Manual Sections
- Manual information is split into nine sections for organization and clarity.
- Man searches through each section until it finds a match.
- Starts at section 1, then section 2, etc.
- Some commands in Linux also have a configuration file with an identical name.
- Ex:
passwd command in /usr/bin and the passwd file in /etc.
- Specify the section to find that page only.
- Section number is located at the top (header) of the page.
Section 1
- Refers to user commands.
Section 4
- Contains special files.
Section 5
- Describes file formats for many system configuration files.
Section 8
- Documents system administration and privileged commands designed for the root user.
Run man man for more details.
Searching by Keyword
apropos command
- Search all sections of the manual pages and show a list of all entries matching the specified keyword in their names or descriptions.
- Must
mandb command in order to build an indexed database of the manual pages prior to using.
mandb command
- Build an indexed database of the manual pages.
Lab: Find a forgotten XFS administration command.
man -k xfs
or
apropos xfs
Lab: Show a brief list of options and a description.
passwd --help
or
passwd -?
whatis command
- Same output as
man -f
- Display one-line manual page descriptions.
info and pinfo Commands
- Display command detailed documentation.
- Divided into sections called nodes.
- Header:
- Name of the file being displayed.
- Names of the current, next, and previous nodes.
- Almost identical to each other.
u navigate efficiently.
info page Navigation
Down / Up arrows
- Move forward / backward one line.
Spacebar / Del
- Move forward / backward one page.
q
- Quit the info page.
t
- Go to the top node of the document.
s
- Search
Documentation in /usr/share/doc/
/usr/share/doc/
- Stores general documentation for installed packages under subdirectories that match their names.
ls -l /usr/share/doc/gzip
Online RHEL Documentation
- docs.redhat.com
- Release notes and guides on planning, installation, administration, security, storage management, virtualization, etc.
- access.redhat.com
Labs
Lab 2: Navigate Linux Directory Tree
Check your location in the directory tree.
Show file permissions in the current directory including the hidden files.
Change directory into /etc and confirm the directory change.
Switch back to the directory where you were before, and run pwd again to verify.
Lab: Miscellaneous Tasks
Identify the terminal device file.
Open a couple of terminal sessions. Compare the terminal numbers.
Execute the uptime command and analyze the system uptime and processor load information.
Use three commands to identify the location of the vgs command.
which vgs
whereis vgs
type vgs
- Analyze the basic information about the system and kernel reported.
Examine the key items relevant to the processor.
Lab: Man
View man page for uname.
View the 5 man page section for the shadow.
Local File Systems and Swap
File Systems and File System Types
File systems
- Can be optimized, resized, mounted, and unmounted independently.
- Must be connected to the directory hierarchy in order to be accessed by users and applications.
- Mounting may be accomplished automatically at system boot or manually as required.
- Can be mounted or unmounted using their unique identifiers, labels, or device files.
- Each file system is created in a discrete partition, VDO volume, or logical volume.
- A typical production RHEL system usually has numerous file systems.
- During OS installation, only two file systems— / and /boot —are created in the default disk layout, but you can design a custom disk layout and construct separate containers to store dissimilar information.
- Typical additional file systems that may be created during an installation are /home, /opt, /tmp, /usr, and /var.
- / and /boot—are required for installation and booting.
Storing disparate data in distinct file systems versus storing all data in a single file system offers the following advantages:
- Make any file system accessible (mount) or inaccessible (unmount) to users independent of other file systems. This hides or reveals information contained in that file system.
- Perform file system repair activities on individual file systems
- Keep dissimilar data in separate file systems
- Optimize or tune each file system independently
- Grow or shrink a file system independent of other file systems
3 types of file systems:
- disk-based, network-based, and memory-based.
Disk-based
- Typically created on physical drives using SATA, USB, Fibre Channel, and other technologies.
- store information persistently
Network-based
- Essentially disk-based file systems shared over the network for remote access.
- store information persistently
Memory-based
- Virtual
- Created at system startup and destroyed when the system goes down.
- data saved in virtual file systems does not survive across system reboots.
Ext3
- Disk based
- The third generation of the extended filesystem.
- Metadata journaling for faster recovery
- Superior reliability
- Creation of up to 32,000 subdirectories
- supports larger file systems and bigger files than its predecessor
Ext4
- Disk based
- Successor to Ext3.
- Supports all features of Ext3 in addition to:
- Larger file system size
- Bigger file size
- Unlimited number of subdirectories
- Metadata and quota journaling
- Extended user attributes
XFS
- Disk based
- Highly scalable and high-performing 64-bit file system.
- Supports:
- Metadata journaling for faster crash recovery
- Online defragmentation, expansion, quota journaling, and extended user attributes
- default file system type in RHEL 9.
VFAT
- Disk based
- Used for post-Windows 95 file system formats on hard disks, USB drives, and floppy disks.
ISO9660
- Disk based
- Used for optical file systems such as CD and DVD.
NFS - (Network File System.)
- Network based
- Shared directory or file system for remote access by other Linux systems.
AutoFS (Auto File System)
- Network based
- NFS file system set to mount and unmount automatically on remote client systems.
Extended File Systems
- First generation is obsolete and is no longer supported
- Second, third, and fourth generations are currently available and supported.
- Fourth generation is the latest in the series and is superior in features and enhancements to its predecessors.
- Structure is built on a partition or logical volume at the time of file system creation.
- Structure is divided into two sets:
- first set holds the file system’s metadata and it is very tiny.
- Superblock
- keeps vital file system structural information:
- type
- size
- status of the file system
- number of data blocks it contains
- automatically replicated and maintained at various known locations throughout the file system.
- primary superblock
- superblock at the beginning of the file system
- backup superblocks.
- I used to supplant the corrupted or lost primary superblock to bring the file system back to its normal state.
- Copy of the primary
- Inode table
- maintains a list of index node (inode) numbers.
- Each file is assigned an inode number at the time of its creation, and the inode number
- holds the file’s attributes such as:
- type
- permissions
- ownership
- owning group
- size
- last access/modification time
- holds and keeps track of the pointers to the actual data blocks where the file contents are located.
- second set stores the actual data, and it occupies almost the entire partition or the logical volume (VDO and LVM) space.\
journaling
-
Supported by Ext3 and Ext4
-
Recover swiftly after a system crash.
-
keep track of recent changes in their metadata in a journal (or log).
-
Each metadata update is written in its entirety to the journal after completion.
-
The system peruses the journal of each extended file system following the reboot after a crash to determine if there are any errors
-
Lets the system recover the file system rapidly using the latest metadata information stored in its journal.
-
Ext3 that supports file systems up to 16TiB and files up to 2TiB,
-
Ext4 supports very large file systems up to 1EiB (ExbiByte) and files up to 16TiB (TebiByte).
- Uses a series of contiguous physical blocks on the hard disk called extents, resulting in improved read and write performance with reduced fragmentation.
- Supports extended user attributes, metadata and quota journaling, etc.
XFS File System
- High-performing 64-bit extent-based journaling file system type.
- Allows the creation of file systems and files up to 8EiB (ExbiByte).
- Does not run file system checks at system boot
- Relies on you to use the
xfs_repair utility to manually fix any issues.
- Sets the extended user attributes and certain mount options by default on new file systems.
- Enables defragmentation on mounted and active file systems to keep as much data in contiguous blocks as possible for faster access.
- Inability to shrink.
- Uses journaling for metadata operations, guaranteeing the consistency of the file system against abnormal or forced unmounting.
- Journal information is read and any pending metadata transactions are replayed when the XFS file system is remounted.
- Speedy input/output performance.
- Can be snapshot in a mounted, active state.
VFAT File System
- Extension to the legacy FAT file system (FAT16)
- Supports 255 characters in filenames including spaces and periods
- Does not differentiate between lowercase and uppercase letters.
- Primarily used on removable media, such as floppy and USB flash drives, for exchanging data between Linux and Windows.
ISO9660 File System
- For removable optical disc media such as CD/DVD drives
File System Management
File System Administration Commands
- Some are limited to their operations on the Extended, XFS, or VFAT file system type.
- Others are general and applicable to all file system types.
Extended File System Management Commands
e2label
- Modifies the label of a file system
tune2fs
- Tunes or displays file system attributes
XFS Management Commands
xfs_admin
- Tunes file system attributes
xfs_growfs
- Extends the size of a file system
xfs_info
- Exhibits information about a file system
General File System Commands
blkid
- Displays block device attributes including their UUIDs and labels
df
- Reports file system utilization
du
- Calculates disk usage of directories and file systems
fsadm
- Resizes a file system. This command is automatically invoked when the
lvresize command is run with the -r switch.
lsblk
- Lists block devices and file systems and their attributes including their UUIDs and labels
mkfs
- Creates a file system. Use the
-t option and specify ext3, ext4, vfat, or xfs file system type.
mount
- Mount a file system for user access.
- Display currently mounted file systems.
umount
Mounting and Unmounting File Systems
- File system must be connected to the directory structure at a desired attachment point, (mount point)
- A mount point in essence is any empty directory that is created and used for this purpose.
Use the mount command to view information about xfs mounted file systems:
[root@server2 ~]# mount -t xfs
/dev/mapper/rhel-root on / type xfs (rw,relatime,seclabel,attr2,inode64,logbufs=8,logbsize=32k,noquota)
/dev/sda1 on /boot type xfs (rw,relatime,seclabel,attr2,inode64,logbufs=8,logbsize=32k,noquota)
Mount command
-t option
- Mount a file system to a mount point.
- Performed with the root user privileges.
- Requires the absolute pathnames of the file system block device and the mount point name.
- Accepts the UUID or label of the file system in lieu of the block device name.
- Mount all or a specific type of file system.
- Upon successful mount, the kernel places an entry for the file system in the /proc/self/mounts file.
- A mount point should be empty when an attempt is made to mount a file system on it, otherwise the content of the mount point will hide.
- The mount point must not be in use or the mount attempt will fail.
auto (noauto)
- Mounts (does not mount) the file system when the
-a option is specified
defaults
- Mounts a file system with all the default values (async, auto, rw, etc.)
_netdev
- Used for a file system that requires network connectivity in place before it can be mounted. NFS is an example.
remount
- Remounts an already mounted file system to enable or disable an option
ro (rw)
- Mounts a file system read-only read/write)
umount Command
- Detach a file system from the directory hierarchy and make it inaccessible to users and applications.
- Expects the absolute pathname to the block device containing the file system or its mount point name in order to detach it.
- Unmount all or a specific type of file system.
- Kernel removes the corresponding file system entry from the /proc/self/mounts file after it has been successfully disconnected.
Determining the UUID of a File System
-
Extended and XFS file systems have a 128-bit (32 hexadecimal characters) UUID (Universally Unique IDentifier) assigned to it at the time of its creation.
-
UUIDs assigned to vfat file systems are 32-bit (8 hexadecimal characters) in length.
-
Assigning a UUID makes the file system unique among many other file systems that potentially exist on the system.
-
Persistent across system reboots.
-
Used by default in RHEL 9 in the /etc/fstab file for any file system that is created by the system in a standard partition.
-
RHEL attempts to mount all file systems listed in the /etc/fstab file at reboots.
-
Each file system has an associated device file and UUID, but may or may not have a corresponding label.
-
The system checks for the presence of each file system’s device file, UUID, or label, and then attempts to mount it.
Determine the UUID of /boot
[root@server2 ~]# lsblk | grep boot
├─sda1          8:1    0    1G  0 part /boot
[root@server2 ~]# sudo xfs_admin -u /dev/sda1
UUID = 630568e1-608f-4603-9b97-e27f82c7d4b4

[root@server2 ~]# sudo blkid /dev/sda1
/dev/sda1: UUID="630568e1-608f-4603-9b97-e27f82c7d4b4" TYPE="xfs" PARTUUID="7dcb43e4-01"

[root@server2 ~]# sudo lsblk -f /dev/sda1
NAME FSTYPE FSVER LABEL UUID                                 FSAVAIL FSUSE% MOUNTPOINTS
sda1 xfs                630568e1-608f-4603-9b97-e27f82c7d4b4  616.1M    36% /boot
For extended file systems, you can use the tune2fs, blkid, or lsblk commands to determine the UUID.
A UUID is also assigned to a file system that is created in a VDO or LVM volume; however, it need not be used in the fstab file, as the device
files associated with the logical volumes are always unique and persistent.
Labeling a File System
- A unique label may be used instead of a UUID to keep the file system association with its device file exclusive and persistent across system reboots.
- A label is limited to a maximum of 12 characters on the XFS file system
- 16 characters on the Extended file system.
- By default, no labels are assigned to a file system at the time of its creation.
The /boot file system is located in the /dev/sda1 partition and its type is XFS. You can use the xfs_admin or the lsblk command as follows to
determine its label:
[root@server2 ~]# sudo xfs_admin -l /dev/sda1
label = ""

[root@server2 ~]# sudo lsblk -f /dev/sda1
NAME FSTYPE FSVER LABEL UUID                                 FSAVAIL FSUSE% MOUNTPOINTS
sda1 xfs                630568e1-608f-4603-9b97-e27f82c7d4b4  616.1M    36% /boot
- Not needed on a file system if you intend to use its UUID or if it is created in a logical volume
- You can still apply one using the
xfs_admin command with the -L option.
- Labeling an XFS file system requires that the target file system be unmounted.
unmount /boot, set the label “bootfs” on its device file, and remount it:
[root@server2 ~]# sudo umount /boot
[root@server2 ~]# sudo xfs_admin -L bootfs /dev/sda1
writing all SBs
new label = "bootfs"
Confirm the new label by executing sudo xfs_admin -l /dev/sda1 or sudo lsblk -f /dev/sda1.
For extended file systems, you can use the e2label command to apply a label and the tune2fs, blkid, and lsblk commands to view and verify.
Now you can replace the UUID=\"22d05484-6ae1-4ef8-a37d-abab674a5e35" for /boot in the fstab file with LABEL=bootfs, and unmount and remount /boot as demonstrated above for confirmation.
[root@server2 ~]# mount /boot
mount: (hint) your fstab has been modified, but systemd still uses
       the old version; use 'systemctl daemon-reload' to reload.
A label may also be applied to a file system created in a logical volume; however, it is not recommended for use in the fstab file, as the
device files for logical volumes are always unique and remain persistent across system reboots.
Automatically Mounting a File System at Reboots
/etc/fstab
- File systems defined in the /etc/fstab file are mounted automatically at reboots.
- Must contain proper and complete information for each listed file system.
- An incomplete or inaccurate entry might leave the system in an undesirable or unbootable state.
- Only need to specify one of the four attributes
- Block device name
- UUID
- label
- mount point
- The
mount command obtains the rest of the information from this file.
- Only need to specify one of these attributes with the
umount command to detach it from the directory hierarchy.
- Contains entries for file systems that are created at the time of installation.
[root@server2 ~]# cat /etc/fstab

#
# /etc/fstab
# Created by anaconda on Sun Feb 25 12:11:47 2024
#
# Accessible filesystems, by reference, are maintained under '/dev/disk/'.
# See man pages fstab(5), findfs(8), mount(8) and/or blkid(8) for more info.
#
# After editing this file, run 'systemctl daemon-reload' to update systemd
# units generated from this file.
#
/dev/mapper/rhel-root   /                       xfs     defaults        0 0
LABEL=bootfs /boot                   xfs     defaults        0 0
/dev/mapper/rhel-swap   none                    swap    defaults        0 0
EXAM TIP: Any missing or invalid entry in this file may render the system unbootable. You will have to boot the system in emergency mode to fix this file. Ensure that you understand each field in the file for both file system and swap entries.
The format of this file is such that each row is broken out into six columns to identify the required attributes for each file system to be successfully mounted. Here is what the columns contain:
Column 1:
- physical or virtual device path where the file system is resident, or its associated UUID or label.
- can be entries for network file systems here as well.
Column 2:
- Identifies the mount point for the file system.
- swap partitions, use either “none” or “swap”.
Column 3:
- Type of file system such as Ext3, Ext4, XFS, VFAT, or ISO9660.
- For swap, the type “swap” is used.
- may use “auto” instead to leave it up to the mount command to determine the type of the file system.
Column 4:
- Identifies one or more comma-separated options to be used when mounting the file system.
- Consult the manual pages of the
mount command or the fstab file for additional options and details.
Column 5:
- Used by the dump utility to ascertain the file systems that need to be dumped.
- Value of 0 (or the absence of this column) disables this check.
- This field is applicable only on Extended file systems;
- XFS does not use it.
Column 6:
-
Sequence number in which to run the e2fsck (file system check and repair utility for Extended file system types) utility on the file system at system boot.
-
By default, 0 is used for memory-based, remote, and removable file systems, 1 for /, and 2 for /boot and other physical file systems. 0 can also be used for /, /boot, and other physical file systems you don’t want to be checked or repaired.
-
Applicable only on Extended file systems;
-
XFS does not use it.
-
0 in columns 5 and 6 for XFS, virtual, remote, and removable file system types has no meaning. You do not need to add them for these file system types.
Lab: Create and Mount Ext4, VFAT, and XFS File Systems in Partitions (server2)
- Create 2 x 100MB partitions on the /dev/sdb disk,
- initialize them separately with the Ext4 and VFAT file system types,
- define them for persistence using their UUIDs,
- create mount points called /ext4fs1 and /vfatfs1,
- attach them to the directorystructure
- verify their availability and usage
- you will use the disk /dev/sdc and repeat the above procedure to establish an XFS file system in it and mount it on /xfsfs1.
1. Apply the label “msdos” to the sdb disk using the parted command:
[root@server20 ~]# sudo parted /dev/sdb mklabel msdos
Warning: The existing disk label on /dev/sdb will be destroyed and all data on this disk will be
lost. Do you want to continue?
Yes/No? y
Information: You may need to update /etc/fstab.
2. Create 2 x 100MB primary partitions on sdb with the parted command:
[root@server20 ~]# sudo parted /dev/sdb mkpart primary 1 101m
Information: You may need to update /etc/fstab.

[root@server20 ~]# sudo parted /dev/sdb mkpart primary 102 201m
Information: You may need to update /etc/fstab.
3. Initialize the first partition (sdb1) with Ext4 file system type using the mkfs command:
[root@server20 ~]# sudo mkfs -t ext4 /dev/sdb1
mke2fs 1.46.5 (30-Dec-2021)
/dev/sdb1 contains a LVM2_member file system
Proceed anyway? (y,N) y
Creating filesystem with 97280 1k blocks and 24288 inodes
Filesystem UUID: 73db0582-7183-42aa-951d-2f48b7712597
Superblock backups stored on blocks:
	8193, 24577, 40961, 57345, 73729

Allocating group tables: done
Writing inode tables: done
Creating journal (4096 blocks): done
Writing superblocks and filesystem accounting information: done
4. Initialize the second partition (sdb2) with VFAT file system type using the mkfs command:
[root@server20 ~]# sudo mkfs -t vfat /dev/sdb2
mkfs.fat 4.2 (2021-01-31)
5. Initialize the whole disk (sdc) with the XFS file system type using the mkfs.xfs command. Add the -f flag to force the removal of any old partitioning or labeling information from the disk.
[root@server20 ~]# sudo mkfs.xfs /dev/sdc -f
Filesystem should be larger than 300MB.
Log size should be at least 64MB.
Support for filesystems like this one is deprecated and they will not be supported in future releases.
meta-data=/dev/sdc               isize=512    agcount=4, agsize=16000 blks
         =                       sectsz=512   attr=2, projid32bit=1
         =                       crc=1        finobt=1, sparse=1, rmapbt=0
         =                       reflink=1    bigtime=1 inobtcount=1 nrext64=0
data     =                       bsize=4096   blocks=64000, imaxpct=25
         =                       sunit=0      swidth=0 blks
naming   =version 2              bsize=4096   ascii-ci=0, ftype=1
log      =internal log           bsize=4096   blocks=1368, version=2
         =                       sectsz=512   sunit=0 blks, lazy-count=1
realtime =none                   extsz=4096   blocks=0, rtextents=0
6. Determine the UUIDs for all three file systems using the lsblk command:
[root@server2 ~]# lsblk -f /dev/sdb /dev/sdc
NAME   FSTYPE FSVER LABEL UUID                                 FSAVAIL FSUSE% MOUNTPOINTS
sdb
├─sdb1 ext4   1.0         0bdd22d0-db53-40bb-8cc7-36efc9184196
└─sdb2 vfat   FAT16       FB3A-6572
sdc    xfs                91884326-9686-4569-96fa-9adb02c1f6f4>)
7. Open the /etc/fstab file, go to the end of the file, and append entries for the file systems for persistence using their UUIDs:
UUID=0bdd22d0-db53-40bb-8cc7-36efc9184196 /ext4fs1 ext4 defaults 0 0
UUID=FB3A-6572 /vfatfs1 vfat defaults 0 0
UUID=91884326-9686-4569-96fa-9adb02c1f6f4 /xfsfs1 xfs defaults 0 0
8. Create mount points /ext4fs1, /vfatfs1, and /xfsfs1 for the three
file systems using the mkdir command:
[root@server2 ~]# sudo mkdir /ext4fs1 /vfatfs1 /xfsfs1
9. Mount the new file systems using the mount command. This command will fail if there are any invalid or missing information in the file.
[root@server2 ~]# sudo mount -a
mount: (hint) your fstab has been modified, but systemd still uses
       the old version; use 'systemctl daemon-reload' to reload.
10. View the mount and availability status as well as the types of all three file systems using the df command:
[root@server2 ~]# df -hT
Filesystem            Type      Size  Used Avail Use% Mounted on
devtmpfs              devtmpfs  4.0M     0  4.0M   0% /dev
tmpfs                 tmpfs     888M     0  888M   0% /dev/shm
tmpfs                 tmpfs     356M  5.1M  351M   2% /run
/dev/mapper/rhel-root xfs        17G  2.0G   15G  12% /
/dev/sda1             xfs       960M  344M  617M  36% /boot
tmpfs                 tmpfs     178M     0  178M   0% /run/user/0
/dev/sdb1             ext4       84M   14K   77M   1% /ext4fs1
/dev/sdb2             vfat       95M     0   95M   0% /vfatfs1
/dev/sdc              xfs       245M   15M  231M   6% /xfsfs1
Lab: Create and Mount Ext4 and XFS File Systems in LVM Logical Volumes (server2)
- Create a volume group called vgfs comprised of a 172MB physical volume created in a partition on the /dev/sdd disk.
- The PE size for the volume group should be set at 16MB.
- Create two logical volumes called ext4vol and xfsvol of sizes 80MB each and initialize them with the Ext4 and XFS file system types.
- Ensure that both file systems are persistently defined using their logical volume device filenames.
- Create mount points called /ext4fs2 and /xfsfs2,
- Mount the file systems.
- Verify their availability and usage.
1. Create a 172MB partition on the sdd disk using the parted command:
[root@server2 ~]# sudo parted /dev/sdd mkpart pri 1 172m
Information: You may need to update /etc/fstab.
2. Initialize the sdd1 partition for use in LVM using the pvcreate command:
[root@server2 ~]# sudo pvcreate /dev/sdd1
  Device /dev/sdb2 has updated name (devices file /dev/sdd2)
  Device /dev/sdb1 has no PVID (devices file brKVLFEG3AoBzhWoso0Sa1gLYHgNZ4vL)
  Physical volume "/dev/sdd1" successfully created.
3. Create the volume group vgfs with a PE size of 16MB using the physical volume sdd1:
[root@server2 ~]# sudo vgcreate -s 16 vgfs /dev/sdd1
  Volume group "vgfs" successfully created
The PE size is not easy to alter after a volume group creation, so ensure it is defined as required at creation.
4. Create two logical volumes ext4vol and xfsvol of size 80MB each in vgfs using the lvcreate command:
[root@server2 ~]# sudo lvcreate -n ext4vol -L 80 vgfs
  Logical volume "ext4vol" created.

[root@server2 ~]# sudo lvcreate  -n xfsvol -L 80 vgfs
  Logical volume "xfsvol" created.
5. Format the ext4vol logical volume with the Ext4 file system type using the mkfs.ext4 command:
[root@server2 ~]# sudo mkfs.ext4 /dev/vgfs/ext4vol
mke2fs 1.46.5 (30-Dec-2021)
Creating filesystem with 81920 1k blocks and 20480 inodes
Filesystem UUID: 4ed1fef7-2164-485b-8035-7f627cd59419
Superblock backups stored on blocks:
	8193, 24577, 40961, 57345, 73729

Allocating group tables: done
Writing inode tables: done
Creating journal (4096 blocks): done
Writing superblocks and filesystem accounting information: done
You can also use sudo mkfs -t ext4 /dev/vgfs/ext4vol.
6. Format the xfsvol logical volume with the XFS file system type using the mkfs.xfs command:
[root@server2 ~]# sudo mkfs.xfs /dev/vgfs/xfsvol
Filesystem should be larger than 300MB.
Log size should be at least 64MB.
Support for filesystems like this one is deprecated and they will not be supported in future releases.
meta-data=/dev/vgfs/xfsvol       isize=512    agcount=4, agsize=5120 blks
         =                       sectsz=512   attr=2, projid32bit=1
         =                       crc=1        finobt=1, sparse=1, rmapbt=0
         =                       reflink=1    bigtime=1 inobtcount=1 nrext64=0
data     =                       bsize=4096   blocks=20480, imaxpct=25
         =                       sunit=0      swidth=0 blks
naming   =version 2              bsize=4096   ascii-ci=0, ftype=1
log      =internal log           bsize=4096   blocks=1368, version=2
         =                       sectsz=512   sunit=0 blks, lazy-count=1
realtime =none                   extsz=4096   blocks=0, rtextents=0
You may also use sudo mkfs -t xfs /dev/vgfs/xfsvol instead.
7. Open the /etc/fstab file, go to the end of the file, and append entries for the file systems for persistence using their device files:
/dev/vgfs/ext4vol /ext4fs2 ext4 defaults 0 0
/dev/vgfs/xfsvol /xfsfs2 xfs defaults 0 0
8. Create mount points /ext4fs2 and /xfsfs2 using the mkdir command:
[root@server2 ~]# sudo mkdir /ext4fs2 /xfsfs2
9. Mount the new file systems using the mount command. This command will fail if there is any invalid or missing information in the file.
[root@server2 ~]# sudo mount -a
mount: (hint) your fstab has been modified, but systemd still uses
       the old version; use 'systemctl daemon-reload' to reload.
10. View the mount and availability status as well as the types of the
new LVM file systems using the lsblk and df commands:
[root@server2 ~]# lsblk /dev/sdd
NAME             MAJ:MIN RM  SIZE RO TYPE MOUNTPOINTS
sdd                8:48   0  250M  0 disk
└─sdd1             8:49   0  163M  0 part
  ├─vgfs-ext4vol 253:2    0   80M  0 lvm  /ext4fs2
  └─vgfs-xfsvol  253:3    0   80M  0 lvm  /xfsfs2
[root@server2 ~]# df -hT | grep fs2
/dev/mapper/vgfs-ext4vol ext4       70M   14K   64M   1% /ext4fs2
/dev/mapper/vgfs-xfsvol  xfs        75M  4.8M   70M   7% /xfsfs2
Lab: Resize Ext4 and XFS File Systems in LVM Logical Volumes (server 2)
- Grow the size of the vgfs volume group that was created in the last lab by adding the whole sde disk to it.
- Extend the ext4vol logical volume along with the file system it contains by 40MB using two separate commands.
- Extend the xfsvol logical volume along with the file system it contains by 40MB using a single command.
- Verify the new extensions.
1. Initialize the sde disk and add it to the vgfs volume group:
sde had a gpt partition table with no partitions ran the following to reset it:
[root@server2 ~]# dd if=/dev/zero of=/dev/sde bs=1M count=2 conv=fsync
2+0 records in
2+0 records out
2097152 bytes (2.1 MB, 2.0 MiB) copied, 0.0102036 s, 206 MB/s
[root@server2 ~]# sudo partprobe /dev/sde
[root@server2 ~]# sudo pvcreate /dev/sde
  Physical volume "/dev/sde" successfully created.
[root@server2 ~]# sudo pvcreate /dev/sde
  Physical volume "/dev/sde" successfully created.
[root@server2 ~]# sudo vgextend vgfs /dev/sde
  Volume group "vgfs" successfully extended
2. Confirm the new size of vgfs using the vgs and vgdisplay commands:
[root@server2 ~]# sudo vgs
  VG   #PV #LV #SN Attr   VSize   VFree
  rhel   1   2   0 wz--n- <19.00g      0
  vgfs   2   2   0 wz--n- 400.00m 240.00m
[root@server2 ~]# vgdisplay vgfs
  Devices file sys_wwid t10.ATA_VBOX_HARDDISK_VBa5e3cbf7-10921e08 PVID qeP9dCevNnTy422I8p18NxDKQ2WyDodU last seen on /dev/sdf1 not found.
  --- Volume group ---
  VG Name               vgfs
  System ID
  Format                lvm2
  Metadata Areas        2
  Metadata Sequence No  4
  VG Access             read/write
  VG Status             resizable
  MAX LV                0
  Cur LV                2
  Open LV               2
  Max PV                0
  Cur PV                2
  Act PV                2
  VG Size               400.00 MiB
  PE Size               16.00 MiB
  Total PE              25
  Alloc PE / Size       10 / 160.00 MiB
  Free  PE / Size       15 / 240.00 MiB
  VG UUID               amDADJ-I4dH-jQUF-RFcE-58iL-jItl-5ti6LS
There are now two physical volumes in the volume group and the total size increased to 400MiB.
3. Grow the logical volume ext4vol and the file system it holds by 40MB using the lvextend and fsadm command pair. Make sure to use an uppercase L to specify the size. The default unit is MiB. The plus sign (+) signifies an addition to the current size.
[root@server2 ~]# sudo lvextend -L +40 /dev/vgfs/ext4vol
  Rounding size to boundary between physical extents: 48.00 MiB.
  Size of logical volume vgfs/ext4vol changed from 80.00 MiB (5 extents) to 128.00 MiB (8 extents).
  Logical volume vgfs/ext4vol successfully resized.

[root@server2 ~]# sudo fsadm resize /dev/vgfs/ext4vol
resize2fs 1.46.5 (30-Dec-2021)
Filesystem at /dev/mapper/vgfs-ext4vol is mounted on /ext4fs2; on-line resizing required
old_desc_blocks = 1, new_desc_blocks = 1
The filesystem on /dev/mapper/vgfs-ext4vol is now 131072 (1k) blocks long.
The resize subcommand instructs the fsadm command to grow the file system to the full length of the specified logical volume.
4. Grow the logical volume xfsvol and the file system (-r) it holds by (+) 40MB using the lvresize command:
[root@server2 ~]# sudo lvresize -r -L +40 /dev/vgfs/xfsvol
  Rounding size to boundary between physical extents: 48.00 MiB.
  Size of logical volume vgfs/xfsvol changed from 80.00 MiB (5 extents) to 128.00 MiB (8 extents).
  File system xfs found on vgfs/xfsvol mounted at /xfsfs2.
  Extending file system xfs to 128.00 MiB (134217728 bytes) on vgfs/xfsvol...
xfs_growfs /dev/vgfs/xfsvol
meta-data=/dev/mapper/vgfs-xfsvol isize=512    agcount=4, agsize=5120 blks
         =                       sectsz=512   attr=2, projid32bit=1
         =                       crc=1        finobt=1, sparse=1, rmapbt=0
         =                       reflink=1    bigtime=1 inobtcount=1 nrext64=0
data     =                       bsize=4096   blocks=20480, imaxpct=25
         =                       sunit=0      swidth=0 blks
naming   =version 2              bsize=4096   ascii-ci=0, ftype=1
log      =internal log           bsize=4096   blocks=1368, version=2
         =                       sectsz=512   sunit=0 blks, lazy-count=1
realtime =none                   extsz=4096   blocks=0, rtextents=0
data blocks changed from 20480 to 32768
xfs_growfs done
  Extended file system xfs on vgfs/xfsvol.
  Logical volume vgfs/xfsvol successfully resized.
5. Verify the new extensions to both logical volumes using the lvs command. You may also issue the lvdisplay or vgdisplay command instead.
[root@server2 ~]# sudo lvs | grep vol
  Devices file sys_wwid t10.ATA_VBOX_HARDDISK_VBa5e3cbf7-10921e08 PVID qeP9dCevNnTy422I8p18NxDKQ2WyDodU last seen on /dev/sdf1 not found.
  ext4vol vgfs -wi-ao---- 128.00m
  xfsvol  vgfs -wi-ao---- 128.00m
6. Check the new sizes and the current mount status for both file systems using the df and lsblk commands:
[root@server2 ~]# df -hT | grep -E 'ext4vol|xfsvol'
/dev/mapper/vgfs-xfsvol  xfs       123M  5.4M  118M   5% /xfsfs2
/dev/mapper/vgfs-ext4vol ext4      115M   14K  107M   1% /ext4fs2
[root@server2 ~]# lsblk /dev/sdd /dev/sde
NAME             MAJ:MIN RM  SIZE RO TYPE MOUNTPOINTS
sdd                8:48   0  250M  0 disk
└─sdd1             8:49   0  163M  0 part
  ├─vgfs-ext4vol 253:2    0  128M  0 lvm  /ext4fs2
  └─vgfs-xfsvol  253:3    0  128M  0 lvm  /xfsfs2
sde                8:64   0  250M  0 disk
├─vgfs-ext4vol   253:2    0  128M  0 lvm  /ext4fs2
└─vgfs-xfsvol    253:3    0  128M  0 lvm  /xfsfs2
Lab: Create and Mount XFS File System in LVM VDO Volume
- Create an LVM VDO volume called lvvdo of virtual size 20GB on the 5GB sdf disk in a volume group called vgvdo1.
- Initialize the volume with the XFS file system type.
- Define it for persistence using its device files.
- Create a mount point called /xfsvdo1, attach it to the directory structure.
- verify its availability and usage.\
1. Initialize the sdf disk using the pvcreate command:
[root@server2 ~]# sudo pvcreate /dev/sdf
  WARNING: adding device /dev/sdf with idname t10.ATA_VBOX_HARDDISK_VBa5e3cbf7-10921e08 which is already used for missing device.
  Physical volume "/dev/sdf" successfully created.
2. Create vgvdo1 volume group using the vgcreate command:
[root@server2 ~]# sudo vgcreate vgvdo1 /dev/sdf
  WARNING: adding device /dev/sdf with idname t10.ATA_VBOX_HARDDISK_VBa5e3cbf7-10921e08 which is already used for missing device.
  Volume group "vgvdo1" successfully created
3. Display basic information about the volume group:
root@server2 ~]# sudo vgdisplay vgvdo1
  Devices file sys_wwid t10.ATA_VBOX_HARDDISK_VBa5e3cbf7-10921e08 PVID qeP9dCevNnTy422I8p18NxDKQ2WyDodU last seen on /dev/sdf1 not found.
  --- Volume group ---
  VG Name               vgvdo1
  System ID
  Format                lvm2
  Metadata Areas        1
  Metadata Sequence No  1
  VG Access             read/write
  VG Status             resizable
  MAX LV                0
  Cur LV                0
  Open LV               0
  Max PV                0
  Cur PV                1
  Act PV                1
  VG Size               <5.00 GiB
  PE Size               4.00 MiB
  Total PE              1279
  Alloc PE / Size       0 / 0
  Free  PE / Size       1279 / <5.00 GiB
  VG UUID               b9u8Ng-m3BF-Jz2b-sBu8-gEG1-bBGQ-sBgrt0
4. Create a VDO volume called lvvdo1 using the lvcreate command. Use the -l option to specify the number of logical extents (1279) to be allocated and the -V option for the amount of virtual space (20GB).
[root@server2 ~]# sudo lvcreate -n lvvdo -l 1279 -V 20G --type vdo vgvdo1
WARNING: vdo signature detected on /dev/vgvdo1/vpool0 at offset 0. Wipe it? [y/n]: y
  Wiping vdo signature on /dev/vgvdo1/vpool0.
    The VDO volume can address 2 GB in 1 data slab.
    It can grow to address at most 16 TB of physical storage in 8192 slabs.
    If a larger maximum size might be needed, use bigger slabs.
  Logical volume "lvvdo" created.
5. Display detailed information about the volume group including the logical volume and the physical volume:
[root@server2 ~]# sudo vgdisplay -v vgvdo1
  Devices file sys_wwid t10.ATA_VBOX_HARDDISK_VBa5e3cbf7-10921e08 PVID qeP9dCevNnTy422I8p18NxDKQ2WyDodU last seen on /dev/sdf1 not found.
  --- Volume group ---
  VG Name               vgvdo1
  System ID
  Format                lvm2
  Metadata Areas        1
  Metadata Sequence No  3
  VG Access             read/write
  VG Status             resizable
  MAX LV                0
  Cur LV                2
  Open LV               0
  Max PV                0
  Cur PV                1
  Act PV                1
  VG Size               <5.00 GiB
  PE Size               4.00 MiB
  Total PE              1279
  Alloc PE / Size       1279 / <5.00 GiB
  Free  PE / Size       0 / 0
  VG UUID               b9u8Ng-m3BF-Jz2b-sBu8-gEG1-bBGQ-sBgrt0

  --- Logical volume ---
  LV Path                /dev/vgvdo1/vpool0
  LV Name                vpool0
  VG Name                vgvdo1
  LV UUID                nTPKtv-3yTW-J7Cy-HVP1-Aujs-cXZ6-gdS2fI
  LV Write Access        read/write
  LV Creation host, time server2, 2024-07-01 12:57:56 -0700
  LV VDO Pool data       vpool0_vdata
  LV VDO Pool usage      60.00%
  LV VDO Pool saving     100.00%
  LV VDO Operating mode  normal
  LV VDO Index state     online
  LV VDO Compression st  online
  LV VDO Used size       <3.00 GiB
  LV Status              NOT available
  LV Size                <5.00 GiB
  Current LE             1279
  Segments               1
  Allocation             inherit
  Read ahead sectors     auto

  --- Logical volume ---
  LV Path                /dev/vgvdo1/lvvdo
  LV Name                lvvdo
  VG Name                vgvdo1
  LV UUID                Z09BdK-ETJk-Gi53-m8Cg-mnTd-RYug-Z9nV0L
  LV Write Access        read/write
  LV Creation host, time server2, 2024-07-01 12:58:02 -0700
  LV VDO Pool name       vpool0
  LV Status              available
  # open                 0
  LV Size                20.00 GiB
  Current LE             5120
  Segments               1
  Allocation             inherit
  Read ahead sectors     auto
  - currently set to     8192
  Block device           253:6

  --- Physical volumes ---
  PV Name               /dev/sdf
  PV UUID               WKc956-Xp66-L8v9-VA6S-KWM5-5e3X-kx1v0V
  PV Status             allocatable
  Total PE / Free PE    1279 / 0
6. Display the new VDO volume creation using the lsblk command:
[root@server2 ~]# sudo lsblk /dev/sdf
NAME                    MAJ:MIN RM SIZE RO TYPE MOUNTPOINTS
sdf                       8:80   0   5G  0 disk
└─vgvdo1-vpool0_vdata   253:4    0   5G  0 lvm
  └─vgvdo1-vpool0-vpool 253:5    0  20G  0 lvm
    └─vgvdo1-lvvdo      253:6    0  20G  0 lvm
The output shows the virtual volume size (20GB) and the underlying disk size (5GB).
7. Initialize the VDO volume with the XFS file system type using the mkfs.xfs command. The VDO volume device file is
/dev/mapper/vgvdo1-lvvdo as indicated in the above output. Add the -f flag to force the removal of any old partitioning or labeling information from the disk.
[root@server2 mapper]# sudo mkfs.xfs /dev/mapper/vgvdo1-lvvdo
meta-data=/dev/mapper/vgvdo1-lvvdo isize=512    agcount=4, agsize=1310720 blks
         =                       sectsz=4096  attr=2, projid32bit=1
         =                       crc=1        finobt=1, sparse=1, rmapbt=0
         =                       reflink=1    bigtime=1 inobtcount=1 nrext64=0
data     =                       bsize=4096   blocks=5242880, imaxpct=25
         =                       sunit=0      swidth=0 blks
naming   =version 2              bsize=4096   ascii-ci=0, ftype=1
log      =internal log           bsize=4096   blocks=16384, version=2
         =                       sectsz=4096  sunit=1 blks, lazy-count=1
realtime =none                   extsz=4096   blocks=0, rtextents=0
Discarding blocks...Done.
(lab said vgvdo1-lvvdo1 but it didn’t exist for me.)
8. Open the /etc/fstab file, go to the end of the file, and append the following entry for the file system for persistent mounts using its device file:
/dev/mapper/vgvdo1-lvvdo /xfsvdo1 xfs defaults 0 0
9. Create the mount point /xfsvdo1 using the mkdir command:
[root@server2 mapper]# sudo mkdir /xfsvdo1
10. Mount the new file system using the mount command. This command will fail if there are any invalid or missing information in the file.
[root@server2 mapper]# sudo mount -a
mount: (hint) your fstab has been modified, but systemd still uses
       the old version; use 'systemctl daemon-reload' to reload.
The mount command with the -a flag is a validation test for the fstab file. It should always be executed after updating this file and before rebooting the server to avoid landing the system in an unbootable state.
11. View the mount and availability status as well as the type of the VDO file system using the lsblk and df commands:
[root@server2 mapper]# lsblk /dev/sdf
NAME                    MAJ:MIN RM SIZE RO TYPE MOUNTPOINTS
sdf                       8:80   0   5G  0 disk
└─vgvdo1-vpool0_vdata   253:4    0   5G  0 lvm
  └─vgvdo1-vpool0-vpool 253:5    0  20G  0 lvm
    └─vgvdo1-lvvdo      253:6    0  20G  0 lvm  /xfsvdo1

[root@server2 mapper]# df -hT /xfsvdo1
Filesystem               Type  Size  Used Avail Use% Mounted on
/dev/mapper/vgvdo1-lvvdo xfs    20G  175M   20G   1% /xfsvdo1
Monitoring File System Usage
df (disk free) command
- reports usage details for mounted file systems.
- reports the numbers in KBs unless the -m or -h option is specified to view the sizes in MBs or human-readable format.
Let’s run this command with the -h option on server2:
[root@server2 ~]# df -h
Filesystem Size Used Avail Use% Mounted on
devtmpfs 4.0M 0 4.0M 0% /dev
tmpfs 888M 0 888M 0% /dev/shm
tmpfs 356M 5.1M 351M 2% /run
/dev/mapper/rhel-root 17G 2.0G 15G 12% /
tmpfs 178M 0 178M 0% /run/user/0
/dev/sda1 960M 344M 617M 36% /boot
Column 1:
- file system device file or type
Columns 2, 3, 4, 5, 6
- total, used, and available spaces in and the usage percentage and mount point
Useful flags
-T
- Add the file system type to the output (example: df -hT)
-x
- Exclude the specified file system type from the output (example: df -hx tmpfs)
-t
- Limit the output to a specific file system type (example: df -t xfs)
-i
- show inode information (example: df -hi)
Calculating Disk Usage
du command
- reports the amount of space a file or directory occupies.
- -m or -h option to view the output in MBs or human-readable format. In addition, you can
- view a usage summary with the -s switch and a grand total with -c.
Run this command on the /usr/bin directory to view the usage summary:
[root@server2 ~]# du -sh /usr/bin
151M /usr/bin
Add a “total” row to the output and with numbers displayed in KBs:
[root@server2 ~]# du -sc /usr/bin
154444 /usr/bin
154444 total
[root@server2 ~]# du -sch /usr/bin
151M /usr/bin
151M total
Try this command with different options on the /usr/sbin/lvm file and observe the results.
Swap and its Management
-
Move pages of idle data between physical memory and swap.
-
Swap areas act as extensions to the physical memory.
-
May be activated or deactivated independent of swap spaces located in other partitions and volumes.
-
The system splits the physical memory into small logical chunks called pages and maps their physical locations to virtual locations on the swap to facilitate access by system processors.
-
This physical-to-virtual mapping of pages is stored in a data structure called page table, and it is maintained by the kernel.
-
When a program or process is spawned, it requires space in the physical memory to run and be processed.
-
Although many programs can run concurrently, the physical memory cannot hold all of them at once.
-
The kernel monitors the memory usage.
-
As long as the free memory remains above a high threshold, nothing happens.
-
When the free memory falls below that threshold, the system starts moving selected idle pages of data from physical memory to the swap space to make room to accommodate other programs.
-
This piece in the process is referred to as page out.
-
Since the system CPU performs the process execution in around-robin fashion, when the system needs this paged-out data for execution, the CPU looks for that data in the physical memory and a pagefault occurs, resulting in moving the pages back to the physical memory from the swap.
-
This return of data to the physical memory is referred to as page in.
-
The entire process of paging data out and in is known as demand paging.
-
RHEL systems with less physical memory but high memory requirements can become over busy with paging out and in.
-
When this happens, they do not have enough cycles to carry out other useful tasks, resulting in degraded system performance.
-
The excessive amount of paging that affects the system performance is called thrashing.
-
When thrashing begins, or when the free physical memory falls below a low threshold, the system deactivates idle processes and prevents new processes from being launched.
-
The idle processes are only reactivated, and new processes are only allowed to be started when the system discovers that the available physical memory has climbed above the threshold level and thrashing has ceased.
Determining Current Swap Usage
- Size of a swap area should not be less than the amount of physical memory.
- Depending on workload requirements, it may be twice the size or larger.
- It is also not uncommon to see systems with less swap than the actual amount of physical memory.
- This is especially witnessed on systems with a huge physical memory size.
free command
- View memory and swap space utilization.
- view how much physical memory is installed (total), used (used), available (free), used by shared library routines (shared), holding data before it is written to disk (buffers), and used to store frequently accessed data (cached) on the system. The
-h
- list the values in human-readable format,
-k
-m
-g
-t
- display a line with the “total” at the bottom of the output.
[root@server2 mapper]# free -ht
total used free shared buff/cache available
Mem: 1.7Gi 783Mi 714Mi 5.0Mi 440Mi 991Mi
Swap: 2.0Gi 0B 2.0Gi
Total: 3.7Gi 783Mi 2.7Gi
Try free -hts 3 and free -htc 2 to refresh the output every three seconds (-s) and to display the output twice (-c).
- Reads memory and swap information from the /proc/meminfo file to produce the report. The values are shown in KBs by
default, and they are slightly off from what is shown above with
free. Here are the relevant fields from this file:
[root@server2 mapper]# cat /proc/meminfo | grep -E 'Mem|Swap'
MemTotal: 1818080 kB
MemFree: 731724 kB
MemAvailable: 1015336 kB
SwapCached: 0 kB
SwapTotal: 2097148 kB
SwapFree: 2097148 kB
Prioritizing Swap Spaces
- You may find multiple swap areas configured and activated to meet the workload demand.
- The default behavior of RHEL is to use the first activated swap area and move on to the next when the first one is exhausted.
- The system allows us to prioritize one area over the other by adding the option “pri” to the swap entries in the fstab file.
- This flag supports a value between -2 and 32767 with -2 being the default.
- A higher value of “pri” sets a higher priority for the corresponding swap region.
- For swap areas with an identical priority, the system alternates between them.
Swap Administration Commands
- In order to create and manage swap spaces on the system, the
mkswap, swapon, and swapoff commands are available.
- Use
mkswap to initialize a partition for use as a swap space.
- Once the swap area is ready, you can activate or deactivate it from the command line with the help of the other two commands,
- Can also set it up for automatic activation by placing an entry in the fstab file.
- The fstab file accepts the swap area’s device file, UUID, or label.
Lab: Create and Activate Swap in Partition and Logical Volume (server 2)
- Create one swap area in a new 40MB partition called sdb3 using the
mkswap command.
- Create another swap area in a 140MB logical volume called swapvol in vgfs.
- Add their entries to the /etc/fstab file for persistence.
- Use the UUID and priority 1 for the partition swap and the device file and priority 2 for the logical volume swap.
- Activate them and use appropriate tools to validate the activation.
EXAM TIP: Use the lsblk command to determine available disk space.
1. Use parted print on the sdb disk and the vgs command on the vgfs volume group to determine available space for a new 40MB partition and a 144MB logical volume:
[root@server2 mapper]# sudo parted /dev/sdb print
Model: ATA VBOX HARDDISK (scsi)
Disk /dev/sdb: 262MB
Sector size (logical/physical): 512B/512B
Partition Table: msdos
Disk Flags:
Number Start End Size Type File system Flags
1 1049kB 101MB 99.6MB primary ext4
2 102MB 201MB 99.6MB primary fat16
[root@server2 mapper]# sudo vgs vgfs
Devices file sys_wwid t10.ATA_VBOX_HARDDISK_VBa5e3cbf7-10921e08 PVID qeP9dCevNnTy422I8p18NxDKQ2WyDodU last seen on /dev/sdf1 not found.
VG #PV #LV #SN Attr VSize VFree
vgfs 2 2 0 wz--n- 400.00m 144.00m
The outputs show 49MB (250MB minus 201MB) free space on the sdb disk and 144MB free space in the volume group.
2. Create a partition called sdb3 of size 40MB using the parted command:
[root@server2 mapper]# sudo parted /dev/sdb mkpart primary 202 242
Information: You may need to update /etc/fstab.
3. Create logical volume swapvol of size 144MB in vgs using the lvcreate command:
[root@server2 mapper]# sudo lvcreate -L 144 -n swapvol vgfs
Logical volume "swapvol" created.
4. Construct swap structures in sdb3 and swapvol using the mkswap command:
[root@server2 mapper]# sudo mkswap /dev/sdb3
Setting up swapspace version 1, size = 38 MiB (39841792 bytes)
no label, UUID=a796e0df-b1c3-4c30-bdde-dd522bba4fff
[root@server2 mapper]# sudo mkswap /dev/vgfs/swapvol
Setting up swapspace version 1, size = 144 MiB (150990848 bytes)
no label, UUID=88196e73-feaf-4137-8743-f9340296aeec
5. Edit the fstab file and add entries for both swap areas for auto-activation on reboots. Obtain the UUID for partition swap with
lsblk -f /dev/sdb3 and use the device file for logical volume. Specify their priorities.
UUID=a796e0df-b1c3-4c30-bdde-dd522bba4fff swap swap pri=1 0 0
/dev/vgfs/swapvol swap swap pri=2 0 0
EXAM TIP: You will not be given any credit for this work if you forget to add entries to the fstab file.
6. Determine the current amount of swap space on the system using the swapon command:
[root@server2]# sudo swapon
NAME TYPE SIZE USED PRIO
/dev/dm-1 partition 2G 0B -2
There is one 2GB swap area on the system and it is configured at the default priority of -2.
7. Activate the new swap regions using the swapon command:
[root@server2]# sudo swapon -a
8. Confirm the activation using the swapon command or by viewing the /proc/swaps file:
[root@server2 mapper]# sudo swapon
NAME TYPE SIZE USED PRIO
/dev/dm-1 partition 2G 0B -2
/dev/sdb3 partition 38M 0B 1
/dev/dm-7 partition 144M 0B 2
[root@server2 mapper]# cat /proc/swaps
Filename Type Size Used Priority
/dev/dm-1 partition 2097148 0 -2
/dev/sdb3 partition 38908 0 1
/dev/dm-7 partition 147452 0 2
#dm is device mapper
9. Issue the free command to view the reflection of swap numbers on the Swap and Total lines:
[root@server2 mapper]# free -ht
total used free shared buff/cache available
Mem: 1.7Gi 793Mi 706Mi 5.0Mi 438Mi 981Mi
Swap: 2.2Gi 0B 2.2Gi
Total: 3.9Gi 793Mi 2.9Gi
Local Filesystems and Swap DIY Labs
Lab: Create VFAT, Ext4, and XFS File Systems in Partitions and Mount Persistently
- Create three 70MB primary partitions on one of the available 250MB disks (lsblk) by invoking the parted utility directly at the command prompt.
[root@server2 mapper]# parted /dev/sdc mklabel msdos
Information: You may need to update /etc/fstab.
[root@server2 mapper]# parted /dev/sdc mkpart primary 1 70m
Information: You may need to update /etc/fstab.
root@server2 mapper]# parted /dev/sdb print
Model: ATA VBOX HARDDISK (scsi)
Disk /dev/sdb: 262MB
Sector size (logical/physical): 512B/512B
Partition Table: msdos
Disk Flags:
Number Start End Size Type File system Flags
1 1049kB 70.3MB 69.2MB primary
parted) mkpart primary 71MB 140MB
Warning: The resulting partition is not properly aligned for best performance: 138671s % 2048s != 0s
Ignore/Cancel?
Ignore/Cancel? ignore
(parted) mkpart primary 140MB 210MB
Warning: The resulting partition is not properly aligned for best performance: 273438s % 2048s != 0s
Ignore/Cancel? ignore
(parted) print
Model: ATA VBOX HARDDISK (scsi)
Disk /dev/sdb: 262MB
Sector size (logical/physical): 512B/512B
Partition Table: msdos
Disk Flags:
Number Start End Size Type File system Flags
1 1049kB 70.3MB 69.2MB primary
2 71.0MB 140MB 69.0MB primary
3 140MB 210MB 70.0MB primary
- Apply label “msdos” if the disk is new.
- Initialize partition 1 with VFAT, partition 2 with Ext4, and partition 3 with XFS file system types.
[root@server2 mapper]# sudo mkfs -t vfat /dev/sdc1
mkfs.fat 4.2 (2021-01-31)
[root@server2 mapper]# sudo mkfs -t ext4 /dev/sdc2
mke2fs 1.46.5 (30-Dec-2021)
Creating filesystem with 67380 1k blocks and 16848 inodes
Filesystem UUID: 43b590ff-3330-4b88-aef9-c3a97d8cf51e
Superblock backups stored on blocks:
8193, 24577, 40961, 57345
Allocating group tables: done
Writing inode tables: done
Creating journal (4096 blocks): done
Writing superblocks and filesystem accounting information: done
[root@server2 mapper]# sudo mkfs -t xfs /dev/sdc3
Filesystem should be larger than 300MB.
Log size should be at least 64MB.
Support for filesystems like this one is deprecated and they will not be supported in future releases.
meta-data=/dev/sdb3 isize=512 agcount=4, agsize=4273 blks
= sectsz=512 attr=2, projid32bit=1
= crc=1 finobt=1, sparse=1, rmapbt=0
= reflink=1 bigtime=1 inobtcount=1 nrext64=0
data = bsize=4096 blocks=17089, imaxpct=25
= sunit=0 swidth=0 blks
naming =version 2 bsize=4096 ascii-ci=0, ftype=1
log =internal log bsize=4096 blocks=1368, version=2
= sectsz=512 sunit=0 blks, lazy-count=1
realtime =none extsz=4096 blocks=0, rtextents=0
- Create mount points /vfatfs5, /ext4fs5, and /xfsfs5, and mount all three manually.
[root@server2 mapper]# mkdir /vfatfs5 /ext4fs5 /xfsfs5
[root@server2 mapper]# mount /dev/sdc1 /vfatfs5
mount: (hint) your fstab has been modified, but systemd still uses
the old version; use 'systemctl daemon-reload' to reload.
[root@server2 mapper]# mount /dev/sdc2 /ext4fs5
mount: (hint) your fstab has been modified, but systemd still uses
the old version; use 'systemctl daemon-reload' to reload.
[root@server2 mapper]# mount /dev/sdc3 /xfsfs5
mount: (hint) your fstab has been modified, but systemd still uses
the old version; use 'systemctl daemon-reload' to reload.
[root@server2 mapper]# mount
/dev/sdb1 on /vfatfs5 type vfat (rw,relatime,fmask=0022,dmask=0022,codepage=437,iocharset=ascii,shortname=mixed,errors=remount-ro)
/dev/sdb2 on /ext4fs5 type ext4 (rw,relatime,seclabel)
/dev/sdb3 on /xfsfs5 type xfs (rw,relatime,seclabel,attr2,inode64,logbufs=8,logbsize=32k,noquota)
- Determine the UUIDs for the three file systems, and add them to the fstab file.
[root@server2 mapper]# blkid /dev/sdc1 /dev/sdc2 /dev/sdc3 >> /etc/fstab
[root@server2 mapper]# vim /etc/fstab
- Unmount all three file systems manually, and execute
mount -a to mount them all.
umount /dev/sdb1 /dev/sdb2 /dev/sdb3
- Run
df -h for verification.
Lab: Create XFS File System in LVM VDO Volume and Mount Persistently
[root@server2 ~]# sudo lvcreate -n vdo5 -l 1279 -V 20G --type vdo vgvdo1
WARNING: vdo signature detected on /dev/vgvdo1/vpool0 at offset 0. Wipe it? [y/n]: y
Wiping vdo signature on /dev/vgvdo1/vpool0.
The VDO volume can address 2 GB in 1 data slab.
It can grow to address at most 16 TB of physical storage in 8192 slabs.
If a larger maximum size might be needed, use bigger slabs.
Logical volume "vdo5" created.
- Initialize the volume with XFS file system type.
[root@server2 mapper]# sudo mkfs.xfs /dev/mapper/vgvdo1-vdo5
meta-data=/dev/mapper/vgvdo1-vdo5 isize=512 agcount=4, agsize=1310720 blks
= sectsz=4096 attr=2, projid32bit=1
= crc=1 finobt=1, sparse=1, rmapbt=0
= reflink=1 bigtime=1 inobtcount=1 nrext64=0
data = bsize=4096 blocks=5242880, imaxpct=25
= sunit=0 swidth=0 blks
naming =version 2 bsize=4096 ascii-ci=0, ftype=1
log =internal log bsize=4096 blocks=16384, version=2
= sectsz=4096 sunit=1 blks, lazy-count=1
realtime =none extsz=4096 blocks=0, rtextents=0
Discarding blocks...Done.
- Create mount point /vdofs5, and mount it manually.
[root@server2 mapper]# mkdir /vdofs5
[root@server2 mapper]#mount /dev/mapper/vgvdo1-vdo5 /vdofs5)/etc/fstab
[root@server2 mapper]# umount /dev/mapper/vgvdo1-vdo5
- Unmount the file system manually and execute
mount -a to mount it back.
[root@server2 mapper]# blkid /dev/mapper/vgvdo1-vdo5 >> /etc/fstab
[root@server2 mapper]# vim /etc/fstab
Lab: Create Ext4 and XFS File Systems in LVM Volumes and Mount Persistently
- Initialize an available 250MB disk for use in LVM (lsblk).
[root@server2 mapper]# parted /dev/sdc mklabel msdos
Warning: The existing disk label on /dev/sdc will be destroyed and all data on
this disk will be lost. Do you want to continue?
Yes/No? y
Information: You may need to update /etc/fstab.
[root@server2 mapper]# parted /dev/sdc mkpart primary 1 100%
Information: You may need to update /etc/fstab.
- Create volume group vg with PE size 8MB and add the physical volume.
[root@server2 ~]# sudo pvcreate /dev/sdc1
Devices file /dev/sdc is excluded: device is partitioned.
WARNING: adding device /dev/sdc1 with idname t10.ATA_VBOX_HARDDISK_VB6894bac4-590d5546 which is already used for /dev/sdc.
Physical volume "/dev/sdc1" successfully created.
[root@server2 ~]# vgcreate -s 8 vg /dev/sdc1
Devices file /dev/sdc is excluded: device is partitioned.
WARNING: adding device /dev/sdc1 with idname t10.ATA_VBOX_HARDDISK_VB6894bac4-590d5546 which is already used for /dev/sdc.
Volume group "vg" successfully created
- Create two logical volumes lv200 and lv300 of sizes 120MB and 100MB.
[root@server2 ~]# lvcreate -n lv200 -L 120 vg
Devices file /dev/sdc is excluded: device is partitioned.
Logical volume "lv200" created.
[root@server2 ~]# lvcreate -n lv300 -L 100 vg
Rounding up size to full physical extent 104.00 MiB
Logical volume "lv300" created.
- Use the
vgs, pvs, lvs, and vgdisplay commands for verification.
- Initialize the volumes with Ext4 and XFS file system types.
[root@server2 ~]# mkfs.ext4 /dev/vg/lv200
mke2fs 1.46.5 (30-Dec-2021)
Creating filesystem with 122880 1k blocks and 30720 inodes
Filesystem UUID: 52eac2ee-b5bd-4025-9e40-356b38d21996
Superblock backups stored on blocks:
8193, 24577, 40961, 57345, 73729
Allocating group tables: done
Writing inode tables: done
Creating journal (4096 blocks): done
Writing superblocks and filesystem accounting information: done
[root@server2 ~]# mkfs.xfs /dev/vg/lv300
Filesystem should be larger than 300MB.
Log size should be at least 64MB.
Support for filesystems like this one is deprecated and they will not be supported in future releases.
meta-data=/dev/vg/lv300 isize=512 agcount=4, agsize=6656 blks
= sectsz=512 attr=2, projid32bit=1
= crc=1 finobt=1, sparse=1, rmapbt=0
= reflink=1 bigtime=1 inobtcount=1 nrext64=0
data = bsize=4096 blocks=26624, imaxpct=25
= sunit=0 swidth=0 blks
naming =version 2 bsize=4096 ascii-ci=0, ftype=1
log =internal log bsize=4096 blocks=1368, version=2
= sectsz=512 sunit=0 blks, lazy-count=1
realtime =none extsz=4096 blocks=0, rtextents=0
- Create mount points /lvmfs5 and /lvmfs6, and mount them manually.
[root@server2 ~]# mkdir /lvmfs5 /lvmfs6
[root@server2 ~]# mount /dev/vg/lv200 /lvmfs5
mount: (hint) your fstab has been modified, but systemd still uses
the old version; use 'systemctl daemon-reload' to reload.
[root@server2 ~]# mount /dev/vg/lv300 /lvmfs6
mount: (hint) your fstab has been modified, but systemd still uses
the old version; use 'systemctl daemon-reload' to reload.
- Add the file system information to the fstab file using their device files.
[root@server2 ~]# blkid /dev/vg/lv200 >> /etc/fstab
[root@server2 ~]# blkid /dev/vg/lv300 >> /etc/fstab
[root@server2 ~]# vim /etc/fstab
- Unmount the file systems manually, and execute mount -a to mount them back. Run
df -h to confirm.
[root@server2 ~]# umount /dev/vg/lv200 /dev/vg/lv300
[root@server2 ~]# mount -a
Lab 14-4: Extend Ext4 and XFS File Systems in LVM Volumes
- initialize an available 250MB disk for use in LVM (lsblk).
[root@server2 ~]# pvcreate /dev/sdb
Devices file /dev/sdc is excluded: device is partitioned.
WARNING: dos signature detected on /dev/sdb at offset 510. Wipe it? [y/n]: y
Wiping dos signature on /dev/sdb.
WARNING: adding device /dev/sdb with idname t10.ATA_VBOX_HARDDISK_VB428913dd-446a194f which is already used for missing device.
Physical volume "/dev/sdb" successfully created.
- Add the new physical volume to volume group vg200.
[root@server2 ~]# vgextend vg /dev/sdb
Devices file /dev/sdc is excluded: device is partitioned.
WARNING: adding device /dev/sdb with idname t10.ATA_VBOX_HARDDISK_VB428913dd-446a194f which is already used for missing device.
Volume group "vg" successfully extended
- Expand logical volumes lv200 and lv300 along with the underlying file systems to 200MB and 250MB.
[root@server2 ~]# lvextend -L 200m /dev/vg/lv200
Size of logical volume vg/lv200 changed from 120.00 MiB (15 extents) to 200.00 MiB (25 extents).
Logical volume vg/lv200 successfully resized.
[root@server2 ~]# lvextend -L 250m /dev/vg/lv200
Rounding size to boundary between physical extents: 256.00 MiB.
Size of logical volume vg/lv200 changed from 200.00 MiB (25 extents) to 256.00 MiB (32 extents).
Logical volume vg/lv200 successfully resized.
- Use the
vgs, pvs, lvs, vgdisplay, and df commands for verification.
Lab 14-5: Create Swap in Partition and LVM Volume and Activate Persistently
- Create two 100MB partitions on an available 250MB disk (lsblk) by invoking the parted utility directly at the command prompt.
- Apply label “msdos” if the disk is new.
[root@localhost ~]# parted /dev/sdd mklabel msdos
Information: You may need to update /etc/fstab.
[root@localhost ~]# parted /dev/sdd mkpart primary 1 100MB
Information: You may need to update /etc/fstab.
[root@localhost ~]# parted /dev/sdd mkpart primary 101 201
Information: You may need to update /etc/fstab.
- Initialize one of the partitions with swap structures.
[root@localhost ~]# sudo mkswap /dev/sdd1
Setting up swapspace version 1, size = 94 MiB (98562048 bytes)
no label, UUID=40eea6c2-b80c-4b25-ad76-611071db52d5
- Apply label swappart to the swap partition, and add it to the fstab file.
[root@localhost ~]# swaplabel -L swappart /dev/sdd1
[root@localhost ~]# blkid /dev/sdd1 >> /etc/fstab
[root@localhost ~]# vim /etc/fstab
UUID="40eea6c2-b80c-4b25-ad76-611071db52d5" swap swap pri=1 0 0
-
Execute swapon -a to activate it.
-
Run swapon -s to confirm activation.
-
Initialize the other partition for use in LVM.
[root@localhost ~]# pvcreate /dev/sdd2
Physical volume "/dev/sdd2" successfully created.
- Expand volume group vg (Lab 14-3) by adding this physical volume to it.
[root@localhost ~]# vgextend vg /dev/sdd2
Volume group "vg200" successfully extended
- Create logical volume swapvol of size 180MB.
[root@localhost ~]# lvcreate -L 180 -n swapvol vg
Logical volume "swapvol" created.
- Use the
vgs, pvs, lvs, and vgdisplay commands for verification.
- Initialize the logical volume for swap.
[root@localhost vg200]# mkswap /dev/vg/swapvol
Setting up swapspace version 1, size = 180 MiB (188739584 bytes)
no label, UUID=a4b939d0-4b53-4e73-bee5-4c402aff6f9b
- Add an entry to the fstab file for the new swap area using its device file.
[root@localhost vg200]# vim /etc/fstab
/dev/vg200/swapvol swap swap pri=2 0 0
- Execute
swapon -a to activate it.
- Run
swapon -s to confirm activation.
Network File System (NFS)
NFS Basics and Configuration
Same tools for mounting and unmounting a filesystem.
- Mounted and accessed the same way as local filesystems.
- Network protocol that allows file sharing over the network.
- Multi-platform
- Multiple clients can access a single share at the same time.
- Reduced overhead and storage cost.
- Give users access to uniform data.
- Consolidate scattered user home directories.
- May cause client to hang if share is not accessible.
- Share stays mounted until manually unmounted or the client shuts down.
- Does not support wildcard characters or environment variables.
NFS Supported versions
- RHEL 9 Supports versions 3,4.0,4.1, and 4.2 (default)
- NFSv3 supports:
- TCP and UDP.
- asynchronous writes.
- 64-bit files sizes.
- Access files larger than 2GB.
- NFSv4.x supports:
- All features of NFSv3.
- Transit firewalls and work on internet.
- Enhanced security and support for encrypted transfers and ACLs.
- Better scalability
- Better cross-platform
- Better system crash handling
- Use usernames and group names rather than UID and GID.
- Uses TCP by default.
- Can use UDP for backwards compatibility.
- Version 4.2 only supports TCP
Network File System service
- Export shares to mount on remote clients
- Exporting
- When the NFS server makes shares available.
- Mounting
- When a client mounts an exported share locally.
- Mount point should be empty before trying to mount a share on it.
- System can be both client and server.
- Entire directory tree of the share is shared.
- Cannot re-share a subdirectory of a share.
- A mounted share cannot be exported from the client.
- A single exported share is mounted on a directory mount point.
- Make sure to update the fstab file on the client.
NFS Server and Client Configuration
How to export a share
- Add entry of the share to /etc/exports using
exportfs command
- Add firewall rule to allow access
Mount a share from the client side
- Use
mount and add the filesystem to the fstab file.
Lab: Export Share on NFS Server
- Install nfs-utils
sudo dnf -y install nfs-utils
- Create /common
- Add full permissions
- Add NFS service persistently to the firewalld configuration to allow NFS traffic and load the new rule:
sudo firewall-cmd --permanent --add-service nfs
sudo firewall-cmd --reload
- Start the NFS service and enable it to autostart at system reboots:
sudo systemctl --now enable nfs-server
- Verify Operational Status of the NFS services:
sudo systemctl status nfs-server
- Open /etc/exports and add entry for /common to export it to server10 with read/write:
- Export the entry defined in /etc/exports/. -a option exports all entries in the file. -v is verbose.
- Unexport the share (-u):
sudo exportfs -u server10:/common
- Re-export the share:
LAB: Mount share on NFS client
- Install nfs-utils
sudo dnf -y install nfs-utils
- Create /local mount point
- Mount the share manually:
sudo mount server20:/common /local
- Confirm using mount: (shows nfs version)
- Confirm using df:
- Add to /fstab for persistence:
server20:/common /local nfs _netdev 0 0
Note:
_netdev option makes system wait for networking to come up before trying to mount the share.
- Unmount share manually using umount then remount to validate accuracy of the entry in /fstab:
sudo umount /local
sudo mount -a
- Verify:
- Create a file in /local/ and verify:
touch /local/nfsfile
ls -l /local
- Confirm the sync on server 2
- Update fstab
AutoFS
- Automatically mount and unmount on clients during runtime and system reboots.
- Triggers mount or unmount action based on mount point activity.
- Client-side service
- Mount an NFS share on demand
- Entry placed in AutoFS config files.
- Automatically mounts share upon detecting activity in it’s mount point. (touch, ls, cd)
- unmounts share if the share hasn’t been accessed for a predefined period of time.
- Mounts managed with autofs should not be mounted manually via /etc/fstab to avoid inconsistencies.
- Saves Kernel from having to maintain unused NFS shares. (Improved performance!)
- NFS shares are defined in config files called maps (/etc/ or /etc/auto.master.d/)
- Does not use /etc/fstab.
- Does not require root to mount a share (fstab does).
- Prevents client from hanging if share is down.
- Share is unmounted if not accessed for 5 minutes (default)
- Supports wildcard characters or environment variables.
- Automount daemon
- in the userland mounts configured shares automatically upon access.
- invoked at system boot.
- Reads AutoFS master map and create initial mount point entries. (not mounting yet)
- Does not mount shares until user activity is detected.
- Unmounts after set timeframe of inactivity.
- Use the mount command on a share to verify the path of the AutoFS map, file system type, and options used during mount.
/etc/autofs.conf/ preset Directives:
master_map_name=auto.master
timeout = 300
negative_timeout = 60
mount_nfs_default_protocol = 4
logging = none
Additional directives:
master_map_name
-
Name of the master map. Default is /etc/auto.master
timeout
-
Time in second to unmount a share.
negative_timeout
-
Timeout (in seconds) value for failed mount attempts. (1 minute default)
mount_nfs_default_protocol
-
Sets the NFS version used to mount shares.
logging
-
Logging level (none, verbose, debug)
-
Default is none (disabled)
-
Normally left to their default values.
AutoFS Maps
- Where AutoFS finds the shares to mount and their locations.
- Also tells Autofs what options to use.
Map Types:
Master Map
Define entries for indirect and direct maps.
- /etc/auto.master is default
- Default is defined in /etc/autofs.conf with master_map_name directive.
- May be used to define entries for indirect and direct maps.
- But it is recommended to store user-defined maps in /etc/auto.master.d/
- AutoFS service parses this at startup.
- You can append an option to auto.master but it will apply globally to all subentries in the specified map file.
Map entry format examples:
/- /etc/auto.master.d/auto.direct \# Line 1
/misc /etc/auto.misc \# Line 2
Direct Map
/- /etc/auto.master.d/auto.direct <-- defines direct map and points to auto.direct for details
Mount shares on unrelated mount points
- Always visible to users
- Can exist with an indirect share under one parent directory
- Accessing a directory containing many direct mount points mounts all shares.
- Each direct map entry places a separate share entry to /etc/mtab
- /etc/mtab maintains a list of all mounted file systems whether they are local or remote.
- Updated whenever a local file system, removable file system, or a network share is mounted or unmounted.
Indirect Map
/misc /etc/auto.misc <-- indirect map and points to auto.misc for details
Automount removable filesystems
- Mount point /misc precedes mount point entries in /etc/auto.miscq
- Used to automount removable file systems (CD, DVD, USB disks, etc.)
- Custom indirect map files should be located in /etc/auto.master.d/
- Preferred over direct mount for mounting all shares under one common parent directory.
- Become visible only after they have been accessed.
- Local and indirect mounted shares cannot coexist under the same parent directory.
- One entry in /etc/mtab gets added for each indirect map.
- Usually better to use indirect map for automounting NFS shares.
Lab: Access NFS Share Using Direct Map (server10)
- Install Autofs
sudo dnf install -y autofs
- Create mount point /autodir using mkdir
- Add an entry to /etc/auto.master to point the AutoFS service to the auto.dir file for more information:
/- /etc/auto.master.d/auto.dir
- Create /etc/auto.master.d/auto.dir and add the mount point, NFS server, and share info:
/autodir server20:/common
- Start AutoFS service and enable it at startup:
sudo systemctl enable --now autofs
- Make sure AUtoFS service is running. Use -l and –no-pager options to show full details without piping the output to a pager program (pg)
sudo systemctl status autofs -l --no-pager
- Run ls on the mount point then verify the share is automounted and accessible with mount.
ls /autodir
mount | grep autodir
- Wait 5 minutes and run the mount command again to see it has disappeared.
Exercise 16-4: Access NFS Share Using Indirect Map
- configure an indirect map to automount the NFS share /common that is available from server20.
- install the relevant software and set up AutoFS maps to support the automatic mounting.
- Observe that the specified mount point “autoindir” is created automatically under /misc.
Note that /common is already mounted on the /local mount point via the fstab file and it is also configured via a direct map for automounting on /autodir. There should occur no conflict in configuration or functionality among the three.
1. Install the autofs software package if it is not already there:
2. Confirm the entry for the indirect map /misc in the /etc/auto.master
file exists:
[root@server30 common]# grep ^/misc /etc/auto.master
/misc /etc/auto.misc
3. Edit the /etc/auto.misc file and add the mount point, NFS server, and share information to it:
autoindir server30:/common
4. Start the AutoFS service now and set it to autostart at system reboots:
[root@server40 /]# systemctl enable --now autofs
5. Verify the operational status of the AutoFS service. Use the -l and --no-pager options to show full details without piping the output to a pager program (the pg command in this case):
[root@server40 /]# systemctl status autofs -l --no-pager
6. Run the ls command on the mount point /misc/autoindir and then grep for both auto.misc and autoindir on the mount command output to verify that the share is automounted and accessible:
[root@server40 /]# ls /misc/autoindir
test.text
[root@server40 /]# mount | egrep 'auto.misc|autoindir'
/etc/auto.misc on /misc type autofs (rw,relatime,fd=7,pgrp=3321,timeout=300,minproto=5,maxproto=5,indirect,pipe_ino=31779)
server30:/common on /misc/autoindir type nfs4 (rw,relatime,vers=4.2,rsize=262144,wsize=262144,namlen=255,hard,proto=tcp,timeo=600,retrans=2,sec=sys,clientaddr=192.168.0.40,local_lock=none,addr=192.168.0.30)
- /misc/autoindir has been auto generated.
- You can use the umbrella mount point /misc to mount additional auto-generated mount points.
Automounting User Home Directories \
AutoFS allows us to automount user home directories by exploiting two special characters in indirect maps.
asterisk (*)
- Replaces the references to specific mount points
ampersand (&)
-
Substitutes the references to NFS servers and shared subdirectories.
-
With user home directories located under /home, on one or more NFS servers, the AutoFS service will connect with all of them simultaneously when a user attempts to log on to a client.
-
The service will mount only that specific user’s home directory rather than the entire /home.
-
The indirect map entry for this type of substitution is defined in an indirect map, such as /etc/auto.master.d/auto.home.
* -rw &:/home/&
-
With this entry in place, there is no need to update any AutoFS configuration files if additional NFS servers with /home shared are added or removed.
-
If user home directories are added or deleted, there will be no impact on the functionality of AutoFS.
-
If there is only one NFS server sharing the home directories, you can simply specify its name in lieu of the first & symbol in the above entry.
Exercise 16-5: Automount User Home Directories Using Indirect Map
There are two portions for this exercise. The first portion should be done on server20 (NFS server) and the second portion on server10 (NFS client) as user1 with sudo where required.
first portion
- create a user account called user30 with UID 3000.
- add the /home directory to the list of NFS shares so that it becomes available for remote mount.
second portion
- create a user account called user30 with UID 3000, base directory /nfshome, and no home directory.
- create an umbrella mount point called /nfshome for mounting the user home directory from the NFS server.
- install the relevant software and establish an indirect map to automount the remote home directory of user30 under /nfshome.
- observe that the home directory is automounted under /nfshome when you sign in as user30.
On NFS server server20:
1. Create a user account called user30 with UID 3000 (-u) and assign
password “password1”:
[root@server30 common]# useradd -u 3000 user30
[root@server30 common]# echo password1 | sudo passwd --stdin user30
Changing password for user user30.
passwd: all authentication tokens updated successfully.
2. Edit the /etc/exports file and add an entry for /home (do not modify or remove the previous entry):
/home server40(rw)
3. Export all the shares listed in the /etc/exports file:
[root@server30 common]# sudo exportfs -avr
exporting server40.example.com:/home
exporting server40.example.com:/common
On NFS client server10:
1. Install the autofs software package if it is not already there:
dnf install autofs
2. Create a user account called user30 with UID 3000 (-u), base home directory location /nfshome (-b), no home directory (-M), and password “password1”:
[root@server40 misc]# sudo useradd -u 3000 -b /nfshome -M user30
[root@server40 misc]# echo password1 | sudo passwd --stdin user30
This is to ensure that the UID for the user is consistent on the server and the client to avoid access issues.
3. Create the umbrella mount point /nfshome to automount the user’s home directory:
4. Edit the /etc/auto.master file and add the mount point and indirect map location to it:
/nfshome /etc/auto.master.d/auto.home
5. Create the /etc/auto.master.d/auto.home file and add the following information to it:
* -rw server30:/home/&
For multiple user setup, you can replace “user30” with the & character, but ensure that those users exist on both the server and the client with consistent UIDs.
6. Start the AutoFS service now and set it to autostart at system reboots. This step is not required if AutoFS is already running and enabled.
systemctl enable --now autofs
7. Verify the operational status of the AutoFS service. Use the -l and --no-pager options to show full details without piping the output to a pager program (the pg command):
systemctl status autofs -l --no-pager
8. Log in as user30 and run the pwd, ls, and df commands for verification:
[root@server40 nfshome]# su - user30
[user30@server40 ~]$ ls
user30.txt
[user30@server40 ~]$ pwd
/nfshome/user30
[user30@server40 ~]$ df -h
Filesystem Size Used Avail Use% Mounted on
devtmpfs 4.0M 0 4.0M 0% /dev
tmpfs 888M 0 888M 0% /dev/shm
tmpfs 356M 5.1M 351M 2% /run
/dev/mapper/rhel-root 17G 2.2G 15G 13% /
/dev/sda1 960M 344M 617M 36% /boot
tmpfs 178M 0 178M 0% /run/user/0
server30:/common 17G 2.2G 15G 13% /local
server30:/home/user30 17G 2.2G 15G 13% /nfshome/user30
EXAM TIP: You may need to configure AutoFS for mounting a remote user
home directory.
NFS DIY Labs
- As user1 with sudo on server30, share directory /sharenfs (create it) in read/write mode using NFS.
[root@server30 /]# mkdir /sharenfs
[root@server30 /]# chmod 777 /sharenfs
[root@server30 /]# vim /etc/exports
# Add -> /sharenfs server40(rw)
[root@server30 /]# dnf -y install nfs-utils
[root@server30 /]# firewall-cmd --permanent --add-service nfs
[root@server30 /]# firewall-cmd --reload
success
[root@server30 /]# systemctl --now enable nfs-server
[root@server30 /]# exportfs -av
exporting server40.example.com:/sharenfs
- On server40 as user1 with sudo, install the AutoFS software and start the service.
[root@server40 nfshome]# dnf -y install autofs
- Configure the master and a direct map to automount the share on /mntauto (create it).
[root@server40 ~]# vim /etc/auto.master
/- /etc/auto.master.d/auto.dir
[root@server40 ~]# vim /etc/auto.master.d/auto.dir
/mntauto server30:/sharenfs
[root@server40 /]# mkdir /mntauto
[root@server40 ~]# systemctl enable --now autofs
- Run ls on /mntauto to trigger the mount.
[root@server40 /]# mount | grep mntauto
/etc/auto.master.d/auto.dir on /mntauto type autofs (rw,relatime,fd=10,pgrp=6211,timeout=300,minproto=5,maxproto=5,direct,pipe_ino=40247)
server30:/sharenfs on /mntauto type nfs4 (rw,relatime,vers=4.2,rsize=262144,wsize=262144,namlen=255,hard,proto=tcp,timeo=600,retrans=2,sec=sys,clientaddr=192.168.0.40,local_lock=none,addr=192.168.0.30)
[root@server40 /]# df -h | grep mntauto
server30:/sharenfs 17G 2.2G 15G 13% /mntauto
Lab: Automount NFS Share with Indirect Map
- As user1 with sudo on server40, configure the master and an indirect map to automount the share under /autoindir (create it).
[root@server40 /]# mkdir /autoindir
[root@server40 etc]# vim /etc/auto.master
/autoindir /etc/auto.misc
[root@server40 etc]# vim /etc/auto.misc
sharenfs server30:/common
[root@server40 etc]# systemctl restart autofs
- Run ls on /autoindir/sharenfs to trigger the mount.
[root@server40 etc]# ls /autoindir/sharenfs
test.text
[root@server40 etc]# df -h
Filesystem Size Used Avail Use% Mounted on
devtmpfs 4.0M 0 4.0M 0% /dev
tmpfs 888M 0 888M 0% /dev/shm
tmpfs 356M 5.1M 351M 2% /run
/dev/mapper/rhel-root 17G 2.2G 15G 13% /
/dev/sda1 960M 344M 617M 36% /boot
tmpfs 178M 0 178M 0% /run/user/0
server30:/common 17G 2.2G 15G 13% /autoindir/sharenfs
Process and Task Scheduling
Processes and Priorities
Process
- a unit for provisioning system resources.
- any program, application, or command that runs on the system.
- created in memory when a program, application, or command is initiated.
- organized in a hierarchical fashion.
- Each process has a parent process (a.k.a. a calling process) that spawns it.
- A single parent process may have one or many child processes
- passes many of its attributes to them at the time of their creation.
- Each process is assigned an exclusive identification number (Process IDentifier (PID))
- is used by the kernel to manage and control the process through its lifecycle.
- When a process completes its lifespan or is terminated, this event is reported back to its parent process, and all the resources provisioned to it (cpu cycles, memory, etc.) are then freed and the PID is removed from the system.
- background system processes are called daemons
- which sit in the memory and wait for an event to trigger a request to use their services.
- /proc
- Where information for each running process is recorded and maintained.
- Referenced by
ps and other commands
Process States
- Five basic process states:
- running
- being executed by the system CPU.
- sleeping
- waiting for input from a user or another process.
- waiting
- has received the input it was waiting for and is now ready to run as soon as its turn comes.
- stopped
- currently halted and will not run even when its turn comes unless a signal is sent to change its behavior.
- zombie
- Dead.
- Exists in the process table alongside other process entries
- takes up no resources.
- entry is retained until its parent process permits it to die
- also called a defunct process.

ps command
- Lists processes specific to the terminal where this command is issued.
- Shows:
- PID
- terminal (TTY) the process spawned in
- cumulative time (TIME) the system CPU has given to the process
- name of the command or program (CMD) being executed.
- may be customized to view only desired columns
- can use ps to list a process by it’s ownership or owning group.
- Output with -ef
- UID
- PID
- PPID
- C
- STIME
- TTY
- Controlling terminal
- ?
- console
- TIME
- Aggregated execution time
- CMD
- Flags
- -e
- -f
- -F
- -l
- -efl
- –forest
- -x
- -o
- user-defined format
- Make sure there are no white spaces between comma separated values.
- -C
- command list
- list processes that match a specific command name.
- -U or -u
- List user supplied as argument.
- -G or -g
- List processes owned by a specific group
top command
- Display processes in real time
- q or ctrl+c to quit
- Hotkeys while in top
- o
- re-sequence the process list.
- f
- F
- select the field to sort on
- h
- summary portion
- First 5 lines
- 1
- system uptime, number of users logged in, and system load averages over the period of 1, 5, and 15 minutes.
- 2
- task (or process) information
- total number of tasks running
- How many of the total are running, sleeping, stopped, and zombie
- 3
- processor usage
- CPU time in percentage spent in running user and system processes, in idling and waiting, and so on.
- 4
- memory utilization
- total, free, used, and allocated for buffering and caching
- 5
- swap useage
- avail Mem
- estimate of memory available for starting processes without using swap.
- tasks portion
- details for each process
- 12 columns
- 1 and 2
- Process identifier (PID) and owner (USER)
- 3 and 4
- Process priority (PR) and nice value (NI)
- 5 and 6
- Depict amounts of virtual memory (VIRT) and non-swapped resident memory (RES) in use
- 7
- Shows the amount of shareable memory available to the process (SHR)
- 8
- Represents the process status (S)
- 9 and 10
- Express the CPU (%CPU) and memory (%MEM) utilization
- 11
- Exhibits the CPU time in hundredths of a second (TIME+)
- 12
- Identifies the process name (COMMAND)
Listing a Specific Process
pidof and pgrep command
- List only the PID of a specific process
- pass a process name as an argument to view its PID
- identical if used without any options
Listing Processes by User and Group Ownership
- can use
ps to list a process by it’s ownership or owning group.
Process Niceness and Priority
- A process is spawned at a certain priority,
- priority is established based on the nice value.
- Higher niceness lowers execution priority of a process
- Lower niceness increase priority.
- Child process inherits nice value of it’s calling process.
- Can choose a nicenes based on urgency, importance, or system load.
- Normal users can only increase niceness of their processes.
- Root can raise or lower niceness of any process.
- 40 nice values
- -20
- highest and most favorable
- +19
- lowest and least favorable
- 0
- Showing nice and priority with ps
- niceness of 0 corresponds to priority of 80
- -20 corresponds to priority of 60
- Showing nice and priority with top.
- niceness of 0 corresponds to priority of 20
- -20 corresponds to priority of 0
nice command
- Launch a program at a non-default priority.
renice command
- Alter the priority of a running program
Controlling Processes with Signals
- terminating the process gracefully
- killing it abruptly
- forcing it to re-read its configuration.
- Ordinary users can kill processes that they own, while the root user privilege is needed to kill any process on the system.
- Processes in a waiting state ignore the soft termination signal.
kill command
- Pass a signal to a process
- Requires one or more PIDs
Flags
Common signals
- 1 SIGHUP (hangup)
- causes a process to disconnect itself from a closed terminal that it was tied to
- instruct a running daemon to re-read its configuration without a restart.
- 2 SIGINT
- ^c (Ctrl+c) signal issued on the controlling terminal to interrupt the execution of a process.
- 9 SIGKILL
- Terminates a process abruptly
- 15 SIGTERM (default)
- Soft termination signal to stop a process in an orderly fashion.
- Default signal if none is specified with the command.
- 18 SIGCONT
- Same as using the bg command to resume
- 19 SIGSTOP
- Same as using Ctrl+z to suspend a job
- 20 SIGTSTP
- Same as using the fg command
pkill command
- pass a signal to a process
- requires one or more process names to send a signal to.
Job Scheduling
- Run a command at a specified time.
- One time or periodic.
- One time command can be used to run a command at a time with low system usage.
- Periodic examples:
- creating a compressed archive
- trimming log files
- monitoring the system
- running a custom script
- removing unwanted files from the system.
atd and crond manage jobs
atd
- Run one time jobs.
- atd daemon retries a missed job at the same time next day.
- Does not need a restart with changes
crond
- Run periodic scheduled jobs.
- Daemon reads the schedules in files located in the /var/spool/cron and /etc/cron.d directories.
- scans these files in short intervals
- updates the in-memory schedules to reflect any modifications.
- runs a job at its scheduled time only
- does not entertain any missed jobs.
- Does not need a restart with changes
Controlling user access
- all users can schedule jobs
- access to job scheduling can be edited
- must add users to allowed or deny file in /etc
- /etc/at.allow & /etc/cron.allow
- Does not exist by default.
- /etc/at.deny & /etc/cron.deny
- list one username per line
- root user is always permitted
- Denial message appears if unauthorized user attempts to use at or cron.
- Only if there is an entry for the calling user in the deny files.
| at.allow / cron.allow |
at.deny / cron.deny |
Impact |
| Exists, and contains user entries |
Existence does not matter |
All users listed in allow files are permitted |
| Exists, but is empty |
Existence does not matter |
No users are permitted |
| Does not exist |
Exists, and contains user entries |
All users, other than those listed in deny files, are permitted |
| Does not exist |
Exists, but is empty |
All users are permitted |
| Does not exist |
Does not exist |
No users are permitted |
Scheduler Log File
/var/log/cron
- Logs for both atd and cron
Shows
- time of activity
- hostname
- process name and PID
- owner
- message for each invocation
- service start time and delays
- must have root privileges to view
at command
- schedule a one-time execution of a program in the future.
- Submitted jobs are spooled in the /var/spool/at/ and executed by the atd daemon at the specified time.
- file created containing the settings for establishing the user’s shell environment to ensure a successful execution.
- also includes the name of the command or program to be run.
- no need to restart the daemon after a job submission.
- assumes the current year and today’s date if the year and date are not mentioned.
- ways to express time:
- at 1:15am
- (executes the task at the next 1:15 a.m.)
- at noon
- (executes the task at 12:00 p.m.)
- at 23:45
- (executes the task at 11:45 p.m.)
- at midnight
- (executes the task at 12:00 a.m.)
- at 17:05 tomorrow
- (executes the task at 5:05 p.m. on the next day)
- at now + 5 hours
- (executes the task 5 hours from now. We can specify minutes, days, or weeks in place of hours)
- at 3:00 10/15/20
- (executes the task at 3:00 a.m. on October 15, 2020)
- Flags
Crontab
crontab command
- other method for scheduling tasks for running in the future.
- Unlike atd, crond executes cron jobs on a regular basis as defined in the /etc/crontab file.
- Crontables (another name for crontab files) are located in the /var/spool/cron directory.
- Each authorized user with a scheduled job has a file matching their login name in this directory.
- such as /var/spool/cron/user1
- /etc/crontab/ & /etc/cron.d/
- Other locations for system crontables.
- Only root can create, modify, or delete them.
- crond daemon
- scans entries in all 3 directories.
- adds log entry to /var/log/cronfile
- no need to start after modifying cron jobs.
- flags
- -e
- -l
- -r
- remove crontables.
- Do not run crontab -r if you do not wish to remove the crontab file. Instead, edit the file with crontab -e and just erase the entry.
- -u
- modify a different user’s crontable
- provided they are allowed to do so and the other user is listed in the cron.allow file.
- root user can use the -u flag to alter other users’ crontables even if the affected users are not listed in the allow file.
Syntax of User Crontables
- /etc/crontab
- Specifies the syntax that each user cron job must comply with in order for crond to interpret and execute it successfully.
- Each entry for a user crontable has 6 lines
- 1-5
- 6
- login name of executing user
- rest for command or program to be executed.
example crontable line
- 20 1,12 1-15 feb * ls> /tmp/ls.out
- Field Content Description
- 1
- Minute of the hour
- Valid values are 0 (the exact hour) to 59. This field can have one specific value as in field 1, multiple comma-separated values as in field 2, a range of values as in field 3, a mix of fields 2 and 3 (1-5,6-19), or an * representing every minute of the hour as in field 5.
- 2
- Hour of the day
- Valid values are 0 (midnight) to 23. Same usage applies as described for field 1.
- 3
- Day of the month
- Valid values are 1 to 31. Same usage applies as described for field 1.
- 4
- Month of the year
- Valid values are 1 to 12 or jan to dec. Same usage applies as described for field 1.
- 5
- Day of the week
- Valid values are 0 to 7 or sun to sat, with 0 and 7 representing Sunday, 1 representing Monday, and so on. Same usage applies as described for field 1.
- 6
- Command or program to execute
- Specifies the full path name of the command or program to be executed, along with any options or arguments that it requires.
/etc/crontab contents:

- Step values may be used with * and ranges in the crontables using the forward slash character (/).
- Step values allow the number of skips for a given value.
- Example:
- /2 in the minute field
- /3 in the minute field
- 0-59/4 in the minute field
Make sure you understand and memorize the order of the fields defined in crontables.
Anacron
- service that runs after every system reboot
- checks for any cron and at jobs that were scheduled for execution during the time the system was down and were missed as a result.
- useful on laptop, desktop, and similar purpose systems with extended periods of frequent downtimes and are not intended for 24/7 operations.
- Scans the /etc/cron.hourly/0anacron file for three factors to learn whether to run missed jobs.
- May be run manually at the command line.
- Run
anacron to run all jobs in /etc/anacrontab that were missed.
- /var/spool/anacron
- Where anacron stores job execution dates
- 3 factors must be true for anacron to execute scripts in /etc/cron.daily, /etc/cron.weekly, and /etc/cron.monthly
-
- Presence of the /var/spool/anacron/cron.daily file.
-
- Elapsed time of 24 hours since it was last run.
-
- System is plugged in to an AC source.
- settings defined in /etc/anacrontab
- 5 variables defined by default:
- SHELL and PATH
- Set the shell and path to be used for executing the programs.
- MAILTO
- Defines the login name or an email of the user who is to be sent any output and error messages.
- RANDOM_DELAY
- Expresses the maximum arbitrary delay in minutes added to the base delay of the jobs as defined in column 2 of the last three lines.
- START_HOURS_RANGE
- States the hour duration within which the missed jobs could be run.
- Bottom 3 lines define the schedule and the programs to be executed:
- Column 1:
- Period in days (or @daily, @weekly, @monthly, or @yearly)
- How often to run the specified job.
- Column 2:
- How many minutes to wait after system boot to execute the job.
- Column 3:
- Columns 4 to 6:
- Command to be used to execute the scripts located under the /etc/cron.daily, /etc/cron.weekly, and /etc/cron.monthly directories.
- By default, the
run-parts command is invoked for execution at the default niceness.
- For each job:
- Examines whether the job was already run during the specified period (column 1).
- Executes it after waiting for the number of minutes (column 2) plus the RANDOM_DELAY value if it wasn’t.
- When all missed jobs have been carried out and there is none pending, Anacron exits.
Process and Task Scheduling Labs
Lab: ps
- ps
- Check manual pages:
- Run with “every” and “full format” flags:
- Produce an output with the command name in column 1, PID in column 2, PPID in column 3, and owner name in column 4, run it as follows:
- Check how many sshd processes are currently running on the system:
Lab: top
- top
- View manual page:
Lab: List a specific process
- list the PID of the rsyslogd daemon
pidof rsyslogd
or
pgrep rsyslogd
Lab: Listing Processes by User and Group Ownership
- List processes owned by user1:
- List processes owned by group root:
Lab: nice
- View the default nice value:
- List priority and niceness for all processes:
Lab: Start Processes at Non-Default Priorities (2 terminals)
- Run the top command at the default priority/niceness in Terminal 1:
- Check the priority and niceness for the top command in Terminal 2 using the ps command:
- Terminate the top session in Terminal 1 by pressing the letter q and relaunch it at a lower priority with a nice value of +2:
- \Check the priority and niceness for the top command in Terminal 2 using the ps command:
- Terminate the top session in Terminal 1 by pressing the letter q and relaunch it at a higher priority with a nice value of -10. Use sudo for root privileges.
- Check the priority and niceness for the top command in Terminal 2 using the ps command:
- Terminate the top session by pressing the letter q.
Lab: Alter Process Priorities (2 terminals)
- Run the top command at the default priority/niceness in Terminal 1:
- Check the priority and niceness for the top command in Terminal 2 using the ps command:
- While the top session is running in Terminal 1, increase its priority by renicing it to -5. Use the command substitution to get the PID of top. Prepend the renice command by sudo. The output indicates the old (0) and new (-5) priorities for the process.
sudo renice -n -5 $(pidof top)
- Validate the above change with ps. Focus on columns 7 and 8.
- Repeat the above but set the process to run at a lower priority by renicing it to 8: The output indicates the old (-5) and new (8) priorities for the process.
sudo renice -n 8 $(pidof top)
- Validate the above change with ps. Focus on columns 7 and 8.
Lab: Controlling Processes with Signals
- Pass the soft termination signal to the crond daemon, use either of the following:
sudo pkill crond
# or
sudo kill $(pidof crond)
- Confirm:
- Forcefully kill crond:
sudo pkill -9 crond
# or
sudo pkill -s SIGKILL crond
# or
sudo kill -9 $(pgrep crond)
- Kill all crond processes:
- View manual pages:
man kill
man pkill
man killall
Lab: cron and atd
- View log files for cron and atd
Lab: at and crond
- run /home/user1/.bash_profile file for user1 2 hours from now:
at -f ~/.bash_profile now + 2 hours
- Consult crontab manual pages:
Lab: Submit, View, List, and Erase an at Job
1.Run the at command and specify the correct execution time and date for the job. Type the entire command at the first at> prompt and press Enter. Press Ctrl+d at the second at> prompt to complete the job submission and return to the shell prompt.
at 1:30pm 3/31/20
date &> /tmp/date.out
The system assigned job ID 5 to it, and the output also pinpoints the job’s execution time.
2.List the job file created in the /var/spool/at directory:
sudo ls -l /var/spool/at/
3.List the spooled job with the at command. You may alternatively use atq to list it.
4.Display the contents of this file with the at command and specify the job ID:
5.Remove the spooled job with the at command by specifying its job ID. You may alternatively run atrm 5 to delete it.
This should erase the job file from the /var/spool/at directory. You can
- confirm the deletion by running atq or at -l.
Lab: Add, List, and Erase a Cron Job
assume that all users are currently denied access to cron
- Edit the /etc/cron.allow file and add user1 to it:
sudo vim /etc/cron.allow
user1
- Switch to user1 Open the crontable and append the following schedule to it. Save the file when done and exit out of the editor.
crontab -e
*/5 10-11 5,20 * * echo "Hello, this is a cron test." > /tmp/hello.out
- Check for the presence of a new file by the name user1 under the /var/spool/cron directory:
sudo ls -l /var/spool/cron
- List the contents of the crontable:
- Remove the crontable and confirm the deletion:
Lab: Anacron
- View the default content of /etc/anacrontab without commented or empty lines:
cat /etc/anacrontab | grep -ve ^# -ve ^$
- View anacron man pages:
Lab 8-1: Nice and Renice a Process
- As user1 with sudo on server1, open two terminal sessions. Run the top command in terminal 1. Run the pgrep or ps command in terminal 2 to determine the PID and the nice value of top.
- Stop top on terminal 1 and relaunch at a lower priority (+8).
- Confirm the new nice value of the process in terminal 2.
- Issue the renice command in terminal 2 and increase the priority of top to -10:
renice -n -10 $(pidof top)
- Confirm:
As user1 on server1, run the tty and date commands to determine the terminal file (assume /dev/pts/1) and current system time.
Create a cron entry to display “Hello World” on the terminal. Schedule echo “Hello World” > /dev/tty/1 to run 3 minutes from the current system time.
crontab -e
*/3 * * * * echo "Hello World" > /dev/pts/2
As root, ensure user1 can schedule cron jobs.
sudo vim /etc/cron.allow
user1
RHCSA Exam Environment Guide
https://www.youtube.com/watch?v=Me6Y12-sux8&list=PLz70mC333bic8uSAtRaB31CPUr6Ixi5SX&index=2
Be aware of the timer for the exam
Each task has a revisit and done button for you reference. The exam system does not take these into account.
Click activities > terminal to bring up a new terminal. You ssh into the lab vms from there.
For vm manager activities > vm manager
Ip addresses are located in config information
Can also open a console from VM manager
From vm manager, you can select “Rebuild node # vm” to erase and reset the vm.
Try not to use keyboard shortcuts, as it may not behave well in the environment.
Can open chat icon to take a break. Exam timer is still running during break. May have to perform room scan when you start back up.
Contact proctor if you need help.
Exam setup
https://www.youtube.com/watch?v=TmrS7FhaaRA&list=PLz70mC333bic8uSAtRaB31CPUr6Ixi5SX&index=3
Need an 8gb usb and fedora media writer
4gb free space on laptop
4g RAM minimum
wired mouse
two webcams (laptop builtin and external)
High speed internet
ID Proof
No electronic devices
No paper or any helping material
You can skip questions if you want and go back.
You set up exam environment laptop.
You will get an email with the details and the exam image.
Found a PDF on the setup but it may not be up to date:
https://learn.redhat.com/t5/Certification-Resources/Getting-Ready-for-your-Red-Hat-Remote-Exam/ba-p/33528?attachment-id=166
Max Marks: 300
Passing marks: 70% (210)
1 free exam retake
RHCSA Notes
Here are my notes from Asghar Gori’s RHCSA book. Buy the book or read the reviews here.
Track my RHCSA progress: RHCSA Study Tracker
RHCSA Study Tracker
RHCSA Vagrant Lab Setup
We are going to use Vagrant to set up two RHEL 8 servers with some custom configuration options. I will include some helpful Vagrant commands at the end if you get stuck.
In this guide, I will be using Fedora 38 as my main operating system. I use Fedora because it is similar in features to Red Hat Linux Distributions. This will give me even more practice for the RHCSA exam as I use it in day-to-day operations.
Note, if you are using Windows, you will need to install ssh. This can be done by installing Git. Which automatically installs ssh for you.
You will also need to have the latest version of Virtualbox installed.
Here are the steps:
- Download and install Vagrant
- Make a new directory for your vagrant lab to live in
- Add the vagrant box
- Install the Vagrant disk size plugin
- Initialize the Vagrant box and Edit the Vagrant file
- Bring up the Vagrant box
1. Download and install Vagrant.
In Fedora, this is very easy. Run the following command to download and install Vagrant:
sudo dnf install vagrant
2. Make a new directory for your vagrant lab to live in.
Make your vagrant directory and make it your current working directory:
-
Add the Vagrant box.
vagrant box add generic/rhel8
-
Install the Vagrant disk size plugin.
The disk size program will help us set up custom storage sizes. Since we will be re-partitioning storage, this is a useful feature.
vagrant plugin install vagrant-disksize
- Initialize the Vagrant box and edit the Vagrant file.
First, initialize the Vagrant box in the vagrant directory:
vagrant init generic/rhel8
After completion, there will now be a file called “Vagrantfile” in your current directory. Since Vim is on the RHCSA exam, it’s wise to practice with it whenever you can. So let’s open the file in Vim:
vim Vagrantfile
You will see a bunch of lines commented out, and a few lines without comments. Go ahead and comment out everything and paste this at the end of the file:
Vagrant.configure("2") do |config
config.vm.box = "generic/rhel8"
config.vm.define "server1" do |server1|
server1.vm.hostname = "server1.example.com"
server1.vm.network "private_network", ip: "192.168.2.110"
config.disksize.size = '10GB'
end
config.vm.define "server2" do |server2|
server2.vm.hostname = "server2.example.com"
server2.vm.network "private_network", ip: "192.168.2.120"
config.disksize.size = '16GB'
end
config.vm.provider "virtualbox" do |vb|
vb.memory = "2048"
end
end|
The configuration file is fairly self-explanatory. Save Vagrantfile and exit Vim. Then, create /etc/vbox/networks.conf and add the following:
* 10.0.0.0/8 192.168.0.0/1
* 2001::/646
This will allow you to be more flexible with what network addresses can be used in VirtualBox.
Bring up the Vagrant box.
Now, we bring up the Vagrant box. This will open two Virtual machines in Virtualbox named server1 and server2 in headless mode (there is no GUI).
vagrant up
Great! Now we can use Vagrant to ssh into server1:
vagrant ssh server 1
From server1 ssh into server2 using its IP address:
[vagrant@server1 ~]$ ssh 192.168.2.120
Now you are in and ready to stir things up. The last thing you need is some commands to manage your Vagrant machines.
Helpful Vagrant commands.
Shut down Vagrant machines:
vagrant halt
Suspend or resume a machine:
vagrant suspend
vagrand resume
Restart a virtual machine:
vagrant reload
Destroy a Vagrant machine:
vagrant destroy [machine-name]
Show running VMs:
vagrant status
List other Vagrant options:
vagrant
If you are going for RHCSA, there is no doubt that you will also use Vagrant sometime in the future. And as you can see, it’s pretty quick and simple to get started.
Feel free to reach out with questions.
Sample Exams
Appendix A: Sample RHCSA Exam 1
Time Duration:3 hours
Passing Score:70% (210 out of 300)
All settings performed in the virtual machines must survive system reboots, or you will lose marks.
Setup for Sample Exam 1:
RHEL 9 Server with GUI
20GB disk for the OS with default partitioning.
2x300MB disks and a network interface. (.293GiB for virt-manager)
Do not configure the network interface or create a normal user account during installation.
Tasks:
Task 01:
Assuming the root user password is lost, and your system is running in multi-user target with no current root session open. Reboot the system into an appropriate target level and reset the root user password to root1234. (Exercise 11-2). After completing this task, log in as the root user and perform the remaining tasks presented below.
*done
Task 02:
Configure a network connection on the primary network device with:
- IP address 192.168.0.241/24
- gateway 192.168.0.1
- nameserver 192.168.0.1
Use different IP assignments based on your lab setup.
*done
Task 03:
Using a manual method (modify file by hand), set the system hostname to rhcsa1.example.com and alias rhcsa1. Make sure that the new hostname is reflected in the command prompt.
*done
Task 04:
Set the default boot target to multi-user.
*done
Task 05:
Set SELinux to permissive mode.
*done
Task 06:
Perform a case-insensitive search for all lines in the /usr/share/dict/linux.words file that begin with the pattern “essential”. Redirect the output to /var/tmp/pattern.txt file. Make sure that empty lines are omitted.
*done
Task 07:
Change the primary command prompt for the root user to display the hostname, username, and current working directory information in that order. Update the per-user initialization file for permanence.
*done
Task 08:
Create user accounts called user10, user20, and user30. Set their passwords to Temp1234. Make user10 and user30 accounts to expire on December 31, 2023.
*done
Task 09:
Create a group called group10 and add user20 and user30 as secondary members.
*done
Task 10:
Create a user account called user40 with UID 2929. Set the password to user1234.
*done
Task 11:
Attach the RHEL 9 ISO image to the VM and mount it persistently to /mnt/cdrom. Define access to both repositories and confirm.
*done
Task 12:
Create a logical volume called lvol1 of size 280MB in vgtest volume group. Mount the ext4 file system persistently to /mnt/mnt1
*30 minutes in done
Task 13:
Change group membership on /mnt/mnt1 to group10. Set read/write/execute permissions on /mnt/mnt1 for group members and revoke all permissions for public.
*done
Task 14:
Create a logical volume called lvswap of size 280MB in vgtest volume group. Initialize the logical volume for swap use. Use the UUID and place an entry for persistence.
*done
Task 15:
Use the combination of tar and bzip2 commands to create a compressed archive of the /usr/lib directory. Store the archive under /var/tmp as usr.tar.bz2.
*done
Task 16:
Create a directory hierarchy /dir1/dir2/dir3/dir4 and apply SELinux contexts of /etc on it recursively.
*done
Task 17:
Enable access to the atd service for user20 and deny for user30.
*done
Task 18:
Add a custom message “This is RHCSA sample exam on $(date) by $LOGNAME” to the /var/log/messages file as the root user. Use regular expression to confirm the message entry to the log file.
*done
Task 19:
Allow user20 to use sudo without being prompted for their password.
*done
Task 20:
Write a bash shell script to create three user accounts—user555, user666, and user777—with no login shell and passwords matching their usernames. The script should also extract the three usernames from the /etc/passwd file and redirect them into /var/tmp/newusers.
*done (1 hour in)
Task 21:
Launch a container as user20 using the latest version of ubi8 image. Configure the container to auto-start at system reboots without the need for user20 to log in.
*done
Task 22:
Launch a container as user20 using the latest version of ubi9 image with two environment variables SHELL and HOSTNAME. Configure the container to auto-start via systemd without the need for user20 to log in. Connect to the container and verify variable settings.
*done
Reboot the system and validate the configuration.
Appendix B: Sample RHCSA Exam 2
Started at 13:15 on the first timer
Setup for Sample Exam 2:
- Build a virtual machine with RHEL 9 Server with GUI
- Use a 20GB disk for the OS with default partitioning.
- Add 1x400MB disk and a network interface. (.381GiB in Virt-Manager)
- Do not configure the network interface or create a normal user account during installation.
Tasks:
Task 01: Using the nmcli command,
- Configure a network connection on the primary network device:
- IP address 192.168.0.242/24,
- gateway 192.168.0.1, and
- nameserver 192.168.0.1.
Use different IP assignments based on your lab environment.
*done
Task 02: Using the hostnamectl command,
- set the system hostname to rhcsa2.example.com and alias rhcsa2.
- Make sure that the new hostname is reflected in the command prompt.
*done
Task 03: Create a user account called user70
- With UID 7000 and
- Comments “I am user70”
- Set the maximum allowable inactivity for this user to 30 days.
*done
Task 04: Create a user account called user50
- With a non-interactive shell.
*done
Task 05: Attach the RHEL 9 ISO image to the VM and mount it persistently
to /mnt/dvdrom.
- Define access to both repositories and confirm.
*done 13:15 minutes in
Task 06: Create a logical volume called lv1
- Size equal to 10 LEs in vg1 volume group (create vg1 with PE size 8MB in a partition on the 400MB disk).
- Initialize the logical volume with XFS type and mount it on /mnt/lvfs1.
- Create a file called lv1file1 in the mount point.
- Set the file system to automatically mount at each system reboot.
*done
Task 07: Add a group called group20
- Change group membership on /mnt/lvfs1 to group20.
- Set read/write/execute permissions on /mnt/lvfs1 for the owner, group members, and others.
*done
Task 08: Extend the file system in the logical volume lv1 by 64MB
without unmounting it and without losing any data.
- Confirm the new size for the logical volume and the file system.
*done
Task 09: Create a swap partition of size 85MB on the 400MB disk. Use its
UUID and ensure it is activated after every system reboot.
*done
Task 10: Create a disk partition of size 100MB on the 400MB disk
- Format it with Ext4 file system structures.
- Assign label stdlabel to the file system.
- Mount the file system on /mnt/stdfs1 persistently using the label.
- Create file stdfile1 in the mount point.
*done 43 minutes in
Task 11: Use the tar and gzip command combination
- create a compressed archive of the /etc directory.
- Store the archive under /var/tmp using a filename of your choice.
*done
Task 12: Create a directory /direct01
- apply SELinux contexts for /root to it.
*done
Task 13: Set up a cron job for user70
- To search for files by the name “core” in the /var directory and
- copy them to the directory /var/tmp/coredir1.
- This job should run every Monday at 1:20 a.m.
*done
Task 14: Search for all files in the entire directory structure
- That have been modified in the past 30 days and save the file listing in the /var/tmp/modfiles.txt file.
*done
Task 15: Modify the bootloader program and set the default autoboot
timer value to 2 seconds.
*boot
Task 16: Determine the recommended tuning profile for the system and
apply it.
*done
Task 17:
Configure Chrony to synchronize system time with the hardware
clock. Remove all other NTP sources.
*done
Task 18: Install package group called “Development Tools”
- capture its information in /var/tmp/systemtools.out file.
*done 1hour 13 in
Task 19: Lock user account user70.
- Use regular expressions to capture the line that shows the lock and store the output in file /var/tmp/user70.lock.
*bash
Task 20: Write a bash shell script
- so that it prints RHCSA when RHCE is passed as an argument, and vice versa.
- If no argument is provided, the script should print a usage message and quit with exit value 5.
*done 1 hour 43 in
Task 21: Launch a rootful container and configure it to auto-start via
systemd.
*done
Task 22: Launch a rootless container
- As user80 with /data01 mapped to /data01
- using the latest version of the ubi9 image.
- Configure a systemd service to auto-start the container on system reboots without the need for user80 to log in.
- Create files under the shared mount point and validate data persistence.
*done
1 hour 54 minutes
Appendix C: Sample RHCSA Exam 3
Setup for Sample Exam 3:
Two virtual machines with RHEL 9 Server with GUI
- Use a 20GB disk for the OS with default partitioning.
- Add 1x5GB disk to VM1 and a network interface to both virtual machines.
- Do not configure the network interfaces or create a normal user account during installation.
Tasks:
Task 01: On VM1, set the system hostname to rhcsa3.example.com and alias
rhcsa3 using the hostnamectl command.
- Make sure that the new hostname is reflected in the command prompt.
Task 02: On rhcsa3, configure a network connection on the primary
network device:
- IP address 192.168.0.243/24, gateway 192.168.0.1, and nameserver 192.168.0.1 using the nmcli command
Task 03: On VM2, set the system hostname to rhcsa4.example.com
- alias rhcsa4 using a manual method (modify file by hand).
- Make sure that the new hostname is reflected in the command prompt.
Task 04: On rhcsa4, configure a network connection on the primary
network device
- IP address 192.168.0.244/24, gateway 192.168.0.1, and nameserver 192.168.0.1 using a manual method (create/modify files by hand).
Task 05: Run “ping -c2 rhcsa4” on rhcsa3.
- Run “ping -c2 rhcsa3” on rhcsa4.
- You should see 0% loss in both outputs.
Task 06: On rhcsa3 and rhcsa4, attach the RHEL 9 ISO image to the VM and
mount it persistently to /mnt/sr0.
- Define access to both repositories and confirm.
Task 07: On rhcsa3, add HTTP port 8300/TCP to the SELinux policy
database persistently.
Task 08: On rhcsa3, create LVM VDO volume
- Called vdo1 on the 5GB disk
- logical size 20GB and mounted with Ext4 structures on /mnt/vdo1.
Task 09: Configure NFS service on rhcsa3
- share /rh_share3 with rhcsa4.
- Configure AutoFS direct map on rhcsa4 to mount /rh_share3 on /mnt/rh_share4.
- User user80 (create on both systems) should be able to create files under the share on the NFS server as well as under the mount point on the NFS client.
Task 10: Configure NFS service on rhcsa4 and
- share the home directory for user60 (create user60 on both systems) with rhcsa3.
- Configure AutoFS indirect map on rhcsa3 to automatically mount the home directory under /nfsdir when user60 logs on to rhcsa3.
Task 11: On rhcsa3, create a group called group30 with GID 3000
- add user60 and user80 to this group.
- Create a directory called /sdata, enable setgid bit on it.
- Add write permission bit for group members.
- Set ownership and owning group to root and group30.
- Create a file called file1 under /sdata as user60 and modify the file as user80 successfully.
Task 12: On rhcsa3, create directory /var/dir1
- with full permissions for everyone.
- Disallow non-owners to remove files.
- Test by creating file /var/dir1/stkfile1 as user60 and removing it as user80.
Task 13: On rhcsa3, search for all manual pages for the description containing the keyword “password”.
- redirect the output to file /var/tmp/man.out.
Task 14: On rhcsa3, create file lnfile1 under /var/tmp
- Create one hard link /var/tmp/lnfile2 and one soft link /boot/file1.
- Edit lnfile1 using one link at a time and confirm.
Task 15: On rhcsa3, install software group called “Legacy UNIX
Compatibility”.
Task 16: On rhcsa3, add the http service to “external” firewalld zone persistently.
Task 17: On rhcsa3, set SELinux type shadow_t on a new file testfile1 in
/usr
- ensure that the context is not affected by a SELinux
relabeling.
Task 18: Configure passwordless ssh access for user60 from rhcsa3 to
rhcsa4. (Exercise 18-2).
Task 19: Write a bash shell script
- Checks for the existence of files (not directories) under the /usr/bin directory
- That begin with the letters “ac” and display their statistics (the stat command).
Task 20: On rhcsa3, write a containerfile to include the ls and pwd
commands in a custom ubi8 image.
- Launch a named rootless container as user60 using this image.
- Confirm command execution.
Task 21: On rhcsa3, launch a named rootless container as user60
- with host port 10000 mapped to container port 80.
- Employ the latest version of the ubi8 image.
- Configure a systemd service to autostart the container without the need for user60 to log in.
- Validate port mapping using an appropriate podman subcommand.
Task 22: On rhcsa3, launch another named rootless container (use a
unique name for the container) as user60 with /host_data01 mapped to
/container_data01, one variable ENVIRON=Exam, and host port 1050 mapped
to container port 1050. Use the latest version of the ubi9 image.
Configure a separate systemd service to auto-start the container without
the need for user60 to log in. Create a file under the shared directory
and validate data persistence. Verify port mapping and variable settings
using appropriate podman subcommands.
Appendix D: Sample RHCSA Exam 4
(Using server1 and server2)
Setup for Sample Exam 4:
Build two virtual machines with RHEL 9 Server with GUI (Exercises 1-1
and 1-2). Use a 20GB disk for the OS with default partitioning. Add
1x5GB disk to VM2 and a network interface to both virtual machines. Do
not configure the network interfaces or create a normal user account
during installation.
Tasks:
Task 01: On VM1, set the system hostname to rhcsa5.example.com and alias
rhcsa5 using the hostnamectl command. Make sure that the new hostname is
reflected in the command prompt. (Exercises 15-1 and 15-5).
*done
Task 02: On rhcsa5, configure a network connection on the primary
network device with IP address 192.168.0.245/24, gateway 192.168.0.1,
and nameserver 192.168.0.1 using the nmcli command. Use different IP
assignments based on your lab environment. (Exercise 15-4).
*done
Task 03: On VM2, set the system hostname to rhcsa6.example.com and alias rhcsa6 using a manual method (modify file by hand). Make sure that the
new hostname is reflected in the command prompt. (Exercises 15-1 and
15-5).
*done
Task 04: On rhcsa6, configure a network connection on the primary
network device with IP address 192.168.0.246/24, gateway 192.168.0.1,
and nameserver 192.168.0.1 using a manual method (create/modify files by
hand). Use different IP assignments based on your lab environment.
(Exercise 15-3).
*done
Task 05: Run “ping -c2 rhcsa6” on rhcsa5. Run “ping -c2 rhcsa5” on
rhcsa6. You should see 0% loss in both outputs. (Exercise 15-5).
*done
Task 06: On rhcsa5 and rhcsa6, attach the RHEL 9 ISO image to the VM and
mount it persistently to /mnt/sr0. Define access to both repositories
and confirm. (Exercise 9-1).
*done
30 minutes in
Task 07: Export /share5 on rhcsa5 and mount it to /share6 persistently
on rhcsa6. (Exercises 16-1 and 16-2). *done (used notes) 1.5 hours in
Task 08: Use NFS to export home directories for all users (u1, u2, and u3) on rhcsa6 so that tregistry.access.redhat.com/ubi9heir home directories become available under /home1 when they log on to rhcsa5. Create u1, u2, and u3. *done used notes 2 hours in
Task 09: On rhcsa5, add HTTP port 8400/UDP to the public firewall zone persistently.
*done
Task 10: Configure passwordless ssh access for u1 from rhcsa5 to rhcsa6. Copy the directory /etc/sysconfig from rhcsa5 to rhcsa6 under /var/tmp/remote securely. *done (2.5 hour in used notes)
Task 11: On rhcsa6, create LVM VDO volume vdo2 on the 5GB disk with logical size 20GB and mounted persistently with XFS structures on /mnt/vdo2.
*done 3 hours (used notes)
Task 12: On rhcsa6, flip the value of the Boolean nfs_export_all_rw persistently.
*done
Task 13: On rhcsa5 and rhcsa6, set the tuning profile to powersave.
*done
Task 14: On rhcsa5, create file lnfile1 under /var/tmp and create three hard links called hard1, hard2, and hard3 for it. Identify the inode number associated with all four files. Edit any of the files and observe the metadata for all the files for confirmation.
*done (on rhcsa6, oops)
Task 15: On rhcsa5, members (user100 and user200) of group100 should be able to collaborate on files under /shared but cannot delete each other’s files.
*4 hours in (done used notes)
Task 16: On rhcsa6, list all files that are part of the “setup” package, and use regular expressions and I/O redirection to send the output lines containing “hosts” to /var/tmp/setup.pkg.
*done
Task 17: On rhcsa5, check the current version of the Linux kernel. Download and install the latest version of the kernel from Red Hat website. Ensure that the existing kernel and its configuration remain intact. Reboot the system and confirm the newregistry.access.redhat.com/ubi9 version is loaded. *done with dnf instead of downloading from site (4.5hours in)
Task 18: On rhcsa5, configure journald to store messages permanently under /var/log/journal and fall back to memory-only option if /var/log/journal directory does not exist or has permission/access issues.
*done
Task 19: Write a bash shell script that defines an environment variable called ENV1=book1 and creates a user account that matches the value of the variable.
*done
Task 20: On rhcsa5, launch a named rootful container with host port 443 mapped to container port 443. Employ the latest version of the ubi9 image. Configure a systemd service to auto-start the container at system reboots. Validate port mapping using an appropriate podman subcommand.
*done
Task 21: On rhcsa5, launch a named rootless container as user100 with /data01 mapped to /data01 and two variables KERN=$(uname -r) and SHELL defined. Use the latest version of the ubi8 image. Configure a systemd service to auto-start the container at system reboots without the need
for user100 to log in. Create a file under the shared mount point and validate data persistence.
*done (5 hours in)
Task 22: On rhcsa5, write a containerfile to include the PATH
environment variable output in a custom ubi9 image. Launch a named rootless container as user100 using this image. Confirm command execution.
*done (5hours 10 minutes)
System Initialization, Message Logging, and System Tuning
System Initialization and Service Management
systemd (system daemon)
-
System initialization and service management mechanism.
-
Units and targets for initialization, service administration, and state changes
-
Has fast-tracked system initialization and state transitioning by introducing:
- Parallel processing of startup scripts
- Improved handling of service dependencies
- On-demand activation of services
-
Supports snapshotting of system states.
-
Used to handle operational states of services
-
Boots the system into one of several predefined targets
-
Tracks processes using control groups
-
Automatically maintains mount points.
-
First process with PID 1 that spawns at boot
-
Last process that terminates at shutdown.
-
Spawns several processes during a service startup.
-
Places the processes in a private hierarchy composed of control groups (or cgroups for short) to organize processes for the purposes of monitoring and controlling system resources such as:
- processor
- memory
- network bandwidth
- disk I/O
-
Limit, isolate, and prioritize process usage of resources.
-
Resources distributed among users, databases, and applications based on need and priority
-
Initiates distinct services concurrently, taking advantage of multiple CPU cores and other compute resources.
-
Creates sockets for all enabled services that support socket-based activation at the very beginning of the initialization process.
-
It passes them on to service daemon processes as they attempt to start in parallel.
-
This lets systemd handle inter-service order dependencies
-
Allows services to start without any delays.
-
Systemd creates sockets first, starts daemons next, and caches any client requests to daemons that have not yet started in the socket buffer.
-
Files the pending client requests when the daemons they were awaiting come online.
Socket
- Communication method that allows a single process to talk to another process on the same or remote system.
During the operational state, systemd:
- maintains the sockets and uses them to reconnect other daemons and services that were interacting with an old instance of a daemon before that daemon was terminated or restarted.
- services that use activation based on D-Bus (Desktop Bus) are started when a client application attempts to communicate with them for the first time.
- Additional methods used by systemd for activation are
- device-based
- starting the service when a specific hardware type such as USB is plugged in
- path-based
- starting the service when a particular file or directory alters its state.
D-Bus
- Allows multiple services running in parallel on a system or remote systems to talk to one another
on-demand activation
- systemd defers the startup of services—Bluetooth and printing—until they are actually needed.
parallelization and on-demand activation
- save time and compute resources.
- contribute to expediting the boot process considerably.
benefit of parallelism witnessed at system boot is
- the file systems are checked that may result in unnecessary delays.
- With autofs, the file systems are temporarily mounted on their normal mount points
- as soon as the checks on the file systems are finished, systemd remounts them using their standard devices.
- Parallelism in file system mounts does not affect the root and virtual file systems.
Units
Units
-
systemd objects used for organizing boot and maintenance tasks, such as:
- hardware initialization
- socket creation
- file system mounts
- service startups.
-
Unit configuration is stored in their respective configuration files
-
Config files are:
- Auto-generated from other configurations
- Created dynamically from the system state
- Produced at runtime
- User-developed.
-
Units operational states:
- active
- inactive
- in the process of being activated
- deactivated
- failed.
-
Units can be enabled or disabled
- enabled unit
- can be started to an active state
- disabled unit
Units have a name and a type, and they are
- encoded in files with names in the form unitname.type. Some
- examples:
- tmp.mount
- sshd.service
- syslog.socket
- umount.target.
There are two types of unit configuration files:
- System unit files
- distributed with installed packages and located in the /usr/lib/systemd/system/
- User unit files
- user-defined and stored in the /etc/systemd/user/
View unit config file directories:
ls -l /usr/lib/systemd/system
ls -l /etc/systemd/user
pkg-config command:
-
View systemd unit config directory information:
pkg-config systemd --variable=systemdsystemunitdir
pkg-config systemd --variable=systemduserconfdir
-
additional system units that are created at runtime and destroyed when they are no longer needed.
- located in /run/systemd/system/
-
runtime unit files take precedence over the system unit files
-
user unit files take priority over the runtime files.
Unit configuration files
- direct replacement of the initialization scripts found in /etc/rc.d/init.d/ in older RHEL releases.
11 unit types
| Unit Type |
Description |
| Automount |
automount capabilities for on-demand mounting of file systems |
| Device |
Exposes kernel devices in systemd and may be used to implement device-based activation |
| Mount |
Controls when and how to mount or unmount file systems |
| Path |
Activates a service when monitored files or directories are accessed |
| Scope |
Manages foreign processes instead of starting them |
| Service |
Starts, stops, restarts, or reloads service daemons and the processes they are made up of |
| Slice |
May be used to group units, which manage system processes in a tree-like structure for resource management |
| Socket |
Encapsulates local inter-process communication or network sockets for use by matching service units |
| Swap |
Encapsulates swap partitions |
| Target |
Defines logical grouping of units |
| Timer |
Useful for triggering activation of other units based on timers |
Unit files contain common and specific configuration elements.
Common elements
- fall under the [Unit] and [Install] sections
- description
- documentation location
- dependency information
- conflict information
- other options
- independent of the type of unit
unit-specific configuration data
- located under the unit type section:
- [Service] for the service unit type
- [Socket] for the socket unit type
- so forth
Sample unit file for sshd.service from the /usr/lib/systemd/system/:
david@fedora:~$ cat /usr/lib/systemd/system/sshd.service
[Unit]
Description=OpenSSH server daemon
Documentation=man:sshd(8) man:sshd_config(5)
After=network.target sshd-keygen.target
Wants=sshd-keygen.target
# Migration for Fedora 38 change to remove group ownership for standard host keys
# See https://fedoraproject.org/wiki/Changes/SSHKeySignSuidBit
Wants=ssh-host-keys-migration.service
[Service]
Type=notify
EnvironmentFile=-/etc/sysconfig/sshd
ExecStart=/usr/sbin/sshd -D $OPTIONS
ExecReload=/bin/kill -HUP $MAINPID
KillMode=process
Restart=on-failure
RestartSec=42s
[Install]
WantedBy=multi-user.target
- Units can have dependencies based on a sequence (ordering) or a requirement.
- sequence
- outlines one or more actions that need to be taken before or after the activation of a unit (the Before and After directives).
- requirement
- specifies what must already be running (the Requires directive) or not running (the Conflicts directive) in order for the successful launch of a unit.
Example:
- The graphical.target unit file tells us that the system must already be operating in the multi-user mode and not in rescue mode in order for it to boot successfully into the graphical mode.
Wants
- May be used instead of Requires in the [Unit] or [Install] section so that the unit is not forced to fail activation if a required unit fails to start.
Run man systemd.unit for details on systemd unit files.
- There are also other types of dependencies
- systemd generally sets and maintains inter-service dependencies automatically
- This can be done manually if needed.
Targets
- logical collections of units
- special systemd unit type with the .target file extension.
- share the directory locations with other unit configuration files.
- used to execute a series of units.
- true for booting the system to a desired operational run level with all the required services up and running.
- Some targets inherit services from other targets and add their own to them.
- systemd includes several predefined targets
| Target |
Description |
| halt |
Shuts down and halts the system |
| poweroff |
Shuts down and powers off the system |
| shutdown |
Shuts down the system |
| rescue |
Single-user target for running administrative and recovery functions. All local file systems are mounted. Some essential services are started, but networking remains disabled. |
| emergency |
Runs an emergency shell. The root file system is mounted in read-only mode; other file systems are not mounted. Networking and other services remain disabled. |
| multi-user |
Multi-user target with full network support, but without GUI |
| graphical |
Multi-user target with full network support and GUI |
| reboot |
Shuts down and reboots the system |
| default |
A special soft link that points to the default system boot target (multi-user.target or graphical.target) |
| hibernate |
Puts the system into hibernation by saving the running state of the system on the hard disk and powering it off. When powered up, the system restores from its saved state rather than booting up. |
Systemd Targets
Target unit files
- contain all information under the [Unit] section
- description
- documentation location
- dependency and conflict information.
Show the graphical target file (/usr/lib/systemd/system/graphical.target):
root@localhost ~]# cat /usr/lib/systemd/system/graphical.target
[Unit]
Description=Graphical Interface
Documentation=man:systemd.special(7)
Requires=multi-user.target
Wants=display-manager.service
Conflicts=rescue.service rescue.target
After=multi-user.target rescue.service rescue.target display-manager.service
AllowIsolate=yes
Requires, Wants, Conflicts, and After suggests that the system must have already accomplished the rescue.service, rescue.target, multi-user.target, and display-manager.service levels in order to be declared running in the graphical target.
Run man systemd.targetfor details
systemctl Command
- Performs administrative functions and supports plentiful subcommands and flags.
| Subcommand |
Description |
| daemon-reload |
Re-reads and reloads all unit configuration files and recreates the entire user dependency tree. |
| enable (disable) |
Activates (deactivates) a unit for autostart at system boot |
| get-default (set-default) |
Shows (sets) the default boot target |
| get-property (set-property) |
Returns (sets) the value of a property |
| is-active |
Checks whether a unit is running |
| is-enabled |
Displays whether a unit is set to autostart at system boot |
| is-failed |
Checks whether a unit is in the failed state |
| isolate |
Changes the running state of a system |
| kill |
Terminates all processes for a unit |
| list-dependencies |
Lists dependency tree for a unit |
| list-sockets |
Lists units of type socket |
| list-unit-files |
Lists installed unit files |
| list-units |
Lists known units. This is the default behavior when systemctl is executed without any arguments. |
| mask (unmask) |
Prohibits (permits) auto and manual activation of a unit to avoid potential conflict |
| reload |
Forces a running unit to re-read its configuration file. This action does not change the PID of the running unit. |
| restart |
Stops a running unit and restarts it |
| show |
Shows unit properties |
| start (stop) |
Starts (stops) a unit |
| status |
Presents the unit status information |
Listing and Viewing Units
List all units that are currently loaded in memory along with their status and description:
systemctl
Output:
UNIT column
-
shows the name of the unit and its location in the tree
LOAD column
-
reflects whether the unit configuration file was properly loaded (loaded, not found, bad setting, error, and masked)
ACTIVE column
-
returns the high-level activation state ( active, reloading, inactive, failed, activating, and deactivating)
SUB column
-
depicts the low-level unit activation state (reports unit-specific information)
DESCRIPTION column
-
illustrates the unit’s content and functionality.
-
systemctl only lists active units by default
--all
- include the inactive units:
List all active and inactive units of type socket:
systemctl -t socket --all
List all units of type socket currently loaded in memory and the service they activate, sorted by the listening address:
List all unit files (column 1) installed on the system and their current state (column 2):
systemctl list-unit-files
List all units that failed to start at the last system boot:
List the hierarchy of all dependencies (required and wanted units) for the current default target:
systemctl list-dependencies
List the hierarchy of all dependencies (required and wanted units) for a specific unit such as atd.service:
systemctl list-dependencies atd.service
Managing Service Units
systemctl subcommands to manage service units, including
- starting
- stopping
- restarting
- checking status
Check the current operational status and other details for the atd service:
Output:
service description
- read from /usr/lib/systemd/system/atd.service
load status, which
- reveals the current load status of the unit configuration file in memory.
- Other possibilities for “Loaded” include
- “error” (if there was a problem loading the file)
- "not-found" (if no file associated with this unit was found)
- "bad-setting" (if a key setting was missing)
- "masked" (if the unit configuration file is masked)
- (enable or disable) for autostart at system boot.
Active
- current activation status
- time the service was started
- Possible states:
- Active (running): The service is running with one or more processes
- Active (exited): Completed a one-time configuration
- Active (waiting): Running but waiting for an event
- Inactive: Not running
- Activating: In the process of being activated
- Deactivating: In the process of being deactivated
- Failed: If the service crashed or could not be started
Also includes Main PID of the service process and more.
Disable the atd service from autostarting at the next system reboot:
sudo systemctl disable atd
Re-enable atd to autostart at the next system reboot:
Check whether atd is set to autostart at the next system reboot:
Check whether the atd service is running:
Stop and restart atd, run either of the following:
systemctl stop atd ; systemctl start atd
Show the details of the atd service:
Prohibit atd from being enabled or disabled:
Try disabling or enabling atd and observe the effect of the previous command:
Reverse the effect of the mask subcommand and try disable and enable operations:
systemctl unmask atd && systemctl disable atd && systemctl enable atd
Managing Target Units
systemctl can also manage target units.
- view or change the default boot target
- switch from one running target into another
View what units of type target are currently loaded and active:
output:
- target unit’s name
- load state
- high-level and low-level activation states
- short description.
–all option to the above
- see all loaded targets in either active or inactive state.
Viewing and Setting Default Boot Target
- view the current default boot target and to set it.
- get-default and set-default subcommands
Check the current default boot target:
- You may have to modify the default boot target persistently for the exam.
Change the current default boot target from graphical.target to multi-user.target:
systemctl set-default multi-user
- removes the existing symlink (default.target) pointing to the old boot target and replaces it with the new target file path.
revert the default boot target to graphical:
systemctl set-default graphical
Switching into Specific Targets
- Use
systemctl to transition the running system from one target state into another.
- graphical, multi-user, reboot, shutdown—are the most common
- rescue and emergency targets are for troubleshooting and system recovery purposes,
- poweroff and halt are similar to shutdown
- hibernate is suitable for mobile devices.
Switch into multi-user using the isolate subcommand:
systemctl isolate multi-user
- This will stop the graphical service on the system and display the text-based console login screen.
Type in a username such as user1 and enter the password to log in:
Log in and return to the graphical target:
systemctl isolate graphical
Shut down the system and power it off, use the following or simply
run the poweroff command:
Shut down and reboot the system:
halt, poweroff, and reboot are symbolic links to the systemctl command:
[root@localhost ~]# ls -l /usr/sbin/halt /usr/sbin/poweroff /usr/sbin/reboot
lrwxrwxrwx. 1 root root 16 Aug 22 2023 /usr/sbin/halt -> ../bin/systemctl
lrwxrwxrwx. 1 root root 16 Aug 22 2023 /usr/sbin/poweroff -> ../bin/systemctl
lrwxrwxrwx. 1 root root 16 Aug 22 2023 /usr/sbin/reboot -> ../bin/systemctl
shutdown command options:
-H now
- Halt
-P now
- poweroff
-r now
- reboot
- broadcasts a warning message to all logged-in users
- blocks new user login attempts
- waits for the specified amount of time for users to log off
- stops the services
- shut the system down to the specified target state.
System Logging
- Log files need to be rotated periodically to prevent the file system space from filling up.
- Configuration files that define the default and custom locations to direct the log messages to and to configure rotation settings.
system log file
- records custom messages sent to it.
- systemd includes a service for viewing and managing system logs in addition to the traditional logging service.
- This service maintains a log of runtime activities for faster retrieval and can be configured to store the information permanently.
System logging (syslog for short)
- capture messages generated by:
- kernel
- daemons
- commands
- user activities
- applications
- other events
- Forwards messages to various log files
- For security auditing, service malfunctioning, system troubleshooting, or informational purposes.
rsyslogd daemon (rocket-fast system for log processing)
- Responsible for system logging
- Multi-threaded
- support for:
- enhanced filtering
- encryption-protected message relaying
- variety of configuration options.
- Reads its configuration file /etc/rsyslog.conf and the configuration files located in /etc/rsyslog.d/ at startup.
- /var/log
- Default depository for most system log files
- Other services such as audit, Apache, etc. have subdirectories here as well.
rsyslog service
- modular
- allows the modules listed in its configuration file to be dynamically loaded in the kernel when/as needed.
- Each module brings a new functionality to the system upon loading.
rsyslogd daemon
-
can be stopped manually using systemctl stop rsyslog
-
start, restart, reload, and status options are also available
-
A PID is assigned to the daemon at startup
-
rsyslogd.pid file is created in the /run directory to save the PID.
-
PID is stored to prevent multiple instances of this daemon.
TheSyslog Configuration File
/etc/rsyslog.conf
- primary syslog configuration file
View /etc/rsyslog.conf:
cat /etc/rsyslog.conf
Output:
Three sections:
-
Modules, Global Directives, and Rules.
- Modules section
- default defines two modules imuxsock and imjournal
- loaded on demand.
imuxsock module
-
furnishes support for local system logging via the logger command
imjournal module
-
allows access to the systemd journal.
-
Global Directives section
- contains three active directives.
- Definitions in this section influence the overall functionality of the rsyslog service.
- first directive
- Sets the location for the storage of auxiliary files (/var/lib/rsyslog).
- second directive
- instructs the rsyslog service to save captured messages using traditional file formatting
- third directive
- directs the service to load additional configuration from files located in the /etc/rsyslogd.d/ directory.
-
Rules section
- Right field is referred to as action.
selector field
- left field of the rules section
- divided into two period-separated sub-fields called
- facility (left)
- representing one or more system process categories that generate messages
- priority (right)
- identifying the severity associated with the messages.
- semicolon (;) is used as a distinction mark if multiple facility.priority groups are present.
action field
- determines the destination to send the messages to.
- numerous supported facilities:
- auth
- authpriv
- cron
- daemon
- kern
- lpr
- mail
- news
- syslog
- user
- uucp
- local0 throughv local7
- asterisk (*) character represents all of them.
- supported priorities in the descending criticality order:
- emerg
- alert
- crit
- error
- warning
- notice
- info
- debug
- none
-
If a lower priority is selected, the daemon logs all messages of the service at that and higher levels.
After modifying the syslog configuration file, Inspect it and set the verbosity:
rsyslogd -N 1 (-N inspect, 1 level 1)
- Restart or reload the rsyslog service in order for the changes to take effect.
Rotating Log Files
Log location is defined in the rsyslog configuration file.
View the /var/log/ directory:
ls -l /var/log
systemd unit file called logrotate.timer under the /usr/lib/systemd/system directory invokes the logrotate service (/usr/lib/systemd/system/logrotate.service) on a daily basis. Here is what this file contains:
[root@localhost cron.daily]# systemctl cat logrotate.timer
# /usr/lib/systemd/system/logrotate.timer
[Unit]
Description=Daily rotation of log files
Documentation=man:logrotate(8) man:logrotate.conf(5)
[Timer]
OnCalendar=daily
AccuracySec=1h
Persistent=true
[Install]
WantedBy=timers.target
The logrotate service runs rotations as per the schedule and other parameters defined in the /etc/logrotate.conf and additional log configuration files located in the /etc/logrotate.d directory.
/etc/cron.daily/logrotate script
- invokes the logrotate command on a daily basis.
- runs a rotation as per the schedule defined in /etc/logrotate.conf and the
- configuration files for various services are located in /etc/logrotate.d/ The
- configuration files may be modified to alter the schedule or include additional tasks on log files such as:
- removing
- compressing
- emailing
grep -v ^$ /etc/logrotate.conf
# see "man logrotate" for details
# global options do not affect preceding include directives
# rotate log files weekly
weekly
# keep 4 weeks worth of backlogs
rotate 4
# create new (empty) log files after rotating old ones
create
# use date as a suffix of the rotated file
dateext
# uncomment this if you want your log files compressed
#compress
# packages drop log rotation information into this directory
include /etc/logrotate.d
# system-specific logs may be also be configured here.
content:
-
default log rotation frequency (weekly).
-
period of time (4 weeks) to retain the rotated logs before deleting them.
-
Each time a log file is rotated:
- Empty replacement file is created with the date as a suffix to its name
- rsyslog service is restarted
-
script presents the option of compressing the rotated files using the gzip utility.
- logrotate command checks for the presence of additional log configuration files in /etc/logrotate.d/ and includes them as necessary.
- directives defined in /etc/logrotate.conf file have a global effect on all log files
- can define custom settings for a specific log file in /etc/logrotate.conf/ or create a separate file in /etc/logrotate.d/
- settings defined in user-defined files overrides the global settings.
The /etc/logrotate.d/ directory includes additional configuration files for other service logs:
Show the file content for btmp (records of failed user login attempts) that is used to control the rotation behavior for /var/log/btmp:
cat /etc/logrotate.d/btmp
```
- rotation is once a month.
- replacement file created will get read/write permission bits for the owner (*root*)
- owning group will be set to *utmp*
- rsyslog service will maintain one rotated copy of the *btmp* log file.
### The Boot Log File
Logs generated during the system startup:
- Display the service startup sequence.
- Status showing whether the service was started successfully.
- May help in any post-boot troubleshooting if required.
- /var/log/boot.log
View /var/log/boot.log:
sudo head /var/log/boot.log
output:
- OK or FAILED
- indicates if the service was started successfully or not.
### The System Log File
/var/log/messages
- default location for storing most system activities, as defined in the *rsyslog.conf* file
- saves log information in plain text format
- may be viewed with any file display utility (*cat*, *more*, *pg*, *less*, *head*, or *tail*.)
- may be observed in real time using the *tail* command with the -f switch. The *messages* file
- captures:
- the date and time of the activity,
- hostname of the system,
- name and PID of the service
- short description of the event being logged.
View /var/log messages:
```bash
tail /var/log/messages
Logging Custom Messages
The Modules section in the rsyslog.conf file
- Provides the support via the imuxsock module to record custom messages to the messages file using the logger command.
logger command
Add a note indicating the calling user has rebooted the system:
logger -i "System rebooted by $USER"
observe the message recorded along with the timestamp, hostname, and PID:
tail -l /var/log/messages
-p option
- specify a priority level either as a numerical value or in the facility.priority format.
- default priority
View logger man pages:
man logger
The systemd Journal
-
Systemd-based logging service for the collection and storage of logging data.
-
Implemented via the systemd-journald daemon.
-
Gather, store, and display logging events from a variety of sources such as:
- the kernel
- rsyslog and other services
- initial RAM disk
- alerts generated during the early boot stage.
journals
-
stored in the binary format files
-
located in /run/log/journal/ (remember run is not a persistent directory)
-
structured and indexed for faster and easier searches
-
May be viewed and managed using the journalctl command.
-
Can enable persistent storage for the logs if desired.
-
RHEL runs both rsyslogd and systemd-journald concurrently.
-
data gathered by systemd-journald may be forwarded to rsyslogd for further processing and persistent storage in text format.
/etc/systemd/journald.conf
- main config file for journald
- contains numerous default settings that affect the overall functionality of the service.
Retrieving and Viewing Messages
journalctl command
- retrieve messages from the journal for viewing in a variety of ways using different options.
run journalctl without any options to see all the messages generated since the last system reboot:
journalctl
- format of the messages is similar to that of the events logged to /var/log/messages
- Each line begins with a timestamp followed by the system hostname, process name with or without a PID, and the actual message.
Display verbose output for each entry:
View all events since the last system reboot:
-0 (default, since the last system reboot),
-1 (the previous system reboot),
-2 (two reboots before)
1 & 2 only work if there are logs persistently stored.
View only kernel-generated alerts since the last system reboot:
Limit the output to view 3 entries only:
To show all alerts generated by a particular service, such as crond:
journalctl /usr/sbin/crond
Retrieve all messages logged for a certain process, such as the PID associated with the chronyd service:
journalctl _PID=$(pgrep chronyd)
Reveal all messages for a particular system unit, such as sshd.service:
journalctl _SYSTEMD_UNIT=sshd.service
View all error messages logged between a date range, such as October 10, 2019 and October 16, 2019:
journalctl --since 2019-10-16 --until 2019-10-16 -p err
Get all warning messages that have appeared today and display them in reverse chronological order:
journalctl --since today -p warning -r
- Can specify the time range in hh:mm:ss format, or yesterday, today, or tomorrow as well.
follow option
- enable a separate storage location for the journal to save all its messages there persistently.
- default is under /var/log/journal/
The systemd-journald service supports four options with the Storage directive to control how the logging data is handled.
| Option |
Description |
| volatile |
Stores data in memory only |
| persistent |
Stores data permanently under /var/log/journal and falls back to memory-only option if this directory does not exist or has a permission or other issue. The service creates /var/log/journal in case of its non-existence. |
| auto |
Similar to “persistent” but does not create /var/log/journal if it does not exist. This is the default option. |
| none |
Disables both volatile and persistent storage options. Not recommended. |
Journal Data Storage Options
create the /var/log/journal/ manually and use preferred “auto” option.
- faster query responses from in-memory storage
- access to historical log data from on-disk storage.
Run the necessary steps to enable and confirm persistent storage for the journals.
- Create a subdirectory called journal under the /var/log/ directory and confirm:
sudo mkdir /var/log/journal
- Restart the systemd-journald service and confirm:
systemctl restart systemd-journald && systemctl status systemd- journald
- List the new directory and observe a subdirectory matching the machine ID of the system as defined in the /etc/machine-id file is created:
ll /var/log/journal && cat /etc/machine-id
- This log file is rotated automatically once a month based on the settings in the journald.conf file.
Check the manual pages of journal.conf
System Tuning
System tuning service
- Monitor connected devices
- Tweak their parameters to improve performance or conserve power.
- Recommended tuning profile may be identified and activated for optimal performance and power saving.
tuned
- system tuning service
- monitor storage, networking, processor, audio, video, and a variety of other connected devices
- Adjusts their parameters for better performance or power saving based on a chosen profile.
- Several predefined tuning profiles may be activated either statically or dynamically.
tuned service
tuned tuning Profiles
- Nine profiles to support a variety of use cases.
- Can create custom profiles from nothing or by using one of the existing profiles as a template.
- Must to store the custom profile in /etc/tuned/
Three groups:
(1) Performance
(2) Power consumption
(3) Balanced
| Profile |
Description |
| Performance |
|
| Desktop |
Based on the balanced profile for desktop systems. Offers improved throughput for interactive applications. |
| Latency-performance |
For low-latency requirements |
| Network-latency |
Based on the latency-performance for faster network throughput |
| Network-throughput |
Based on the throughput-performance profile for maximum network throughput |
| Virtual-guest |
Optimized for virtual machines |
| Virtual-host |
Optimized for virtualized hosts |
| Power Saving |
|
| Powersave |
Saves maximum power at the cost of performance |
| Balanced/Max Profiles |
|
| Balanced |
Preferred choice for systems that require a balance between performance and power saving |
| Throughput-performance |
Provides maximum performance and consumes maximum power |
Tuning Profiles
Predefined profiles are located in /usr/lib/tuned/ in subdirectories matching their names.
View predefined profiles:
The default active profile set on server1 and server2 is the
virtual-guest profile, as the two systems are hosted in a VirtualBox virtualized environment.
The tuned-adm Command
- single profile management command that comes with tuned
- can list active and available profiles, query current settings, switch between profiles, and turn the tuning off.
- Can recommend the best profile for the system based on many system attributes.
View the man pages:
Lab 12-2: Manage Tuning Profiles
- install the tuned service
- start it now
- enable it for auto-restart upon future system reboots.
- display all available profiles and the current active profile.
- switch to one of the available profiles and confirm.
- determine the recommended profile for the system and switch to it.
- deactivate tuning and reactivate it.
- confirm the activation
- Install the tuned package if it is not already installed:
- Start the tuned service and set it to autostart at reboots:
systemctl --now enable tuned
- Confirm the startup:
- Display the list of available and active tuning profiles:
- List only the current active profile:
- Switch to the powersave profile and confirm:
tuned-adm profile powersave
tuned-adm active
- Determine the recommended profile for server1 and switch to it:
[root@localhost ~]# tuned-adm recommend
virtual-guest
[root@localhost ~]# tuned-adm profile virtual-guest
[root@localhost ~]# tuned-adm active
Current active profile: virtual-guest
- Turn off tuning:
[root@localhost ~]# tuned-adm off
[root@localhost ~]# tuned-adm active
No current active profile.
- Reactivate tuning and confirm:
[root@localhost ~]# tuned-adm profile virtual-guest
[root@localhost ~]# tuned-adm active
Current active profile: virtual-guest
Sysinit, Logging, and Tuning Labs
Lab: Modify Default Boot Target
- Modify the default boot target from graphical to multi-user, and reboot the system to test it.
systemctl set-default multi-user
- Run the
systemctl and who commands after the reboot for validation.
- Restore the default boot target back to graphical and reboot to verify.
Lab: Record Custom Alerts
- Write the message “This is $LOGNAME adding this marker on $(date)” to /var/log/messages.
logger -i "This is $LOGNAME adding this marker on $(date)"
- Ensure that variable and command expansions work. Verify the entry in the file.
tail -l /var/log/messages
Lab: Apply Tuning Profile
- identify the current system tuning profile with the tuned-adm command.
- List all available profiles.
- List the recommended profile for server1.
- Apply the “balanced” profile and verify with tuned-adm.
tuned-adm profile balanced
The Secure Shell Service
The OpenSSH Service
Secure Shell (SSH)
- Delivers a secure mechanism for data transmission between source and destination systems over IP networks.
- Designed to replace the old remote login programs that transmitted user passwords in clear text and data unencrypted.
- Employs digital signatures for user authentication with encryption to secure a communication channel.
- this makes it extremely hard for unauthorized people to gain access to passwords or the data in transit.
- Monitors the data being transferred throughout a session to ensure integrity.
- Includes a set of utilities
ssh and sftp for remote users to log in, transfer files, and execute commands securely.
Common Encryption Techniques
- Two common techniques: symmetric and asymetric
Symmetric Technique
- Secret key encryption.
- Uses a single key called a secret key that is generated as a result of a negotiation process between two entities at the time of their initial contact.
- Both sides use the same secret key during subsequent communication for data encryption and decryption.
Asymmetric Technique
- Public key encryption
- Combination of private and public keys
- Randomly generated and mathematically related strings of alphanumeric characters
- attached to messages being exchanged.
- The client transmutes the information with a public key and the server decrypts it with the paired private key.
- Private key must be kept secure since it is private to a single sender
- the public key is disseminated to clients.
- used for channel encryption and user authentication.
Authentication Methods
- Encrypted channel is established between the client and server
- Then additional negotiations take place between the two to authenticate the user trying to access the server.
- Methods listed in the order in which they are attempted during the authentication process:
- GSSAPI-based ( Generic Security Service Application Program Interface) authentication
- Host-based authentication
- Public key-based authentication
- Challenge-response authentication
- Password-based authentication
GSSAPI-Based Authentication
- Provides a standard interface that allows security mechanisms, such as Kerberos, to be plugged in.
- OpenSSH uses this interface and the underlying Kerberos for authentication.
- Exchange of tokens takes place between the client and server to validate user identity.
Host-Based Authentication
- Allows a single user, a group of users, or all users on the client to be authenticated on the server.
- A user may be configured to log in with a matching username on the server or as a different user that already exists there.
- For each user that requires an automatic entry on the server, a ~/.shosts file is set up containing the client name or IP address, and, optionally, a different username.
- The same rule applies to a group of users or all users on the client that require access to the server.
- In that case, the setup is done in the /etc/ssh/shosts.equiv file on the server.
Private/Public Key-Based Authentication
- Uses a private/public key combination for user authentication.
- User on the client has a private key and the server stores the corresponding public key.
- At the login attempt, the server prompts the user to enter the passphrase associated with the key and logs the user in if the passphrase and key are validated.
Challenge-Response Authentication
- Based on the response(s) to one or more arbitrary challenge questions that the user has to answer correctly in order to be allowed to log in to the server.
Password-Based Authentication
- Last fall back option.
- Server prompts the user to enter their password.
- Checks the password against the stored entry in the shadow file and allows the user in if the password is confirmed.
OpenSSH Protocol Version and Algorithms
- V2
- Supports various algorithms for data encryption and user authentication (digital signatures) such as:
RSA (Rivest-Shamir-Adleman)
- More prevalent than the rest
- Supports both encryption and authentication.
DSA and ECDSA (Digital Signature Algorithm and Elliptic Curve Digital Signature Algorithm)
- Authentication only.
- Used to generate public and private key pairs for the asymmetric technique.
OpenSSH Packages
- Installed during OS installation
openssh
- provides the
ssh-keygen command and some library routines
openssh-clients
- includes commands, such as
sftp, ssh, and ssh-copy-id, and a client configuration file /etc/ssh/ssh_config
openssh-server
- contains the sshd service daemon, server configuration file /etc/ssh/sshd_config, and library routines.
OpenSSH Server Daemon and Client Commands
- OpenSSH server program is sshd
sshd
-
Preconfigured and operational on new RHEL installations
-
Allows remote users to log in to the system using an ssh client program such as PuTTY or the ssh command.
-
Daemon listens on TCP port 22
- Documented in the /etc/ssh/sshd_config file with the Port directive.
-
Use sftp instead of scp do to scp security flaws.
sftp
- Secure remote file transfer program
ssh
- Secure remote login command
ssh-copy-id
- Copies public key to remote systems
ssh-keygen
- Generates and manages private and public key pairs
Server Configuration File
/etc/ssh/sshd_config
/var/log/secure
- log file is used to capture authentication messages.
View directives listed in /etc/ssh/sshd_config:
[root@server30 tmp]# cat /etc/ssh/sshd_config
Port
- Port number to listen on. Default is 22.
Protocol
- Default protocol version to use.
ListenAddress
- Sets the local addresses the sshd service should listen on.
- Default is to listen on all local addresses.
SyslogFacility
- Defines the facility code to be used when logging messages to the /var/log/secure file. This is based on the configuration in the /etc/rsyslog.conf file. Default is AUTHPRIV.
LogLevel
Identifies the level of criticality for the messages to be logged. Default is INFO.
PermitRootLogin
Allows or disallows the root user to log in directly to the system. Default is yes.
PubKeyAuthentication
Enables or disables public key-based authentication. Default is yes.
AuthorizedKeysFile
Sets the name and location of the file containing a user’s authorized keys. Default is ~/.ssh/authorized_keys.
PasswordAuthentication
Enables or disables local password authentication. Default is yes.
PermitEmptyPasswords
Allows or disallows the use of null passwords. Default is no.
ChallengeResponseAuthentication
Enables or disables challenge-response authentication mechanism. Default is yes.
UsePAM
Enables or disables user authentication via PAM. If enabled, only root will be able to run the sshd daemon. Default is yes.
X11Forwarding
Allows or disallows remote access to graphical applications. Default is yes.
Client Configuration File
/etc/ssh/ssh_config
- Local configuration file that directs how the client should behave. This file, , is located in the /etc/ssh directory.
- Directives preset in this file that affect all outbound ssh communication.
View the default directive settings:
[root@server30 tmp]# cat /etc/ssh/sshd_config
Host
- Container that declares directives applicable to one host, a group of hosts, or all hosts.
- Ends when another occurrence of Host or Match is encountered. Default is *, (all hosts)
ForwardX11
- Enables or disables automatic redirection of X11 traffic over SSH connections.
- Default is no.
PasswordAuthentication
- Allows or disallows password authentication.
- Default is yes.
StrictHostKeyChecking
-
Whether to add host keys (host fingerprints) to ~/.ssh/known_hosts when accessing a host for the first time
-
What to do when the keys of a previously accessed host mismatch with what is stored in ~/.ssh/known_hosts.
-
no:
- Adds new host keys and ignores changes to existing keys.
-
yes:
- Adds new host keys and disallows connections to hosts with non-matching keys.
-
accept-new:
- Adds new host keys and disallows connections to hosts with non-matching keys.
-
ask (default):
- Prompts whether to add new host keys and disallows connections to hosts with non-matching keys.
IdentityFile
- Defines the name and location of a file that stores a user’s private key for their identity validation.
- Defaults are:
- id_rsa, id_dsa, and id_ecdsa based on the type of algorithm used.
- Corresponding public key files with .pub extension are also stored at the same directory location.
Port
Sets the port number to listen on. Default is 22.
Protocol
Specifies the default protocol version to use
~/.ssh/
- does not exist by default
- created when:
- a user executes the
ssh-keygen command for the first time to generate a key pair
- A user connects to a remote ssh server and accepts its host key for the first time.
- The client stores the server’s host key locally in a file called known_hosts along with its hostname or IP address.
- On subsequent access attempts, the client will use this information to verify the server’s authenticity.
System Access and File Transfer
Lab: Access RHEL System from Another RHEL System
- issue the ssh command as user1 on server10 to log in to server20.
- Run appropriate commands on server20 for validation.
- Log off and return to the originating system.
1. Issue the ssh command as user1 on server10:
[user1@server30 tmp]$ ssh server20
2. Issue the basic Linux commands whoami, hostname, and pwd to confirm
that you are logged in as user1 on server20 and placed in the correct
home directory:
[user1@server40 ~]$ whoami
user1
[user1@server40 ~]$ hostname
server40
[user1@server40 ~]$ pwd
/home/user1
3. Run the logout or the exit command or simply press the key combination Ctrl+d to log off server20 and return to server10:
[user1@server40 ~]$ exit
logout
Connection to server40 closed.
If you wish to log on as a different user such as user2 (assuming user2
exists on the target server server20), you may run the ssh command in
either of the following ways:
[user1@server30 tmp]$ ssh -l user2 server40
[user1@server30 tmp]$ ssh user2@server40
Lab: Generate, Distribute, and Use SSH Keys
- Generate a passwordless ssh key pair using RSA algorithm for user1 on server10.
- display the private and public file contents.
- Distribute the public key to server20 and attempt to log on to server20 from server10.
- Show the log file message for the login attempt.
1. Log on to server10 as user1.
2. Generate RSA keys without a password (-N) and without detailed
output (-q). Press Enter when prompted to provide the filename to store
the private key.
[user1@server30 tmp]$ ssh-keygen -N "" -q
Enter file in which to save the key (/home/user1/.ssh/id_rsa):
View the private key:
[user1@server30 tmp]$ cat ~/.ssh/id_rsa
View the public key:
[user1@server30 tmp]$ cat ~/.ssh/id_rsa.pub
3. Copy the public key file to server20 under /home/user1/.ssh
directory.
user1@server30 tmp]$ ssh-copy-id server40
/usr/bin/ssh-copy-id: INFO: Source of key(s) to be installed: "/home/user1/.ssh/id_rsa.pub"
/usr/bin/ssh-copy-id: INFO: attempting to log in with the new key(s), to filter out any that are already installed
/usr/bin/ssh-copy-id: INFO: 1 key(s) remain to be installed -- if you are prompted now it is to install the new keys
user1@server40's password:
Number of key(s) added: 1
Now try logging into the machine, with: "ssh 'server40'"
and check to make sure that only the key(s) you wanted were added.
- This command also creates or updates the known_hosts
file on server10 and stores the fingerprints for server20 in it.
[user1@server30 tmp]$ cat ~/.ssh/known_hosts
4. On server10, run the ssh command as user1 to connect to server20.
You will not be prompted for a password because there was none assigned
to the ssh keys.
[user1@server30 tmp]$ ssh server40
Register this system with Red Hat Insights: insights-client --register
Create an account or view all your systems at https://red.ht/insights-dashboard
Last login: Sun Jul 21 01:20:17 2024 from 192.168.0.30
View this login attempt in the /var/log/secure file on server20:
[user1@server40 ~]$ sudo tail /var/log/secure
Executing Commands Remotely Using ssh
- Can use
ssh command to run programs without remoting in:
Execute the hostname command on server20:
[user1@server30 tmp]$ ssh server40 hostname
server40
Run the nmcli command on server20 to show (s) active network connections(c):
[user1@server30 tmp]$ ssh server40 nmcli c s
NAME UUID TYPE DEVICE
enp0s3 1c391bb6-20a3-4eb4-b717-1e458877dbe4 ethernet enp0s3
lo 175f8a4c-1907-4006-b838-eb43438d847b loopback lo
sftp` command
- Interactive file transfer tool.
On server10, to connect to server20:
[user1@server30 tmp]$ sftp server40
Connected to server40.
sftp>
Type ? at the prompt to list available commands along with a short description:
[user1@server30 tmp]$ sftp server40
Connected to server40.
sftp> ?
Available commands:
bye Quit sftp
cd path Change remote directory to 'path'
chgrp [-h] grp path Change group of file 'path' to 'grp'
chmod [-h] mode path Change permissions of file 'path' to 'mode'
chown [-h] own path Change owner of file 'path' to 'own'
df [-hi] [path] Display statistics for current directory or
filesystem containing 'path'
exit Quit sftp
get [-afpR] remote [local] Download file
help Display this help text
lcd path Change local directory to 'path'
lls [ls-options [path]] Display local directory listing
lmkdir path Create local directory
ln [-s] oldpath newpath Link remote file (-s for symlink)
lpwd Print local working directory
ls [-1afhlnrSt] [path] Display remote directory listing
lumask umask Set local umask to 'umask'
mkdir path Create remote directory
progress Toggle display of progress meter
put [-afpR] local [remote] Upload file
pwd Display remote working directory
quit Quit sftp
reget [-fpR] remote [local] Resume download file
rename oldpath newpath Rename remote file
reput [-fpR] local [remote] Resume upload file
rm path Delete remote file
rmdir path Remove remote directory
symlink oldpath newpath Symlink remote file
version Show SFTP version
!command Execute 'command' in local shell
! Escape to local shell
? Synonym for help
Example:
sftp> ls
sftp> mkdir /tmp/dir10-20
sftp> cd /tmp/dir10-20
sftp> pwd
Remote working directory: /tmp/dir10-20
sftp> put /etc/group
Uploading /etc/group to /tmp/dir10-20/group
group 100% 1118 1.0MB/s 00:00
sftp> ls -l
-rw-r--r-- 1 user1 user1 1118 Jul 21 01:41 group
sftp> cd ..
sftp> pwd
Remote working directory: /tmp
sftp> cd /home/user1
sftp> get /usr/bin/gzip
Fetching /usr/bin/gzip to gzip
gzip 100% 90KB 23.0MB/s 00:00
sftp>
lcd, lls, lpwd, and lmkdir are run on the source server.- Other commands are also available. (See man pages)
Type quit at the sftp> prompt to exit the program when you’re done:
sftp> quit
[user1@server30 tmp]$
Secure Shell Service DIY Labs
Lab: Establish Key-Based Authentication
- Create user account user20 on both systems and assign a password.
[root@server40 ~]# adduser user20
[root@server40 ~]# passwd user20
Changing password for user user20.
New password:
BAD PASSWORD: The password is shorter than 8 characters
Retype new password:
passwd: all authentication tokens updated successfully.
- As user20 on server40, generate a private/public key pair without a passphrase using the ssh-keygen command.
[user20@server40 ~]# ssh-keygen -N "" -q
Enter file in which to save the key (/root/.ssh/id_rsa):
- Distribute the public key to server30 with the ssh-copy-id command.
[user20@server40 ~]# ssh-copy-id server30
- Log on to server30 as user20 and accept the fingerprints for the server if presented.
[user20@server40 ~]# ssh server30
Activate the web console with: systemctl enable --now cockpit.socket
Register this system with Red Hat Insights: insights-client --register
Create an account or view all your systems at https://red.ht/insights-dashboard
Last login: Fri Jul 19 14:09:22 2024
[user20@server30 ~]#
- On subsequent log in attempts from server40 to server30, user20 should not be prompted for their password.
Lab: Test the Effect of PermitRootLogin Directive
-
As user1 with sudo on server30, edit the /etc/ssh/sshd_config file and change the value of the directive PermitRootLogin to “no”.
[user1@server30 ~]$ sudo vim /etc/ssh/sshd_config
-
Use the systemctl command to activate the change.
[user1@server30 ~]$ systemctl restart sshd
==== AUTHENTICATING FOR org.freedesktop.systemd1.manage-units ====
Authentication is required to restart 'sshd.service'.
Authenticating as: root
Password:
==== AUTHENTICATION COMPLETE ====
- As root on server40, run ssh server40 (or use its IP). You’ll get permission denied message.
(this didn’t work, I think it’s because I configured passwordless authentication on here)
- Reverse the change on server40 and retry ssh server40. You should be able to log in.