Subsections of Tools
Calibre Web with Docker and NGINX
I couldn’t find a guide on how to set up Calibre web step-by-step as a Docker container. Especially not one that used Nginx as a reverse proxy.
The good news is that it is really fast and simple. You’ll need a few tools to get this done:
- A server with a public IP address
- A DNS Provider (I use CloudFlare)
- Docker
- Nginx
- A Calibre Library
- Certbot
- Rsync
First, sync your local Calibre library to a folder on your server:
rsync -avuP your-library-dir root@example.org:/opt/calibre/
Install Docker
sudo apt update
sudo apt install docker.io
Create a Docker network
sudo docker network create calibre_network
Create a Docker volume to store Calibre Web data
sudo docker volume create calibre_data
Pull the Calibre Web Docker image
sudo docker pull linuxserver/calibre-web
Start the Calibre Web Docker container
sudo docker run -d \
--name=calibre-web \
--restart=unless-stopped \
-p 8083:8083 \
-e PUID=$(id -u) \
-e PGID=$(id -g) \
-v calibre_data:/config \
-v /opt/calibre/Calibre:/books \
--network calibre_network \
linuxserver/calibre-web
Create the site file
sudo vim /etc/nginx/sites-available/calibre-web
Add the following to the file
server { listen 80;
server_name example.com; # Replace with your domain or server IP location /
{
proxy_pass http://localhost:8083;
proxy_set_header Host $host;
proxy_set_header X-Real-IP $remote_addr;
proxy_set_header X-Forwarded-For $proxy_add_x_forwarded_for;
proxy_set_header X-Forwarded-Proto $scheme;
} }
Enable the site
sudo ln -s /etc/nginx/sites-available/calibre-web /etc/nginx/sites-enabled/
Restart Nginx
sudo service nginx restart
DNS CNAME Record
Make sure to set up a cname record for your site with your DNS provider such as: calibre.example.com
SSL Certificate
Install ssl cert using certbot
Site Setup
Head to the site at https://calibre.example.com and log in with default credentials:
username: admin
password: admin123
Select /books as the library directory. Go into admin settings and change your password.
Adding new books
Whenever you add new books to your server via the rsync command from earlier, you will need to restart the Calibre Web Docker container. Then restart Nginx.
sudo docker restart calibre-web
systemctl restart nginx
That’s all there is to it. Feel free to reach out if you have issues.
How to Build a website With Hugo
Word Press is great, but it is probably a lot more bloated then you need for a personal website. Enter Hugo, it has less server capacity and storage needs than Word Press. Hugo is a static site generator than takes markdown files and converts them to html.
Hosting your own website is also a lot cheaper than having a provider like Bluehost do it for you. Instead of $15 per month, I am currently paying $10 per year.
This guide will walk through building a website step-by-step.
- Setting up a Virtual Private Server (VPS)
- Registering a domain name
- Pointing the domain to your server
- Setting up hugo on your local PC
- Syncing your Hugo generate site with your server
- Using nginx to serve your site
- Enable http over SSL
Setting up a Virtual Private Server (VPS)
I use Vultr as my VPS. When I signed up they had a $250 credit towards a new account. If you select the cheapest server (you shouldn’t need anything else for a basic site) that comes out to about $6 a month. Of course the $250 credit goes towards that which equates to around 41 months free.
Head to vultr.com. Create and account and Select the Cloud Compute option.
Under CPU & Storage Technology, select “Regular Performance”. Then under “Server Location, select the server closest to you. Or closest to where you think your main audience will be.
Under Server image, select the OS you are most comfortable with. This guide uses Debian.
Under Server Size, slect the 10GB SSD. Do not select the “IPv6 ONLY” option. Leave the other options as default and enter your server hostname.
On the products page, click your new server. You can find your server credentials and IPv4 address here. You will need these to log in to your server.
Log into your sever via ssh to test. From a Linux terminal run:
ssh username@serveripaddress
Then, enter your password when prompted.
Registering a Domain Name
I got my domain perfectdarkmode.com from Cloudflare.com for about $10 per year. You can check to see available domains there. You can also check https://www.namecheckr.com/ to see iof that name is available on various social media sites.
In CloudFlare, just click “add a site” and pick a domain that works for you. Next, you will need your server address from earlier.
Under domain Registration, click “Manage Domains”, click “manage” on your domain. One the sidebar to the right, there is a qucik actions menu. Click “update DNS configuration”.
Click “Add record”. Type is an “A” record. Enter the name and the ip address that you used earlier for your server. Uncheck “Proxy Status” and save.
You can check to see if your DNS has updated on various DNS severs at https://dnschecker.org/. Once those are up to date (after a couple minutes) you should be able to ping your new domain.
$ ping perfectdarkmode.com
PING perfectdarkmode.com (104.238.140.131) 56(84) bytes of data.
64 bytes from 104.238.140.131.vultrusercontent.com (104.238.140.131): icmp_seq=1 ttl=53 time=33.2 ms
64 bytes from 104.238.140.131.vultrusercontent.com (104.238.140.131): icmp_seq=2 ttl=53 time=28.2 ms
64 bytes from 104.238.140.131.vultrusercontent.com (104.238.140.131): icmp_seq=3 ttl=53 time=31.0 ms
Now, you can use the same ssh command to ssh into your vultr serverusing your domain name.
Setting up hugo on your local PC
Hugo is a popular open-source static site generator. It allows you to take markdown files, and builds them into and html website. To start go to https://gohugo.io/installation/ and download Hugo on your local computer. (I will show you how to upload the site to your server later.)
Pick a theme
The theme I use is here https://themes.gohugo.io/themes/hugo-theme-hello-friend-ng/
You can browse your own themes as well. Just make sure to follow the installation instructions. Let’s create a new Hugo site. Change into the directory where you want your site to be located in. Mine rests in ~/Documents/.
Create your new Hugo site.
This will make a new folder with your site name in the ~/Documents directory. This folder will have a few directories and a config file in it.
archetypes config.toml content data layouts public resources static themes
For this tutorial, we will be working with the config.toml file and the content, public, static, and themes. Next, load the theme into your site directory. For the Hello Friend NG theme:
git clone https://github.com/rhazdon/hugo-theme-hello-friend-ng.git themes/hello-friend-ng
Now we will load the example site into our working site. Say yes to overwrite.
cp -a themes/hello-friend-ng/exampleSite/* .
The top of your new config.toml site now contains:
baseURL = "https://example.com"
title   = "Hello Friend NG"
languageCode = "en-us"
theme = "hello-friend-ng"
Replace your baseURL with your site name and give your site a title. Set the enableGlobalLanguageMenu option to false if you want to remove the language swithcer option at the top. I also set enableThemeToggle to true so users could set the theme to dark or light.
You can also fill in the links to your social handles. Comment out any lines you don’t want with a “#” like so:
[params.social](params.social)
    name = "twitter"
    url  = "https://twitter.com/"

  [params.social](params.social)
    name = "email"
    url  = "mailto:nobody@example.com"

  [params.social](params.social)
    name = "github"
    url  = "https://github.com/"

  [params.social](params.social)
    name = "linkedin"
    url  = "https://www.linkedin.com/"

 # [params.social](params.social)
   # name = "stackoverflow"
   # url  = "https://www.stackoverflow.com/"
You may also want to edit the footer text to your liking. I commented out the second line that comes with the example site:
[params.footer]
trademark = true
rss = true
copyright = true
author = true
topText = []
bottomText = [
# "Powered by <a href=\"http://gohugo.io\">Hugo</a>",
# "Made with ❤ by <a href=\"https://github.com/rhazdon\">Djordje Atlialp</a>"
]
Now, move the contents of the example contents folder over to your site’s contents folder (giggidy):
cp -r ~/Documents/hugo/themes/hello-friend-ng/exampleSite/content/* ~/Documents/hugo/content/
Let’s clean up a little bit. Cd into ~/Documents/hugo/content/posts. Rename the file to the name of your first post. Also, delete all of the other files here:
cd ~/Documents/hugo/contents/posts
mv goisforlovers.md newpostnamehere.md
find . ! -name 'newpostnamehere.md' -type f -exec rm -f {} +
Open the new post file and delete everything after this:
+++
title = "Building a Minimalist Website with Hugo"
description = ""
type = ["posts","post"]
tags = [
    "hugo",
    "nginx",
    "ssl",
    "http",
    "vultr",
]
date = "2023-03-26"
categories = [
    "tools",
    "linux",
]
series = ["tools"]
[ author ]
  name = "David Thomas"
+++
You will need to fill out this header information for each new post you make. This will allow you to give your site a title, tags, date, categories, etc. This is what is called a TOML header. TOML stands for Tom’s Obvious Minimal Language. Which is a minimal language used for parsing data. Hugo uses TOML to fill out your site.
Save your doc and exit. Next, there should be an about.md page now in your ~/Documents/hugo/Contents folder. Edit this to edit your about page for your site. You can use this Markdown Guide if you need help learning markdown language. https://www.markdownguide.org/
Serve your website locally
Let’s test the website by serving it locally and accessing it at localhost:1313 in your web browser. Enter the command:
Hugo will now be generating your website. You can view it by entering localhost:1313 in your webbrowser.
You can use this to test new changes before uploading them to your server. When you svae a post or page file such as your about page, hugo will automatically update the changes to this local page if the local server is running.
Press “Ctrl + c” to stop this local server. This is only for testing and does not need to be running to make your site work.
Build out your public directory
Okay, your website is working locally, how do we get it to your server to host it online? We are almost there. First, we will use the hugo command to build your website in the public folder. Then, we will make a copy of our public folder on our server using rsync. I will also show you how to create an alias so you do not have to remember the rsync command every time.
From your hugo site folder run:
Next, we will put your public hugo folder into /var/www/ on your server. Here is how to do that with an alias. Open ~/.bashrc.
Add the following line to the end of the file, making sure to replace the username and server name:
# My custom aliases
alias rsyncp='rsync -rtvzP ~/Documents/hugo/public/ username@myserver.com:/var/www/public'
Save and exit the file. Then tell bash to update it’s source config file.
Now your can run the command by just using the new alias any time. Your will need to do this every time you update your site locally.
Set up nginx on your server
Install nginx
apt update
apt upgrade
apt install nginx
create an nginx config file in /etc/nginx/sites-available/
vim /etc/nginx/sites-available/public
You will need to add the following to the file, update the options, then save and exit:
server {
        listen 80 ;
        listen [::]:80 ;
        server_name example.org ;
        root /var/www/mysite ;
        index index.html index.htm index.nginx-debian.html ;
        location / {
                try_files $uri $uri/ =404 ;
        }
}
Enter your domain in “server_name” line in place of “example.org”. Also, point “root” to your new site file from earlier. (/var/www/public). Then save and exit.
Link this site-available config file to sites-enabled to enable it. Then restart nginx:
ln -s /etc/nginx/sites-available/public /etc/nginx/sites-enabled
systemctl reload nginx
Access Permissions
We will need to make sure nginx has permissions to your site folder so that it can access them to serve your site. Run:
chmod 777 /var/www/public
Firewall Permissions
You will need to make sure your firewall allows port 80 and 443. Vultr installs the ufw program by default. But your can install it if you used a different provider. Beware, enabling a firewalll could block you from accessing your vm, so do your research before tinkering outside of these instructions.
ufw allow 80
ufw allow 443
Nginx Security
We will want to hide your nginx version number on error pages. This will make your site a bit harder for hackers to find exploits. Open your Nginx config file at /etc/nginx/nginx.conf and remove the “#” before “server_tokens off;”
Enter your domain into your browser. Congrats! You now have a running website!
Use Certbot to enable HTTPS
Right now, our site uses the unencrypted http. We want it to use the encrypted version HTTPS (HTTP over SSL). This will increase user privacy, hide usernames and passwords used on your site, and you get the lock symbol by your URL name instead of “!not secure”.
Install Certbot and It’s Nginx Module
apt install python3-certbot-nginx
Run certbot
Fill out the information, certbot asks for your emaill so it can send you a reminder when the certs need to be renewed every 3 months. You do not need to consent to giving your email to the EFF. Press 1 to select your domain. And 2 too redirect all connections to HTTPS.
Certbot will build out some information in your site’s config file. Refresh your site. You should see your new fancy lock icon.
Set Up a Cronjob to automatically Renew certbot certs
Select a text editor and add this line to the end of the file. Then save and exit the file:
0 0 1 * * certbot --nginx renew
You now have a running website. Just make new posts locally, the run “hugo” to rebuild the site. And use the rsync alias to update the folder on your server. I will soon be making tutorials on making an email address for your domain, such as david@perfectdarkmode.com on my site. I will also be adding a comments section, RSS feed, email subscription, sidebar, and more.
Feel free to reach out with any questions if you get stuck. This is meant to be an all encompassing guide. So I want it to work.
Optimizing images
Create assets folder in main directory.
Create images folder in /assets
Access image using hugo pipes
{{ $image := resources.Get "images/test-image.jpg" }}
<img src="{{ ( $image.Resize "500x" ).RelPermalink }}" />
https://gohugo.io/content-management/image-processing/
How to Process Bookfusion Highlights with Vim
Here are my highlights pulled up in Vim:
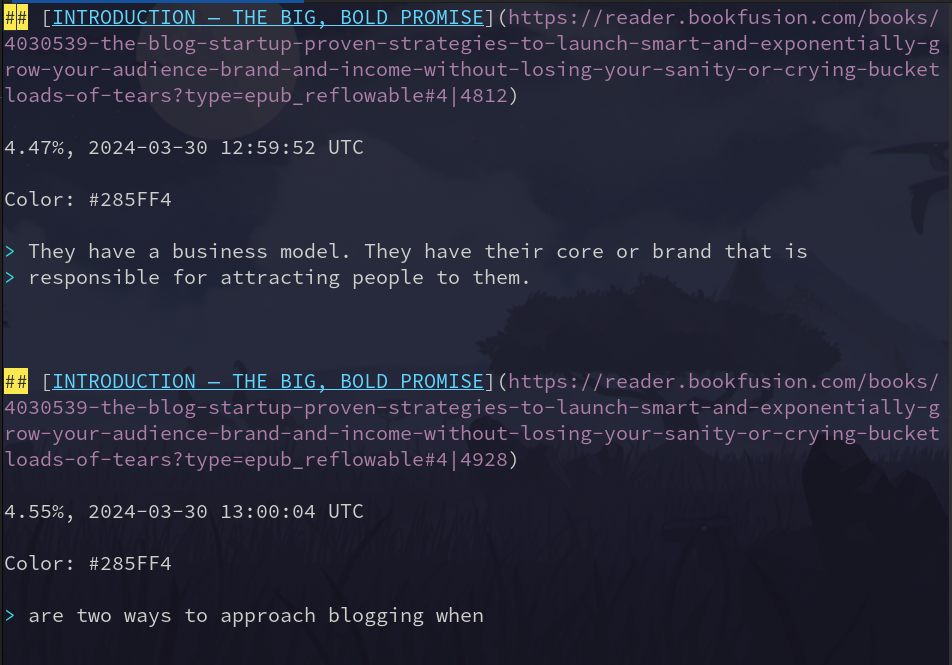
As you can see, Bookfusion gives you a lot of extra information when you export highlights. First, let’s get rid of the lines that begin with ##
Enter command mode in Vim by pressing esc. Then type :g/^##/d and press enter.
Much better.
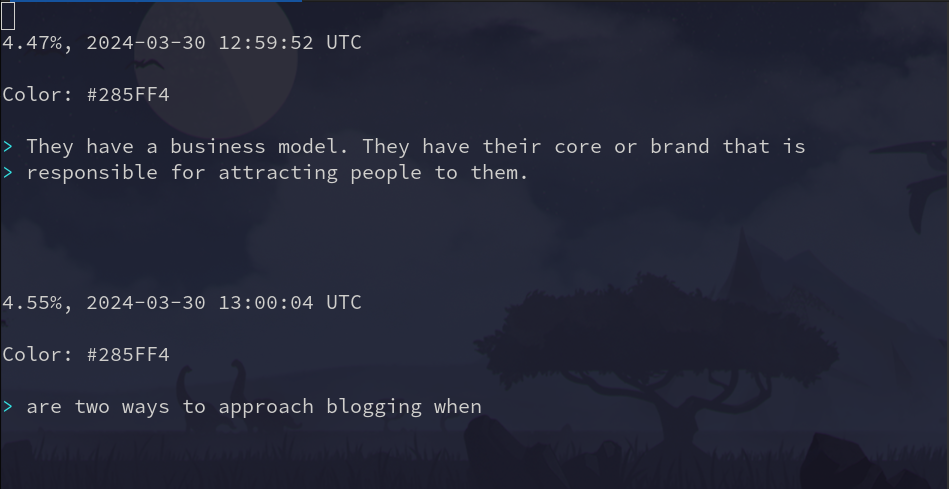
Now let’s get rid of the color references:`
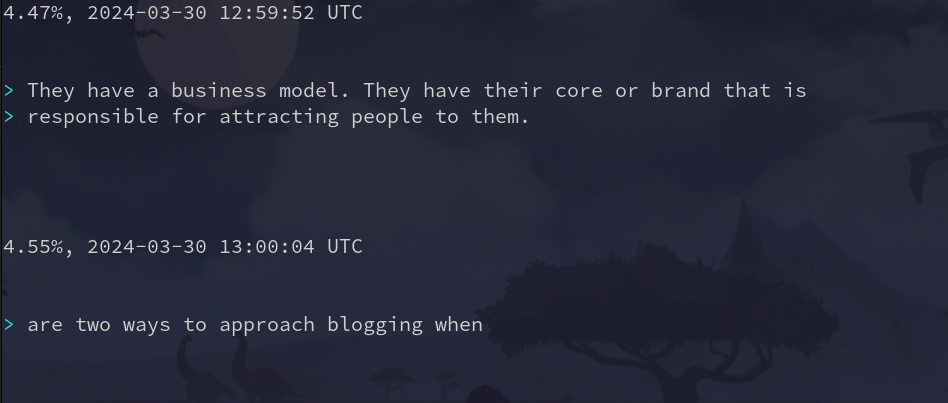
To get rid of the timestamps, we must find a different commonality between the lines. In this case, each line ends with “UTC”. Let’s match that:
Where $ matches the end of the line.
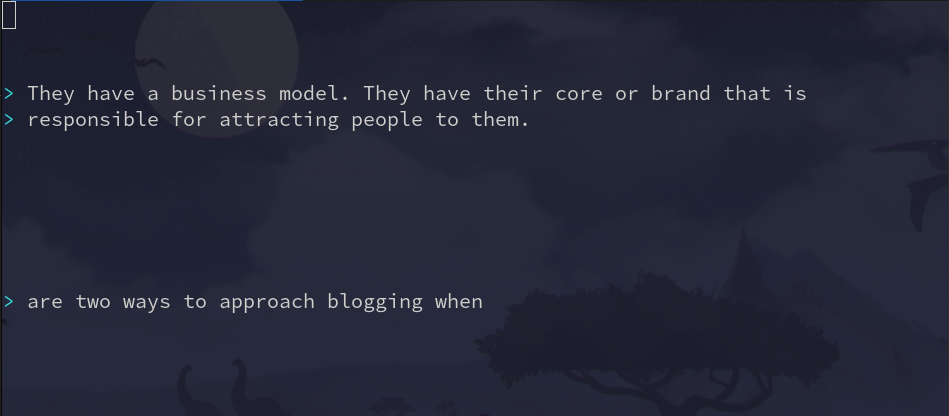
Now, I want to get rid of the > on each line:
%s/> //g
Almost there, you’ll notice there are 6 empty lines in between each highlight. Let’s shrink those down into one:

The command above matches newline character n 3 or more times and replaces them with two newline characters /r/r.
As we scroll down, I see a few weird artifacts from the book conversion to markdown.
Now, I want to get rid of any carrot brackets in the file. Let’s use the substitute command again here:
Depending on your book and formatting. You may have some other stuff to edit.
How to Set Up Hugo Relearn Theme
Hugo Setup
Adding a module as a theme
Make sure Go is installed
Create a new site
hugo new site sitename
cd sitename
Initialize your site as a module
Confirm
Add the module as a dependency using it’s git link
hugo mod get github.com/McShelby/hugo-theme-relearn
Confirm
add the theme to config.toml
# add this line to config.toml and save
theme = ["github.com/McShelby/hugo-theme-relearn"]
Confirm by viewing site
hugo serve
# visit browser at http://localhost:1313/ to view site
Adding a new “chapter” page
hugo new --kind chapter Chapter/_index.md
Add a home page
hugo new --kind home _index.md
Add a default page
hugo new <chapter>/<name>/_index.md
or
hugo new <chapter>/<name>.md
You will need to change some options in _index.md
+++
# is this a "chaper"?
chapter=true
archetype = "chapter"
# page title name
title = "Linux"
# The "chapter" number
weight = 1
+++
Adding a “content page” under a category
hugo new basics/first-content.md
Create a sub directory:
hugo new basics/second-content/_index.md
- change draft = true to draft = false in the content page to make a page render.
Global site parameters
Add these to your config.toml file and edit as you please
[params]
  # This controls whether submenus will be expanded (true), or collapsed (false) in the
  # menu; if no setting is given, the first menu level is set to false, all others to true;
  # this can be overridden in the pages frontmatter
  alwaysopen = true
  # Prefix URL to edit current page. Will display an "Edit" button on top right hand corner of every page.
  # Useful to give opportunity to people to create merge request for your doc.
  # See the config.toml file from this documentation site to have an example.
  editURL = ""
  # Author of the site, will be used in meta information
  author = ""
  # Description of the site, will be used in meta information
  description = ""
  # Shows a checkmark for visited pages on the menu
  showVisitedLinks = false
  # Disable search function. It will hide search bar
  disableSearch = false
  # Disable search in hidden pages, otherwise they will be shown in search box
  disableSearchHiddenPages = false
  # Disables hidden pages from showing up in the sitemap and on Google (et all), otherwise they may be indexed by search engines
  disableSeoHiddenPages = false
  # Disables hidden pages from showing up on the tags page although the tag term will be displayed even if all pages are hidden
  disableTagHiddenPages = false
  # Javascript and CSS cache are automatically busted when new version of site is generated.
  # Set this to true to disable this behavior (some proxies don't handle well this optimization)
  disableAssetsBusting = false
  # Set this to true if you want to disable generation for generator version meta tags of hugo and the theme;
  # don't forget to also set Hugo's disableHugoGeneratorInject=true, otherwise it will generate a meta tag into your home page
  disableGeneratorVersion = false
  # Set this to true to disable copy-to-clipboard button for inline code.
  disableInlineCopyToClipBoard = false
  # A title for shortcuts in menu is set by default. Set this to true to disable it.
  disableShortcutsTitle = false
  # If set to false, a Home button will appear below the search bar on the menu.
  # It is redirecting to the landing page of the current language if specified. (Default is "/")
  disableLandingPageButton = true
  # When using mulitlingual website, disable the switch language button.
  disableLanguageSwitchingButton = false
  # Hide breadcrumbs in the header and only show the current page title
  disableBreadcrumb = true
  # If set to true, hide table of contents menu in the header of all pages
  disableToc = false
  # If set to false, load the MathJax module on every page regardless if a MathJax shortcode is present
  disableMathJax = false
  # Specifies the remote location of the MathJax js
  customMathJaxURL = "https://cdn.jsdelivr.net/npm/mathjax@3/es5/tex-mml-chtml.js"
  # Initialization parameter for MathJax, see MathJax documentation
  mathJaxInitialize = "{}"
  # If set to false, load the Mermaid module on every page regardless if a Mermaid shortcode or Mermaid codefence is present
  disableMermaid = false
  # Specifies the remote location of the Mermaid js
  customMermaidURL = "https://unpkg.com/mermaid/dist/mermaid.min.js"
  # Initialization parameter for Mermaid, see Mermaid documentation
  mermaidInitialize = "{ \"theme\": \"default\" }"
  # If set to false, load the Swagger module on every page regardless if a Swagger shortcode is present
  disableSwagger = false
  # Specifies the remote location of the RapiDoc js
  customSwaggerURL = "https://unpkg.com/rapidoc/dist/rapidoc-min.js"
  # Initialization parameter for Swagger, see RapiDoc documentation
  swaggerInitialize = "{ \"theme\": \"light\" }"
  # Hide Next and Previous page buttons normally displayed full height beside content
  disableNextPrev = true
  # Order sections in menu by "weight" or "title". Default to "weight";
  # this can be overridden in the pages frontmatter
  ordersectionsby = "weight"
  # Change default color scheme with a variant one. Eg. can be "auto", "red", "blue", "green" or an array like [ "blue", "green" ].
  themeVariant = "auto"
  # Change the title separator. Default to "::".
  titleSeparator = "-"
  # If set to true, the menu in the sidebar will be displayed in a collapsible tree view. Although the functionality works with old browsers (IE11), the display of the expander icons is limited to modern browsers
  collapsibleMenu = false
  # If a single page can contain content in multiple languages, add those here
  additionalContentLanguage = [ "en" ]
  # If set to true, no index.html will be appended to prettyURLs; this will cause pages not
  # to be servable from the file system
  disableExplicitIndexURLs = false
  # For external links you can define how they are opened in your browser; this setting will only be applied to the content area but not the shortcut menu
  externalLinkTarget = "_blank"
Syntax highlighting
Supports a variety of [Code Syntaxes]
To select the syntax, wrap the code in backticks and place the syntax by the first set of backticks.
Tags are displayed in order at the top of the page. They will also display using the menu shortcut made further down.
Add tags to a page:
+++
tags = ["tutorial", "theme"]
title = "Theme tutorial"
weight = 15
+++
Choose a default color theme
Add to config.toml with the chosen theme for the “style” option:
[markup]
  [markup.highlight]
    # if `guessSyntax = true`, there will be no unstyled code even if no language
    # was given BUT Mermaid and Math codefences will not work anymore! So this is a
    # mandatory setting for your site if you want to use Mermaid or Math codefences
    guessSyntax = false

    # choose a color theme or create your own
    style = "base16-snazzy"
Add Print option and search output page.
add the following to config.toml
[outputs]
  home = ["HTML", "RSS", "PRINT", "SEARCH"]
  section = ["HTML", "RSS", "PRINT"]
  page = ["HTML", "RSS", "PRINT"]
Customization
This theme has a bunch of editable customizations called partials. You can overwrite the default partials by putting new ones in /layouts/partials/.
to customize “partials”, create a “partials” directory under site/layouts/
cd layouts
mkdir partials
cd partials
You can find all of the partials available for this theme here
Change the site logo using the logo.html partial
Create logo.html in /layouts/partials
Add the content you want in html. This can be an img html tag referencing an image in the static folder. Or even basic text. Here is the basic syntax of an html page, adding “Perfect Dark Mode” as the text to display:
<!DOCTYPE html>
<html>
<body>

<h3>Perfect Dark Mode</h3>

</body>
</html>
Add a favicon to your site
- This is pasted from the relearn site. Add Favicon and edit *
If your favicon is a SVG, PNG or ICO, just drop off your image in your local
static/images/ folder and name it favicon.svg, favicon.png or favicon.ico respectively.
If no favicon file is found, the theme will lookup the alternative filename logo in the same location and will repeat the search for the list of supported file types.
If you need to change this default behavior, create a new file in layouts/partials/ named favicon.html. Then write something like this:
<link rel="icon" href="/images/favicon.bmp" type="image/bmp">
Changing theme colors
In your config.toml file edit the themeVariant option under [params]
themeVariant = "relearn-dark"
There are some options to choose from or you can custom make your theme colors by using this stylesheet generator
Menu Shortcuts
Add a [[menu.shortcuts]] entry for each link
[[menu.shortcuts]]
name = "<i class='fab fa-fw fa-github'></i> GitHub repo"
identifier = "ds"
url = "https://github.com/McShelby/hugo-theme-relearn"
weight = 10

[[menu.shortcuts]]
name = "<i class='fas fa-fw fa-camera'></i> Showcases"
url = "more/showcase/"
weight = 11

[[menu.shortcuts]]
name = "<i class='fas fa-fw fa-bookmark'></i> Hugo Documentation"
identifier = "hugodoc"
url = "https://gohugo.io/"
weight = 20

[[menu.shortcuts]]
name = "<i class='fas fa-fw fa-bullhorn'></i> Credits"
url = "more/credits/"
weight = 30

[[menu.shortcuts]]
name = "<i class='fas fa-fw fa-tags'></i> Tags"
url = "tags/"
weight = 40
Extras
Menu button arrows. (Add to page frontmatter)
menuPre = "<i class='fa-fw fas fa-caret-right'></i> "
Nextcloud on RHEL Based Systems
I’m going to show you how to set up your own, self-hosted Nextcloud server using Alma Linux 9 and Apache.
What is Nextcloud?
Nextcloud is so many things. It offers so many features and options, it deserves a bulleted list:
- Free and open source
- Cloud storage and syncing
- Email client
- Custom browser dashboard with widgets
- Office suite
- RSS newsfeed
- Project organization (deck)
- Notebook
- Calender
- Task manager
- Connect to decentralized social media (like Mastodon)
- Replacement for all of google’s services
- Create web forms or surveys
It is also free and open source. This mean the source code is available to all. And hosting yourself means you can guarantee that your data isn’t being shared.
As you can see. Nextcloud is feature packed and offers an all in one solution for many needs. The set up is fairly simple.
You will need:
- Domain hosted through CloudFlare or other hosting.
- Server with Alma Linux 9 with a dedicated public ip address.
Nextcloud dependencies:
- PHP 8.3
- Apache
- sql database (This tutorial uses MariaDB)
Official docs: https://docs.nextcloud.com/server/latest/admin_manual/installation/source_installation.html
Server Specs
Hard drives:
120g main
500g data
250g backup
OS: Alma 9
CPU: 4 sockets 8 cores
RAM: 32768
ip 10.0.10.56/24
root: { password }
davidt: { password }
Storage setup
mkdir /var/www/nextcloud/ -p
mkdir /home/databkup
parted /dev/sdb mklabel gpt
parted /dev/sdb mkpart primary 0% 100%
parted /dev/sdc mklabel gpt
parted /dev/sdc mkpart primary 0% 100%
mkfs.xfs /dev/sdb1
mkfs.xfs /dev/sdc1
lsblk
blkid /dev/sdb1 >> /etc/fstab
blkid /dev/sdc1 >> /etc/fstab
vim /etc/fstab
mount -a
[root@dt-lab2 ~]# lsblk
NAME               MAJ:MIN RM  SIZE RO TYPE MOUNTPOINTS
sda                  8:0    0  120G  0 disk
├─sda1               8:1    0    1G  0 part /boot
└─sda2               8:2    0  119G  0 part
  ├─almalinux-root 253:0    0   70G  0 lvm  /
  ├─almalinux-swap 253:1    0   12G  0 lvm  [SWAP]
  └─almalinux-home 253:2    0   37G  0 lvm  /home
sdb                  8:16   0  500G  0 disk
└─sdb1               8:17   0  500G  0 part /var/www/nextcloud
sdc                  8:32   0  250G  0 disk
└─sdc1               8:33   0  250G  0 part /home/databkup
Setting up dependencies
Install latest supported PHP
I used this guide to help get a supported php version. As php 2 installed from dnf repos by default:
https://orcacore.com/php83-installation-almalinux9-rockylinux9/
Make sure dnf is up to date:
sudo dnf update -y
sudo dnf upgrade -y
Set up the epel repository:
sudo dnf install epel-release -y
Set up remi to manage php modules:
sudo dnf install -y dnf-utils http://rpms.remirepo.net/enterprise/remi-release-9.rpm
sudo dnf update -y
Remove old versions of php:
List available php streams:
sudo dnf module list reset php -y

Last metadata expiration check: 1:03:46 ago on Sun 29 Dec 2024 03:34:52 AM MST.
AlmaLinux 9 - AppStream
Name                Stream                      Profiles                                  Summary
php                 8.1                         common [d], devel, minimal                PHP scripting language
php                 8.2                         common [d], devel, minimal                PHP scripting language

Remi's Modular repository for Enterprise Linux 9 - x86_64
Name                Stream                      Profiles                                  Summary
php                 remi-7.4                    common [d], devel, minimal                PHP scripting language
php                 remi-8.0                    common [d], devel, minimal                PHP scripting language
php                 remi-8.1                    common [d], devel, minimal                PHP scripting language
php                 remi-8.2                    common [d], devel, minimal                PHP scripting language
php                 remi-8.3 [e]                common [d], devel, minimal                PHP scripting language
php                 remi-8.4                    common [d], devel, minimal                PHP scripting language
Enable the correct stream:
sudo dnf module enable php:remi-8.3
Now the default to install is version 8.3, install it like this:
sudo dnf install php -y
php -v
Let’s install git, as it’s also needed in this setup:
sudo dnf -y install git
Install Composer for managing php modules:
cd && curl -sS https://getcomposer.org/installer | php
sudo mv composer.phar /usr/local/bin/composer
Install needed PHP modules:
sudo dnf -y install php-process php-zip php-gd php-mysqlnd php-ldap php-imagick php-bcmath php-gmp php-intl
Upgrade php memory limit:
sudo vim /etc/php.ini
Apache setup
Add Apache config for vhost:
sudo vim /etc/httpd/conf.d/nextcloud.conf
<VirtualHost *:80>
  DocumentRoot /var/www/nextcloud/
  ServerName  cloud.{ site-name }.com

  <Directory /var/www/nextcloud/>
    Require all granted
    AllowOverride All
    Options FollowSymLinks MultiViews

    <IfModule mod_dav.c>
      Dav off
    </IfModule>
  </Directory>
</VirtualHost>
Set up the mysql database
Install:
sudo dnf install mariadb-server -y
Enable the service:
sudo systemctl enable --now mariadb
Nextcloud needs some tables setup in order to store information in a database. First set up a secure sql database:
sudo mysql_secure_installation
Say “Yes” to the prompts and enter root password:
Switch to unix_socket authentication [Y/n]: Y
Change the root password? [Y/n]: Y	# enter password.
Remove anonymous users? [Y/n]: Y
Disallow root login remotely? [Y/n]: Y
Remove test database and access to it? [Y/n]: Y
Reload privilege tables now? [Y/n]: Y
Sign in to your SQL database with the password you just chose:
Create the database:
While signed in with the mysql command, enter the commands below one at a time. Make sure to replace the username and password. But leave localhost as is:
CREATE DATABASE nextcloud;
GRANT ALL ON nextcloud.* TO 'root'@'localhost' IDENTIFIED BY '{ password }';
FLUSH PRIVILEGES;
EXIT;
Nextcloud Install
Download nextcloud onto the server.
Extract the contents to /var/www/nextcloud
tar -xjf nextcloud-31.0.4.tar.bz2 -C /var/www/ --strip-components=1
Change the nextcloud folder ownership to apache and add permissions:
sudo chmod -R 755 /var/www/nextcloud
sudo chown -R apache:apache /var/www/nextcloud
Selinux:
sudo semanage fcontext -a -t httpd_sys_content_t "/var/www/nextcloud(/.*)?" && \
sudo semanage fcontext -a -t httpd_sys_rw_content_t "/var/www/nextcloud/(config|data|apps)(/.*)?" && \
sudo semanage fcontext -a -t httpd_sys_rw_content_t "/var/www/nextcloud/data(/.*)?"
sudo restorecon -Rv /var/www/nextcloud/
Now we can actually install Nextcloud. cd to the /var/www/nextcloud directory and run occ with these settings to install:
sudo -u apache php occ  maintenance:install \
--database='mysql' --database-name='nextcloud' \
--database-user='root' --database-pass='{ password }' \
--admin-user='admin' --admin-pass='{ password }'
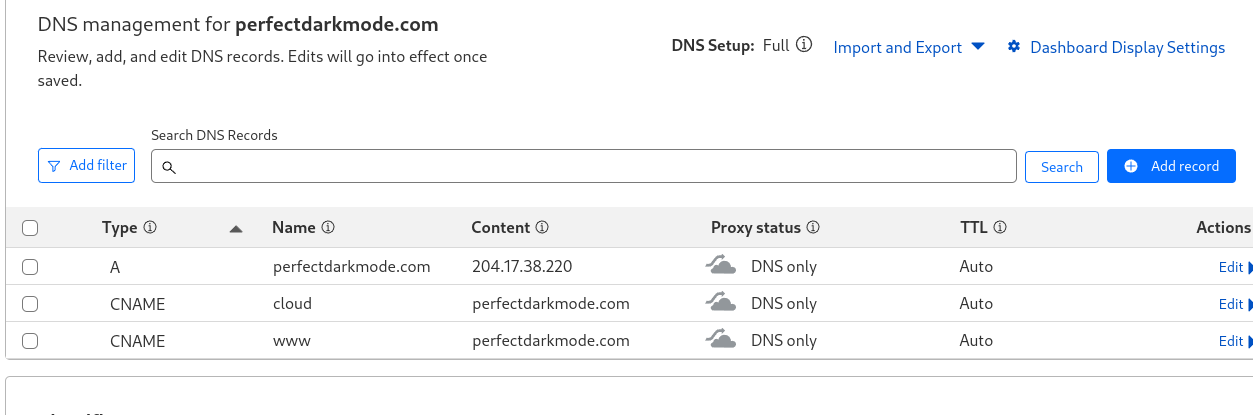
Create a CNAME record for DNS.
Before you go any further, you will need to have a domain name set up for your server. I use Cloudflare to manage my DNS records. You will want to make a CNAME record for your nextcloud subdomain.
Just add “nextcloud” as the name and “yourwebsite.com” as the content. This will make it so “nextcloud.yourwebsite.com” is the site for your nextcloud dashboard. Also, make sure to select “DNS Only” under proxy status.
Here’s what my CloudFlare domain setup looks with this blog as the main site, and cloud.perfectdarkmode.com as the nextcloud site:
Then you need to update trusted domains in /var/www/nextcloud/config/config.php:
'trusted_domains' =>
   [
    'cloud.{ site-name }.com',
    'localhost'
  ],
Install Apache
Install:
sudo dnf -y install httpd
Enable:
systemctl enable --now httpd
Restart httpd
systemctl restart httpd
Firewall rules:
sudo firewall-cmd --add-service https --permanent
sudo firewall-cmd --add-service http --permanent
sudo firewall-cmd --reload
Install SSL with Certbot
Install certbot:
sudo dnf install certbot python3-certbot-apache -y
Obtain an SSL certificate. (See my Obsidian site setup post for information about Certbot and Apache setup.)
sudo certbot -d {subdomain}.{domain}.com
Now log into nextcloud with your admin account using the DNS name you set earlier:

I recommend setting up a normal user account instead of doing everything as “admin”. Just hit the “A” icon at the top right and go to “Accounts”. Then just select “New Account” and create a user account with whatever privileges you want.

I may make a post about which Nextcloud apps I recommend and customize the setup a bit. Let me know if that’s something you’d like to see. That’s all for now.
Make log dir:
mkdir /var/log/nextcloud
touch /var/log/nextcloud.log
chown apache:apache -R /var/log/nextcloud
Change apps to read only
semanage fcontext -a -t httpd_sys_content_t "/var/www/nextcloud/apps(/.*)?"
restorecon -R /var/www/nextcloud/apps
Allow outbound network:
sudo setsebool -P httpd_can_network_connect 1
sudo setsebool -P httpd_graceful_shutdown 1
sudo setsebool -P httpd_can_network_relay 1
sudo ausearch -c 'php-fpm' --raw | audit2allow -M my-phpfpm
sudo semodule -X 300 -i my-phpfpm.pp
Backup
mkdir /home/databkup
chown -R apache:apache /home/databkup
vim /root/cleanbackups.sh
#!/bin/bash

find /home/backup -type f -mtime +5 -exec rm {} \;
chmod +x /root/cleanbackups.sh
crontab -e
# Clean up old backups every day at midnight
0 0 * * * /root/cleanbackups.sh > /dev/null 2>&1

# Backup MySQL database every 12 hours
0 */12 * * * bash -c '/usr/bin/mysqldump --single-transaction -u root -p{password} nextcloud > /home/backup/nextclouddb-backup_$(date +"\%Y\%m\%d\%H\%M\%S").bak'

# Rsync Nextcloud data directory every day at midnight
15 0 * * * /usr/bin/rsync -Aavx /var/www/nextcloud/ /home/databkup/ --delete-before
mkdir /home/backup
Update Mariadb:
systemctl stop mariadb.service
dnf module switch-to mariadb:10.11
systemctl start mariadb.service
mariadb-upgrade --user=root --password='{ password }'

mariadb --version
Mimetype migration error:
sudo -u apache /var/www/nextcloud/occ maintenance:repair --include-expensive
Indices error:
sudo -u apache /var/www/nextcloud/occ db:add-missing-indices
Redis install for memcache
This setup uses Redis for File locking and APCu for memcache
dnf -y install redis php-pecl-redis php-pecl-apcu
systemctl enable --now redis
Add to config.php:
'memcache.locking' => '\OC\Memcache\Redis',
  'memcache.local' => '\OC\Memcache\APCu',
  'redis' => [
   'host'     => '/run/redis/redis-server.sock',
   'port'     => 0,
],
Update /etc/redis/redis.conf
vim /etc/redis/redis.conf
change port to port 0/
uncomment the socket options under “Unix Socket” and change to:
unixsocket /run/redis/redis-server.sock
unixsocketperm 770
Update permissions for redis
usermod -a -G redis apache
Uncomment the line in /etc/php.d/40-apcu.ini and change from 32M to 256M
vim /etc/php.d/40-apcu.ini
apc.shm_size=256M
Restart apache and redis:
systemctl restart redis
systemctl restart httpd
Added logging and phone region to config.php:
mkdir /var/log/nextcloud/
  'log_type' => 'file',
  'logfile' => '/var/log/nextcloud/nextcloud.log',
  'logfilemode' => 416,
  'default_phone_region' => 'US',
  'logtimezone' => 'America/Phoenix',
  'loglevel' => '1',
  'logdateformat' => 'F d, Y H:i:s',
OP-Cache error
Change opcache.interned_strings_buffer to 16 and uncomment:
vim /etc/php.d/10-opcache.ini
opcache.interned_strings_buffer=16
systemctl restart php-fpm httpd
Last job execution ran 2 months ago. Something seems wrong.
Set up cron job for the Apache user:
crontab -u apache -e
Add to file that shows up:
*/5 * * * * php -f /var/www/nextcloud/cron.php
Other Errors
- The “files_reminders” app needs the notification app to work properly. You should either enable notifications or disable files_reminder.
Disabled files_reminder app
- Server has no maintenance window start time configured. This means resource intensive daily background jobs will also be executed during your main usage time. We recommend to set it to a time of low usage, so users are less impacted by the load caused from these heavy tasks. For more details see the documentation ↗.
Added 'maintenance_window_start' => 1, to config.php
- Some headers are not set correctly on your instance - The
Strict-Transport-Security HTTP header is not set (should be at least 15552000 seconds). For enhanced security, it is recommended to enable HSTS. For more details see the documentation ↗.
Added after closing directory line in SSL config:
vim nextcloud-le-ssl.conf
Header always set Strict-Transport-Security "max-age=15552000; includeSubDomains; preload"
And add to the bottom of /var/www/nextcloud/.htaccess:
"Header always set Strict-Transport-Security "max-age=15552000; includeSubDomains"
Change this line in config.php from localhost to server name:
'overwrite.cli.url' => 'http://cloud.{ site-name }.com',
- Integrity checker has been disabled. Integrity cannot be verified.
Ignore this
Your webserver does not serve .mjs files using the JavaScript MIME type. This will break some apps by preventing browsers from executing the JavaScript files. You should configure your webserver to serve .mjs files with either the text/javascript or application/javascript MIME type.
sudo vim /etc/httpd/conf.d/nextcloud.conf- ad
AddType text/javascript .mjs inside the virtual host block. Restart apache.
Your web server is not properly set up to resolve “/ocm-provider/”. This is most likely related to a web server configuration that was not updated to deliver this folder directly. Please compare your configuration against the shipped rewrite rules in “.htaccess” for Apache
add to vim /var/www/nextcloud/.htaccess
<IfModule mod_rewrite.c>
  RewriteEngine on
  RewriteRule ^ocm-provider/(.*)$ /index.php/apps/ocm/$1 [QSA,L]
</IfModule>
Your web server is not properly set up to resolve .well-known URLs, failed on: /.well-known/caldav
added to vim /var/www/nextcloud/.htaccess
# .well-known URLs for CalDAV/CardDAV and other services
<IfModule mod_rewrite.c>
  RewriteEngine On
  RewriteRule ^\.well-known/caldav$ /remote.php/dav/ [R=301,L]
  RewriteRule ^\.well-known/carddav$ /remote.php/dav/ [R=301,L]
  RewriteRule ^\.well-known/webfinger$ /index.php/.well-known/webfinger [R=301,L]
  RewriteRule ^\.well-known/nodeinfo$ /index.php/.well-known/nodeinfo [R=301,L]
  RewriteRule ^\.well-known/acme-challenge/.*$ - [L]
</IfModule>
PHP configuration option “output_buffering” must be disabled
vim /etc/php.ini
output_buffering = Off
[root@oort31 nextcloud]# echo "output_buffering=off" > .user.ini
[root@oort31 nextcloud]# chown apache:apache .user.ini
chmod 644 .user.ini
[root@oort31 nextcloud]# systemctl restart httpd
Installed tmux
dnf -y install tmux
Apps
Disabled File Reminders app
Add fail2ban
sudo dnf -y install fail2ban
vim /etc/fail2ban/jail.local
[DEFAULT]
bantime = 24h
ignoreip = 10.0.0.0/8
usedns = no

[sshd]
enabled = true
maxretry = 3
findtime = 43200
bantime = 86400
systemctl enable –now fail2ban
fail2ban-client status sshd
Self hosting a Nextcloud Server
This is a step-by-step guide to setting up Nextcloud on a Debian server. You will need a server hosted by a VPS like Vultr. And a Domain hosted by a DNS provider such as Cloudflare
What is Nextcloud?
Nextcloud is so many things. It offers so many features and options, it deserves a bulleted list:
- Free and open source
- Cloud storage and syncing
- Email client
- Custom browser dashboard with widgets
- Office suite
- RSS newsfeed
- Project organization (deck)
- Notebook
- Calender
- Task manager
- Connect to decentralized social media (like Mastodon)
- Replacement for all of google’s services
- Create web forms or surveys
It is also free and open source. This mean the source code is available to all. And hosting yourself means you can guarantee that your data isn’t being shared.
As you can see. Nextcloud is feature packed and offers an all in one solution for many needs. The set up is fairly simple!
Install Dependencies
Sury Dependencies
sudo apt install software-properties-common ca-certificates lsb-release apt-transport-https
Enable Sury Repository
sudo sh -c 'echo "deb https://packages.sury.org/php/ $(lsb_release -sc) main" > /etc/apt/sources.list.d/php.list'
Import the GPG key for the repository
wget -qO - https://packages.sury.org/php/apt.gpg | sudo apt-key add -
Install PHP 8.2
https://computingforgeeks.com/how-to-install-php-8-2-on-debian/?expand_article=1
(This is also part of the other dependencies install command below)
Install other dependencies:
apt install -y nginx python3-certbot-nginx mariadb-server php8.2 php8.2-{fpm,bcmath,bz2,intl,gd,mbstring,mysql,zip,xml,curl}
Adding more child processes for PHP to use:
vim /etc/php/8.2/fpm/pool.d/www.conf

# update the following parameters in the file
pm = dynamic
pm.max_children = 120
pm.start_servers = 12
pm.min_spare_servers = 6
pm.max_spare_servers = 18
Start your MariaDB server:
systemctl enable mariadb --now
Set up a SQL Database
Nextcloud needs some tables setup in order to store information in a database. First set up a secure sql database:
sudo mysql_secure_installation
Say “Yes” to the prompts and enter root password:
Switch to unix_socket authentication [Y/n]: Y
Change the root password? [Y/n]: Y	# enter password.
Remove anonymous users? [Y/n]: Y
Disallow root login remotely? [Y/n]: Y
Remove test database and access to it? [Y/n]: Y
Reload privilege tables now? [Y/n]: Y
Sign in to your SQL database with the password you just chose:
Creating a database for NextCloud
While signed in with the mysql command, enter the commands below one at a time. Make sure to replace the username and password. But leave localhost as is:
CREATE DATABASE nextcloud;
GRANT ALL ON nextcloud.* TO 'david'@'localhost' IDENTIFIED BY '@Rfanext12!';
FLUSH PRIVILEGES;
EXIT;
Install SSL with Certbot
Obtain an SSL certificate. See my website setup post for information about Certbot and nginx setup.
certbot certonly --nginx -d nextcloud.example.com
Create a CNAME record for DNS.
You will need to have a domain name set up for your server. I use Cloudflare to manage my DNS records. You will want to make a CNAME record for your nextcloud subdomain.
Just add “nextcloud” as the name and “yourwebsite.com” as the content. This will make it so “nextcloud.yourwebsite.com”. Make sure to select “DNS Only” under proxy status.
Nginx Setup
Edit your sites-available config at /etc/nginx/sites-available/nextcloud. See comments in the following text box:
vim /etc/nginx/sites-available/nextcloud

# Add this to the file:
# replace example.org with your domain name
# use the following vim command to make this easier
# :%s/example.org/perfectdarkmode.com/g
# ^ this will replace all instances of example.org with perfectdarkmode.com. Replace with yur domain

upstream php-handler {
    server unix:/var/run/php/php8.2-fpm.sock;
    server 127.0.0.1:9000;
}
map $arg_v $asset_immutable {
    "" "";
    default "immutable";
}
server {
    listen 80;
    listen [::]:80;
    server_name nextcloud.example.org ;
    return 301 https://$server_name$request_uri;
}
server {
    listen 443      ssl http2;
    listen [::]:443 ssl http2;
    server_name nextcloud.example.org ;
    root /var/www/nextcloud;
    ssl_certificate     /etc/letsencrypt/live/nextcloud.example.org/fullchain.pem ;
    ssl_certificate_key /etc/letsencrypt/live/nextcloud.example.org/privkey.pem ;
    client_max_body_size 512M;
    client_body_timeout 300s;
    fastcgi_buffers 64 4K;
    gzip on;
    gzip_vary on;
    gzip_comp_level 4;
    gzip_min_length 256;
    gzip_proxied expired no-cache no-store private no_last_modified no_etag auth;
    gzip_types application/atom+xml application/javascript application/json application/ld+json application/manifest+json application/rss+xml application/vnd.geo+json application/vnd.ms-fontobject application/wasm application/x-font-ttf application/x-web-app-manifest+json application/xhtml+xml application/xml font/opentype image/bmp image/svg+xml image/x-icon text/cache-manifest text/css text/plain text/vcard text/vnd.rim.location.xloc text/vtt text/x-component text/x-cross-domain-policy;
    client_body_buffer_size 512k;
    add_header Referrer-Policy                      "no-referrer"   always;
    add_header X-Content-Type-Options               "nosniff"       always;
    add_header X-Download-Options                   "noopen"        always;
    add_header X-Frame-Options                      "SAMEORIGIN"    always;
    add_header X-Permitted-Cross-Domain-Policies    "none"          always;
    add_header X-Robots-Tag                         "none"          always;
    add_header X-XSS-Protection                     "1; mode=block" always;
    fastcgi_hide_header X-Powered-By;
    index index.php index.html /index.php$request_uri;
    location = / {
        if ( $http_user_agent ~ ^DavClnt ) {
            return 302 /remote.php/webdav/$is_args$args;
        }
    }
    location = /robots.txt {
        allow all;
        log_not_found off;
        access_log off;
    }
    location ^~ /.well-known {
        location = /.well-known/carddav { return 301 /remote.php/dav/; }
        location = /.well-known/caldav  { return 301 /remote.php/dav/; }
        location /.well-known/acme-challenge    { try_files $uri $uri/ =404; }
        location /.well-known/pki-validation    { try_files $uri $uri/ =404; }
        return 301 /index.php$request_uri;
    }
    location ~ ^/(?:build|tests|config|lib|3rdparty|templates|data)(?:$|/)  { return 404; }
    location ~ ^/(?:\.|autotest|occ|issue|indie|db_|console)                { return 404; }
    location ~ \.php(?:$|/) {
        # Required for legacy support
        rewrite ^/(?!index|remote|public|cron|core\/ajax\/update|status|ocs\/v[12]|updater\/.+|oc[ms]-provider\/.+|.+\/richdocumentscode\/proxy) /index.php$request_uri;
        fastcgi_split_path_info ^(.+?\.php)(/.*)$;
        set $path_info $fastcgi_path_info;
        try_files $fastcgi_script_name =404;
        include fastcgi_params;
        fastcgi_param SCRIPT_FILENAME $document_root$fastcgi_script_name;
        fastcgi_param PATH_INFO $path_info;
        fastcgi_param HTTPS on;
        fastcgi_param modHeadersAvailable true;
        fastcgi_param front_controller_active true;
        fastcgi_pass php-handler;
        fastcgi_intercept_errors on;
        fastcgi_request_buffering off;
        fastcgi_max_temp_file_size 0;
    }
    location ~ \.(?:css|js|svg|gif|png|jpg|ico|wasm|tflite|map)$ {
        try_files $uri /index.php$request_uri;
        add_header Cache-Control "public, max-age=15778463, $asset_immutable";
        access_log off;     # Optional: Don't log access to assets
        location ~ \.wasm$ {
            default_type application/wasm;
        }
    }
    location ~ \.woff2?$ {
        try_files $uri /index.php$request_uri;
        expires 7d;
        access_log off;
    }
    location /remote {
        return 301 /remote.php$request_uri;
    }
    location / {
        try_files $uri $uri/ /index.php$request_uri;
    }
}
Enable the site
Create a link between the file you just made and /etc/nginx/sites-enabled
ln -s /etc/nginx/sites-available/nextcloud /etc/nginx/sites-enabled/
Install Nextcloud
Download the latest Nextcloud version. Then extract into /var/www/. Also, update the file’s permissions to give nginx access:
wget https://download.nextcloud.com/server/releases/latest.tar.bz2
tar -xjf latest.tar.bz2 -C /var/www
chown -R www-data:www-data /var/www/nextcloud
chmod -R 755 /var/www/nextcloud
Start and enable php-fpm on startup
<systemctl enable php8.2fpm --now](><--may not need this.
# Do need this->
sudo systemctl enable php8.2-fpm.service --now
Reload nginx
Here is a built in Nextcloud tool just in case things break. Here is a guide on troubleshooting with occ. The basic command is as follows:
sudo -u www-data php /var/www/nextcloud/occ
Add this as an alias in ~/.bashrc for ease of use.
You are ready to log in to Nextcloud!
Go to your nextcloud domain in a browser. In my case, I head to nextcloud.perfectdarkmode.com. Fill out the form to create your first Nextcloud user:
- Choose an admin username and secure password.
- Leave Data folder as the default value.
- For Database user, enter the user you set for the SQL database.
- For Database password, enter the password you chose for the new user in MariaDB.
- For Database name, enter: nextcloud
- Leave “localhost” as “localhost”.
- Click Finish.
Now that you are signed in. Here are a few things you can do to start you off:
- Download the desktop and mobile app and sync all of your data. (covered below)
- Look at different apps to consolodate your programs all in one place.
- Put the Nextcloud dashboard as your default browser homepage and customize themes.
- Set up email integration.
NextCloud desktop synchronization
Install the desktop client (Fedora)
Sudo dnf install nextcloudclient
Install on other distros: https://help.nextcloud.com/t/install-nextcloud-client-for-opensuse-arch-linux-fedora-ubuntu-based-android-ios/13657
- Run the nextcloud desktop app and sign in.
- Choose folders to sync.
- Folder will be ~/Nextcloud.
- Move everything into your nextcloud folder.
This may break things with filepaths so beware. Now you are ready to use and explore nextcloud. Here is a video from TechHut to get you started down the NextCloud rabbit hole.
Change max upload size (default is 500mg)
/var/www/nextcloud/.user.ini
php_value upload_max_filesize = 16G
php_value post_max_size = 16G
Remove file locks
Put Nextcloud in maintenance mode: Edit config/config.php and change this line:
'maintenance' => true,
Empty table oc_file_locks: Use tools such as phpmyadmin or connect directly to your database and run (the default table prefix is oc_, this prefix can be different or even empty):
DELETE FROM oc_file_locks WHERE 1
mysql -u root -p
MariaDB [(none)]> use nextcloud;
MariaDB [nextcloud]> DELETE FROM oc_file_locks WHERE 1;

*figure out redis install if this happens regularly* [https://docs.nextcloud.org/server/13/admin_manual/configuration_server/caching_configuration.html#id4 9.1k](https://docs.nextcloud.org/server/13/admin_manual/configuration_server/caching_configuration.html#id4)
Using Vagrant on Linux
Vagrant is software that lets you set up multiple, pre-configured virtual machines in a flash. I am going to show you how to do this using Linux and Virtual Box. But you can do this on MacOS and Windows as well.
Download Vagrant, VirtualBox and Git.
Vagrant link.
Virtualbox link.
You may want to follow another tutorial for setting up VirtualBox.
Git link.
Installing git will install ssh on windows. Which you will use to access your lab. Just make sure you select the option to add git and unit tools to your PATH variable.
Make a Vagrant project folder.
Note: All of these commands are going to be in a Bash command prompt.
Move in to your new directory.
Add and Initialize Your Vagrant Project.
You can find preconfigured virtual machines here.
We are going to use ubuntu/trusty64.
Add the Vagrant box
vagrant box add ubuntu/trusty64
Initialize your new Vagrant box
vagrant init ubuntu/trusty64
Use the dir command to see the contents of this directory.
We are going to edit this Vagrantfile to set up our multiple configurations.
Here is the new config without all of the commented lines. Add this (minus the top line) under Vagrant.configure(“2”) do |config|.
Vagrant.configure("2") do |config|
  config.vm.box = "ubuntu/trusty64"
  config.vm.define "server1" do |server1|
    server1.vm.hostname = "server1"
    server1.vm.network "private_network", ip: "10.1.1.2"
  end
  config.vm.define "server2" do |server2|
    server2.vm.hostname = "server2"
    server2.vm.network "private_network", ip: "10.1.1.3"
  end
end
Now save your Vagrant file in Vim.
Bring up your selected vagrant boxes:
Now if you open virtual box, you should see the new machines running in headless mode. This means that the machines have no user interface..
Ssh into server1
You are now in serve1’s terminal.
From server1, ssh into server2
Success! You are now in server2 and can access both machines from your network. Just enter “exit” to return to the previous terminal.
Additional Helpful Vagrant Commands.
Without the machine name specified, vagrant commands will work on all virtual machines in your vagrant folder. I’ve thrown in a couple examples using [machine-name] at the end.
Shut down Vagrant machines
Shut down only one machine
vagrant halt [machine-name]
Suspend and resume a machine
Restart a virtual machine
Destroy a virtual machine
vagrant detstroy [machine-name]
Show running vms
List Vagrant options
Playground for future labs
This type of deployment is going to be the bedrock of many Linux and Red Hat labs. You can easily use pre-configured machines to create a multi-machine environment. This is also a quick way to test your network and server changes without damaging anything.
Now go set up a Vagrant lab yourself and let me know what you plan to do with it!
What is Vagrant?
- Easy to configure, reproducible environments
- Provisions virtualbox vms
- Vagrant box: OS image
Syntax:
Add centos7 box
vagrant box add jasonc/centos7
Many public boxes to download
Vagrant project = folder with a vagrant file
Install Vagrant here: https://www.vagrantup.com/downloads
Make a vagrant folder:
initialize vagrant project:
vagrant init jasonc/centos7
bring up all vms defined in the vagrant file)
vagrant will import the box into virtualbox and start it
the vm is started in headless mode
(there is no user interfaces)
Vagrant up / multi machine
Bring up only one specific vm
SSH Vagrant
- vagrant ssh [vm_name] or vagrant ssh if there is only one vm in the vagrant file
Need to download ssh for windows
downloading git will install this:
https://desktop.github.com/
Shut down vagrant machines
vagrant halt
Shutdown only one machine
vagrant halt [vm]
Saves present state of the machine
just run vagrant up without having to import tha machines again
Suspend the machine
vagrant suspend [VM]
Resume
vagrant resume [VM]
Destroy VM
vagrant destroy [VM]
List options
vagrant
Vagrant command works on the vagrant folder that you are in
Vagrant File
Vagrant.configure (2) do | config |

config.vm.box = "jasonc/centos7"

config.vm.hostname = "linuxsvr1"

(default files)

config.vm.network "private_network", ip: "10.2.3.4"

config.vm.provider "virtualbox" do | vbi

vb.gui = true

vb.memory = "1024"

(shell provisioner)

config.vm.provision "shell", path: "setup.sh"

end

end
Configuring a multi machine setup:
Specify common configurations at the top of the file
Vagrant.configure (2) do | config |

config.vm.box = "jasonc/centos7"

config.vm.define = "server1" do | server1 |

server1.vm.hostname = "server1"

server1.vm.network "private_network", ip: "10.2.3.4"

end

config.vm.define = "server2" do | server2 |

server2.vm.hostname = "server2"

server2.vm.network "private_network", ip: "10.2.3.5"

end

end
You can search for vagrant boxes at https://app.vagrantup.com/boxes/search
Course software downloads: http://mirror.linuxtrainingacademy.com/
Install Git: https://git-scm.com/download/win
- make sure to check option for git and unit tools to be added to the PATH
vagrant ssh
- to connect to the vagrant machine in the folder that you are in
- default password in vagrant
- tyoe ’exit to return to prompt
vagrant halt
- stop the vm and save it’s current state
vagrant reload
vagrant status
- shows running vms in that folder
You can access files in the vagrant directory from both VMs
Example RHEL8 Config
Vagrant.configure("2") do |config|

config.vm.box = "generic/rhel8"

config.vm.define "server1" do |server1|

server1.vm.hostname = "server1.example.com"

server1.vm.network "private_network", ip: "192.168.1.110"

config.disksize.size = '10GB'

end

config.vm.define "server2" do |server2|

server2.vm.hostname = "server2.example.com"

server2.vm.network "private_network", ip: "192.168.1.120"

config.disksize.size = '16GB'

end

config.vm.provider "virtualbox" do |vb|

vb.memory = "2048"

end

end
Plugin to change the disk size:
vagrant plugin install vagrant-disksize
Vim Guide
Vim (Vi Improved)
Vim stands for vi (Improved) just like its name it stands for an improved version of the vi text editor command.
Lightweight
Start Vim
Vim Search Patterns
Moving the Cursor
h or left arrow - move left one character
k or up arrow - move up one line
j or down arrow - move down one line
l or right arrow - will move you right one character
Different Vim Modes
I - Enter INSERT mode from command mode
esc - Go back to command mode
v - visual mode
Vim Appending Text
In enter while in command mode and will bring you to insert mode.
I - insert text before the cursor
O - insert text on the previous line
o - insert text on the next line
a - append text after cursor
A - append text at the end of the line
Vim editing
x - used to cut the selected text also used for deleting characters
dd - used to delete the current line
y - yank or copy whatever is selected
yy - yank or copy the current line
p - paste the copied text before the cursor
Vim Saving and exiting
:w - writes or saves the file
:q - quit out of vim
:wq - write and then quit
:q! - quit out of vim without saving the file
ZZ - equivalent of :wq, but one character faster
u - undo your last action
Ctrl-r - redo your last action
:% sort - Sort lines
Vim Splits
Add to .vimrc for different key mappings for easy navigation between splits to save a keystroke. So instead of ctrl-w then j, it’s just ctrl-j:
nnoremap <C-J> <C-W><C-J>
nnoremap <C-K> <C-W><C-K>
nnoremap <C-L> <C-W><C-L>
nnoremap <C-H> <C-W><C-H>
Open file in new split
https://github.com/preservim/nerdtree
Find and Replace
https://linuxize.com/post/vim-find-replace/
Find and Replace Text in File(s) with Vim
Find and replace in a single file
Open the file in Vim, this command will replace all occurances of the word “foo” with “bar”.
% - apply to whole file
s - substitution
g - operate on all results
Find and replace a string in all files in current directory
In vim, select all files with args. Use regex to select the files you want. Select all files with *
You can also select all recursively:
Run :args to see which files are selected"
This applies the replacement command to all selected args:
:argdo %s/foo/bar/g | update
Nerd Tree Plugin
Add to .vimrc
call plug#begin()
Plug 'preservim/nerdtree'

call plug#end()

nnoremap <leader>n :NERDTreeFocus<CR>
nnoremap <C-n> :NERDTree<CR>
nnoremap <C-t> :NERDTreeToggle<CR>
nnoremap <C-f> :NERDTreeFind<CR>
Vim Calendar
dhttps://blog.mague.com/?p=602
Add to vim.rc
:auto FileType vim/wiki map d :Vim/wikiMakeDiaryNote
function! ToggleCalendar()
  execute ":Calendar"
  if exists("g:calendar_open")
    if g:calendar_open == 1
      execute "q"
      unlet g:calendar_open
    else
      g:calendar_open = 1
    end
  else
    let g:calendar_open = 1
  end
endfunction
:auto FileType vim/wiki map c :call ToggleCalendar()i
Vimwiki
Cheat sheet
http://thedarnedestthing.com/vimwiki%20cheatsheet
Set up
Make sure git is installed? https://github.com/git-guides/install-git
Check git version
git --version Check git version
dnf git install
sudo dnf install git-all
https://github.com/junegunn/vim-plug
Download plug.vim and put it in ~/.vim/autoload
curl -fLo ~/.vim/autoload/plug.vim --create-dirs \
    https://raw.githubusercontent.com/junegunn/vim-plug/master/plug.vim
Create ~/.vimrc
touch ~/.vimrc
Add to ~/.vimrc
Installation using Vim-Plug
Install Vim Plug
curl -fLo ~/.vim/autoload/plug.vim --create-dirs \https://raw.githubusercontent.com/junegunn/vim-plug/master/plug.vim
Add the following to the plugin-configuration in your vimrc:
set nocompatible
filetype plugin on
syntax on

call plug#begin()
Plug 'vimwiki/vimwiki'

call plug#end()

let mapleader=" "
let wiki_1 = {}
let wiki_1.path = '~/Documents/PerfectDarkMode/'
let wiki_1.syntax = 'markdown'
let wiki_1.ext = ''
let wiki_2 = {}
let wiki_2.path = '~/Documents/vim/wiki_personal/'
let wiki_2.syntax = 'markdown'
let wiki_2.ext = ''
let g:vimwiki_list = [wiki_1, wiki_2]
Then run :PlugInstall.
(leader)ws
select which wiki to use
Basic Markup
= Header1 =
== Header2 ==
=== Header3 ===


*bold* -- bold text
_italic_ -- italic text

[wiki link](wiki%20link) -- wiki link
[description](wiki%20link) -- wiki link with description
Lists
* bullet list item 1
    - bullet list item 2
    - bullet list item 3
        * bullet list item 4
        * bullet list item 5
* bullet list item 6
* bullet list item 7
    - bullet list item 8
    - bullet list item 9

1. numbered list item 1
2. numbered list item 2
    a) numbered list item 3
    b) numbered list item 4
For other syntax elements, see :h vimwiki-syntax
Vimwiki Table of Contents
:VimwikiTOC
Create or update the Table of Contents for the current wiki file.
See |vimwiki-toc|.
Table of Contents vimwiki-toc vimwiki-table-of-contents
You can create a “table of contents” at the top of your wiki file.
The command |:VimwikiTOC| creates the magic header >
= Contents =
in the current file and below it a list of all the headers in this file as
links, so you can directly jump to specific parts of the file.
For the indentation of the list, the value of |vimwiki-option-list_margin| is
used.
If you don’t want the TOC to sit in the very first line, e.g. because you have
a modeline there, put the magic header in the second or third line and run
:VimwikiTOC to update the TOC.
If English is not your preferred language, set the option
|g:vimwiki_toc_header| to your favorite translation.
If you want to keep the TOC up to date automatically, use the option
|vimwiki-option-auto_toc|.
vimwiki-option-auto_toc
Key Default value Values~
auto_toc 0 0, 1
Description~
Set this option to 1 to automatically update the table of contents when the
current wiki page is saved: >
let g:vimwiki_list = [{‘path’: ‘~/my_site/’, ‘auto_toc’: 1}]
vimwiki-option-list_margin
Key Default value~
list_margin -1 (0 for markdown)
Description~
Width of left-hand margin for lists. When negative, the current ‘shiftwidth’
is used. This affects the appearance of the generated links (see
|:VimwikiGenerateLinks|), the Table of contents (|vimwiki-toc|) and the
behavior of the list manipulation commands |:VimwikiListChangeLvl| and the
local mappings |vimwiki_glstar|, |vimwiki_gl#| |vimwiki_gl-|, |vimwiki_gl-|,
|vimwiki_gl1|, |vimwiki_gla|, |vimwiki_glA|, |vimwiki_gli|, |vimwiki_glI| and
|vimwiki_i__|.
Note: if you use Markdown or MediaWiki syntax, you probably would like to set
this option to 0, because every indented line is considered verbatim text.
g:vimwiki_toc_header_level
The header level of the Table of Contents (see |vimwiki-toc|). Valid values
are from 1 to 6.
The default is 1.
g:vimwiki_toc_link_format
The format of the links in the Table of Contents (see |vimwiki-toc|).
Value Description~
0 Extended: The link contains the description and URL. URL
references all levels.
1 Brief: The link contains only the URL. URL references only
the immediate level.
Default: 0
Key bindings
Normal mode
Note: your terminal may prevent capturing some of the default bindings listed below. See :h vimwiki-local-mappings for suggestions for alternative bindings if you encounter a problem.
Basic key bindings
<Leader>ww – Open default /wiki index file.<Leader>wt – Open default /wiki index file in a new tab.<Leader>ws – Select and open /wiki index file.<Leader>wd – Delete /wiki file you are in.<Leader>wr – Rename /wiki file you are in.<Enter> – Follow/Create /wiki link.<Shift-Enter> – Split and follow/create /wiki link.<Ctrl-Enter> – Vertical split and follow/create /wiki link.<Backspace> – Go back to parent(previous) /wiki link.<Tab> – Find next /wiki link.<Shift-Tab> – Find previous /wiki link.
Advanced key bindings
Refer to the complete documentation at :h vimwiki-mappings to see many more bindings.
Commands
:Vimwiki2HTML – Convert current wiki link to HTML.:VimwikiAll2HTML – Convert all your wiki links to HTML.:help vimwiki-commands – List all commands.:help vimwiki – General vimwiki help docs.
Diary
alias
alias todo=‘vim -c VimwikiDiaryIndex’
Hotkeys
:VimwikiDiaryGenerateLinks
^w^i
Generate links
^w^w
open today
^wi
Open diary index
ctrl + up previous day
ctrl + down next day
- How to create Weekly, Monthly, and yearly notes
- How to do a template for daily
- set folder location for diary
Diary Template
https://frostyx.cz/posts/vimwiki-diary-template
Nested folder structure
[dev](dev/ndex)
Say yes to make new directory
wiki
Convert to html live and shows some design stuff
https://www.youtube.com/watch?v=A1YgbAp5YRc
https://github.com/Dynalonwiki
Taskwarrior
https://www.youtube.com/watch?v=UuHJloiDErM
requires neovim?
taskwiki
vimwiki integration with task warrior
https://github.com/tools-life/taskwiki
https://www.youtube.com/watch?v=UuHJloiDErM
Ctrl P
Install
Plug ‘ctrlpvim/ctrlp.vim’
You Need to Learn Man Pages
https://www.youtube.com/watch?v=RzAkjX_9B7E&t=295s
Man (manual) pages are the built in help system for Linux. They contain documentation for most commands.
Run the man command on a command to get to it’s man page.
man man
Navigating a man page
h
q
Man uses less
^ mean ctrl
^f Forward one page
^b backward one page
can use # followed by command to repeat that many times
g first line in file
G last line in file
CR means press enter
Searching
/searchword
press enter to jump first occurance of searched word
n to jump to next match
N to go to previous match
?searchword to do a backward search (n and N are reversed when going through results)
Man page conventions
bold text type as shown
italic text replace with arguments
- Italic may not render in terminal and may be underlined or colored text instead.
[-abc] optional
-a | -b Options separated by a pipe symbol cannot be used together.
argument … (followed by 3 dots) can be repeated. (Argument is repeatable)
[expression] … entire expression within [ ] is repeatable.
Parts of a man page
Name
Synopsis
When you see file in a man page, think file and or directory
Description
short and long options do the same thing
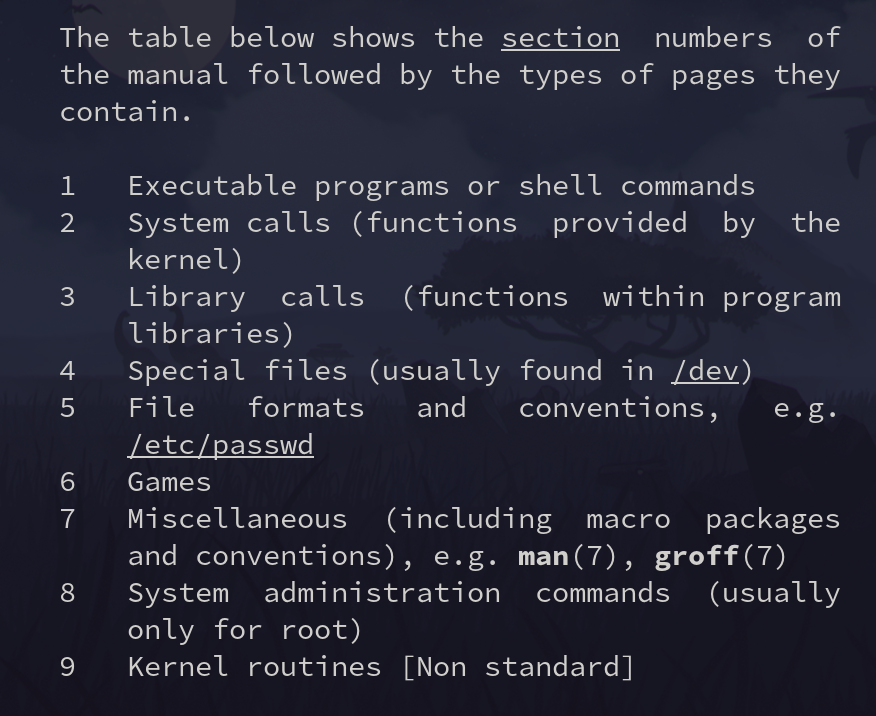
Current section number is printed at the top left of the man page.
-k to search sections using apropos
[root@server30 ~]# man -k unlink
mq_unlink (2)        - remove a message queue
mq_unlink (3)        - remove a message queue
mq_unlink (3p)       - remove a message queue (REALT...
sem_unlink (3)       - remove a named semaphore
sem_unlink (3p)      - remove a named semaphore
shm_open (3)         - create/open or unlink POSIX s...
shm_unlink (3)       - create/open or unlink POSIX s...
shm_unlink (3p)      - remove a shared memory object...
unlink (1)           - call the unlink function to r...
unlink (1p)          - call theunlink() function
unlink (2)           - delete a name and possibly th...
unlink (3p)          - remove a directory entry
unlinkat (2)         - delete a name and possibly th...]
Shows page number in ()
The sections that end in p are POSIX documentation. Theese are not specific to Linux.
[root@server30 ~]# man -k "man pages"
lexgrog (1)          - parse header information in man pages
man (7)              - macros to format man pages
man-pages (7)        - conventions for writing Linux man pages
man.man-pages (7)    - macros to format man pages
[root@server30 ~]# man man-pages
Use man-pages to learn more about man pages
Sections within a manual page
       The list below shows conventional or suggested sections.  Most manual
       pages should include at least the highlighted  sections.   Arrange  a
       new manual page so that sections are placed in the order shown in the
       list.

              NAME
              LIBRARY          [Normally only in Sections 2, 3]
              SYNOPSIS
              CONFIGURATION    [Normally only in Section 4]
              DESCRIPTION
              OPTIONS          [Normally only in Sections 1, 8]
              EXIT STATUS      [Normally only in Sections 1, 8]
              RETURN VALUE     [Normally only in Sections 2, 3]
              ERRORS           [Typically only in Sections 2, 3]
              ENVIRONMENT
              FILES
              ATTRIBUTES       [Normally only in Sections 2, 3]
              VERSIONS         [Normally only in Sections 2, 3]
              STANDARDS
              HISTORY
              NOTES
              CAVEATS
              BUGS
              EXAMPLES
              AUTHORS          [Discouraged]
              REPORTING BUGS   [Not used in man-pages]
              COPYRIGHT        [Not used in man-pages]
              SEE ALSO
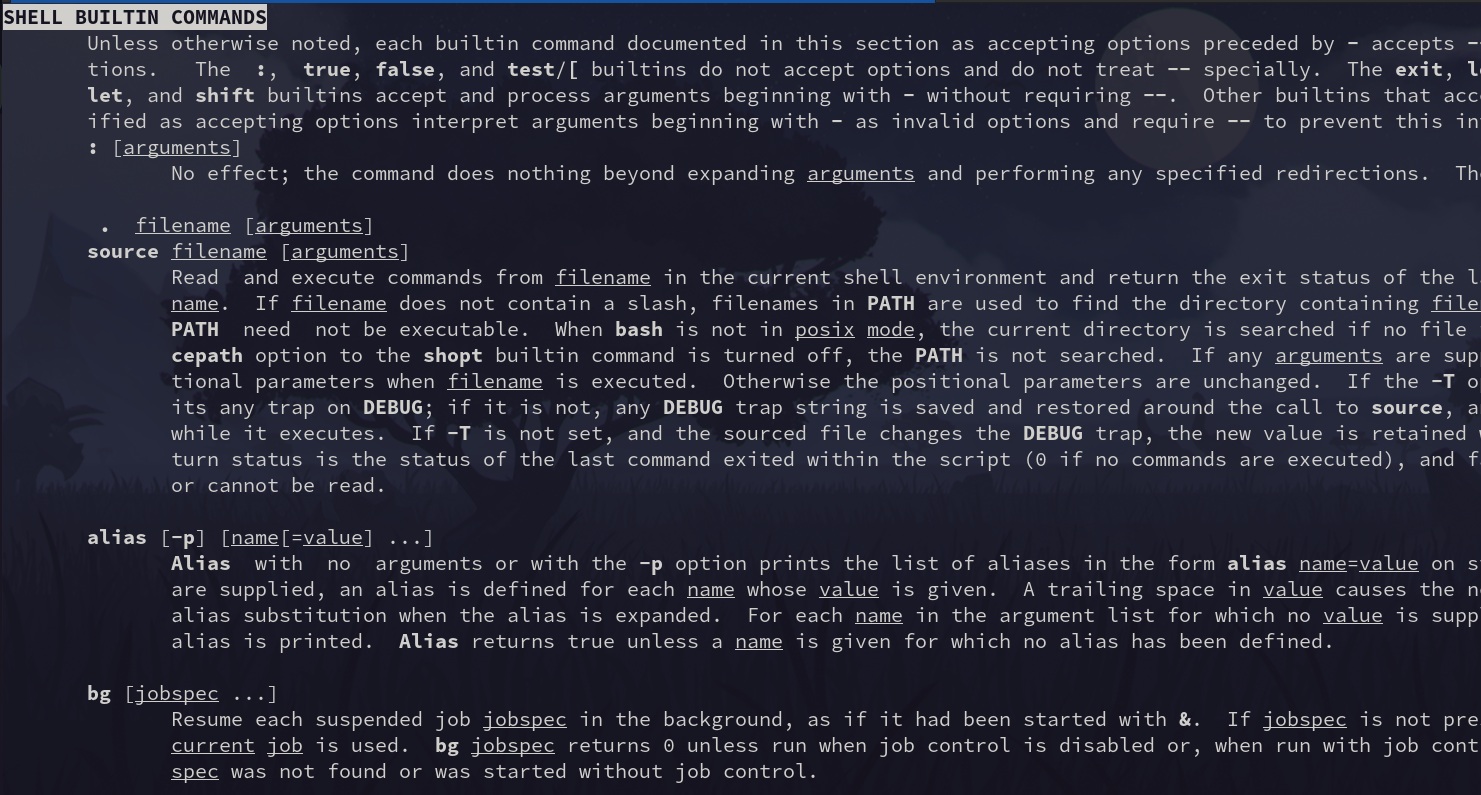
Shell builtins do not have man pages. Look at the shell man page for info on them.
man bash
Search for the Shell Builtins section:
/SHELL BUILTIN COMMANDS
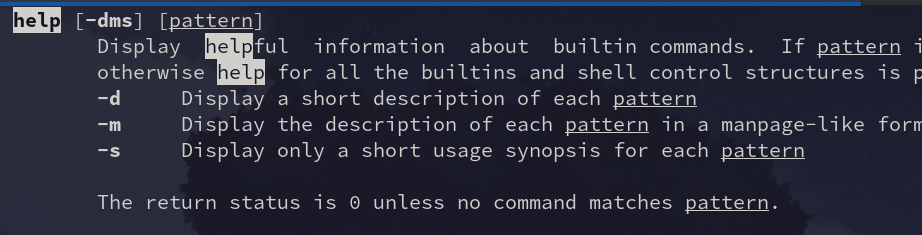
You can find help on builtins with the help command:
david@fedora:~$ help hash
hash: hash [-lr] [-p pathname] [-dt] [name ...]
    Remember or display program locations.

    Determine and remember the full pathname of each command NAME.  If
    no arguments are given, information about remembered commands is displayed.

    Options:
      -d	forget the remembered location of each NAME
      -l	display in a format that may be reused as input
      -p pathname	use PATHNAME as the full pathname of NAME
      -r	forget all remembered locations
      -t	print the remembered location of each NAME, preceding
    		each location with the corresponding NAME if multiple
    		NAMEs are given
    Arguments:
      NAME	Each NAME is searched for in $PATH and added to the list
    		of remembered commands.

    Exit Status:
    Returns success unless NAME is not found or an invalid option is given.
help without any arguments displays commands you can get help on.
david@fedora:~/Documents/davidvargas/davidvargasxyz.github.io$ help help
help: help [-dms] [pattern ...]
    Display information about builtin commands.

    Displays brief summaries of builtin commands.  If PATTERN is
    specified, gives detailed help on all commands matching PATTERN,
    otherwise the list of help topics is printed.

    Options:
      -d	output short description for each topic
      -m	display usage in pseudo-manpage format
      -s	output only a short usage synopsis for each topic matching
    		PATTERN

    Arguments:
      PATTERN	Pattern specifying a help topic

    Exit Status:
    Returns success unless PATTERN is not found or an invalid option is given.
type command tells you what type of command something is.
Using man on some shell builtins brings you to the bash man page Shell Builtin Section
Many commands support -h or --help options to get quick info on a command.